This document is a quick reference guide for Planar Dome EX Displays, covering installation, setup, and basic usage for Windows XP and Windows 2000 operating systems. It provides essential information for both DX2 and AX3 display controllers.
Function Description
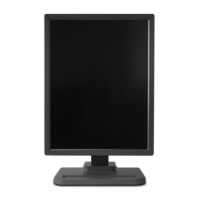
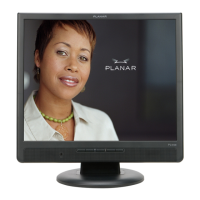
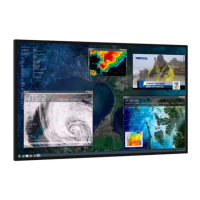
The Planar Dome EX Displays are high-performance display systems designed for professional use, particularly in medical imaging, given the "Medical Sales" contact information. These displays are compatible with either DX2 or AX3 display controllers, offering various resolutions and palette options to suit different application needs. The system supports both single and dual-display configurations, with features like auto-orientation and manual adjustment of resolution and brightness.
Important Technical Specifications
System Requirements for Display Controller Installation:
- PCI Slot: One PCI slot per board (64-bit recommended for DX2). AX3 requires a PCI Express x16 lane slot.
- Hard Disk Space: 50 MB.
- RAM: 256 MB.
- CD-ROM Drive: Required for driver installation.
- Processor (for AX3): Intel Pentium 4/Xeon; AMD Athlon 64/K7/XP or compatible.
- Power Supply (for AX3): 350 watts or greater.
- Operating System: Windows XP or Windows 2000 with Service Pack 4 or higher.
Display Resolutions and Palette Options:
- Dome E2:
- Resolution: 1200 x 1600, 1600 x 1200
- Palette (8 Bits per pixel): Dynamic gray, Nonlinear gray, Static gray
- Palette (32 Bits per pixel): True color
- Dome E3:
- Resolution: 1536 x 2048, 2048 x 1536, 3072 x 2048* (single desktop in portrait mode on a dual-display system), 4096 x 1536+ (single desktop in landscape mode on a dual-display system)
- Palette (8 Bits per pixel): Dynamic gray, Nonlinear gray, Static gray
- Palette (32 Bits per pixel): True color
- Dome E5:
- Resolution: 2048 x 2560, 2560 x 2048, 4096 x 2560* (single desktop in portrait mode on a dual-display system), 5120 x 2048+ (single desktop in landscape mode on a dual-display system)
- Palette (8 Bits per pixel): Dynamic gray, Nonlinear gray, Static gray
Usage Features
Installation and Setup:
- Unpacking: The package includes the Dome EX digital flat panel, display controller (DX2 or AX3), power block, power cord, DVI-to-DVI video cable, and driver CDs. Original packaging should be saved for storage and shipping.
- DIP Switch S2 (DX2 Controller):
- Switch 1 (VGA): ON to enable VGA mode. Only one board should have VGA enabled in multi-board setups, or disabled if a separate VGA card is used.
- Switch 2 (VESA): ON for some Dell systems to enable VESA modes.
- Switch 3 (Single desktop): ON for single desktop mode.
- Display Controller Installation:
- Turn off the computer and disconnect peripherals.
- Remove the computer cover and a blank bracket from an available PCI or PCI Express slot.
- Insert the display controller, aligning pins and pressing firmly.
- Secure the mounting bracket.
- Reattach the computer cover and peripherals.
- For multiple display controllers, install all boards before installing the driver.
- Connecting Components:
- Remove the stand cover by pressing the PUSH button.
- Connect one end of the DVI cable to the DVI connector port on the display and tighten thumbscrews.
- Plug the power cord into the display's power input port.
- Connect the other end of the DVI cable to the video port on the installed display controller (use DVI port #1 for single displays).
- Plug the power cord into a grounded outlet.
- Reattach the stand cover.
- Power on the display first, then the computer.
- Driver Installation (DX Display Driver):
- Remove any previously installed display drivers.
- Log on with administrator privileges.
- Cancel the "Found New Hardware Wizard."
- Insert the W2KDXPCI CD, open the CD folder, and run Setup.exe.
- Follow on-screen prompts, clicking "Next" and "Yes/Continue" if a "Digital Signature Not Found" message appears.
- Restart the computer when prompted.
- Driver Installation (AX3 Display Driver):
- Remove any previously installed display drivers.
- Start the system. Cancel the "Found New Hardware Wizard" and decline to restart.
- Insert the driver installation CD and run SETUP.EXE.
- Follow on-screen prompts, accepting the license agreement and selecting "Express installation" if recommended.
- Restart the computer when prompted, clicking "Yes/Continue" if a "Digital Signature Not Found" message appears.
- Enabling the Display (DX):
- Log on with administrator privileges.
- Right-click the desktop, select "Properties > Settings."
- Select the display icon.
- Select "Extend my Windows desktop onto this monitor," then click "Apply" and "OK."
- Changing Display Properties (DX): Use the "Dome" tab for display properties after the display is attached to the Windows desktop; otherwise, use "Properties > Settings" tab.
- Auto-orientation: The display automatically detects panel orientation (portrait or landscape) on power-on or reset. This feature can be disabled via the "Dome" tab.
- Setting Resolution Palette (DX):
- Log on with administrator privileges.
- Right-click the desktop, select "Properties > Settings."
- Select "Plug and Play Monitor on Dome DX2/PCI Properties" from the Display list.
- Select "Extend my Windows desktop onto this monitor," then click "Apply."
- Select "Advanced > Dome."
- Choose a resolution and palette option, then click "Apply" and "OK."
- Setting Brightness (DX):
- In the "Brightness" field on the "Dome" tab, adjust the scroll box or use arrows. Default brightness is 100%.
- Note: If Dome CXtra software is running, the brightness function on the tab is disabled.
- Setting Display Mode Manually (AX3):
- Right-click the desktop and select "Properties > Settings."
- Select the monitor to change, then click "Advanced."
- Click the "Monitor" tab and ensure "Hide modes that this monitor cannot display" is unchecked.
- Click the "Adapter" tab, then "List All Modes."
- Choose the desired mode and click "OK," then "Apply" or "OK."
- Setting Brightness (AX3): Requires Dome CXtra software. Adjust the white level on the "Backlight" tab of the "RightLight Panel Configuration."
Maintenance Features
Cleaning the LCD Screen:
- Safety First: Unplug the power supply before cleaning.
- Cleaning Solution: Dampen a soft, clean cloth with water or a mild cleanser.
- Wiping: Gently wipe the screen with the dampened cloth.
- Drying: Use a dry, soft, clean cloth to wipe off any residue.
- Immediate Action: Always wipe off water and other stains immediately to prevent screen damage.
Important Cleaning Precautions:
- Do NOT use/spray: Liquid, aerosol, ammonia, or other alcohol-based cleaners directly on the display or screen, as they can damage the display and its case.
- Do NOT touch: Avoid touching the LCD screen with fingers, as skin oils are difficult to remove.
- Do NOT saturate: Do not saturate the cleaning cloth. Excess liquid dripping into the display case can cause damage.
General Guidelines:
- Use both hands to lift or adjust the display.
- Avoid touching the display screen.
- Do not set up the display in areas with sudden temperature changes or strong light sources.
- Do not block the vents on the back of the display.
- Do not remove the back cover or disassemble the display.
- Wear an antistatic heel or wrist strap when installing the controller and display to avoid damage to computer components.