INSTALLATION OF THE PLANMECA ETHERNET INTERFACE BOX TO THE DIXI3 DIGITAL INTRA X-RAY SYS-
6 Planmeca Ethernet interface Installation manual
Select
Programs/Planmeca/Didapi Configuration
from your Start menu. From the appearing
window select
Ethernet Interface
.
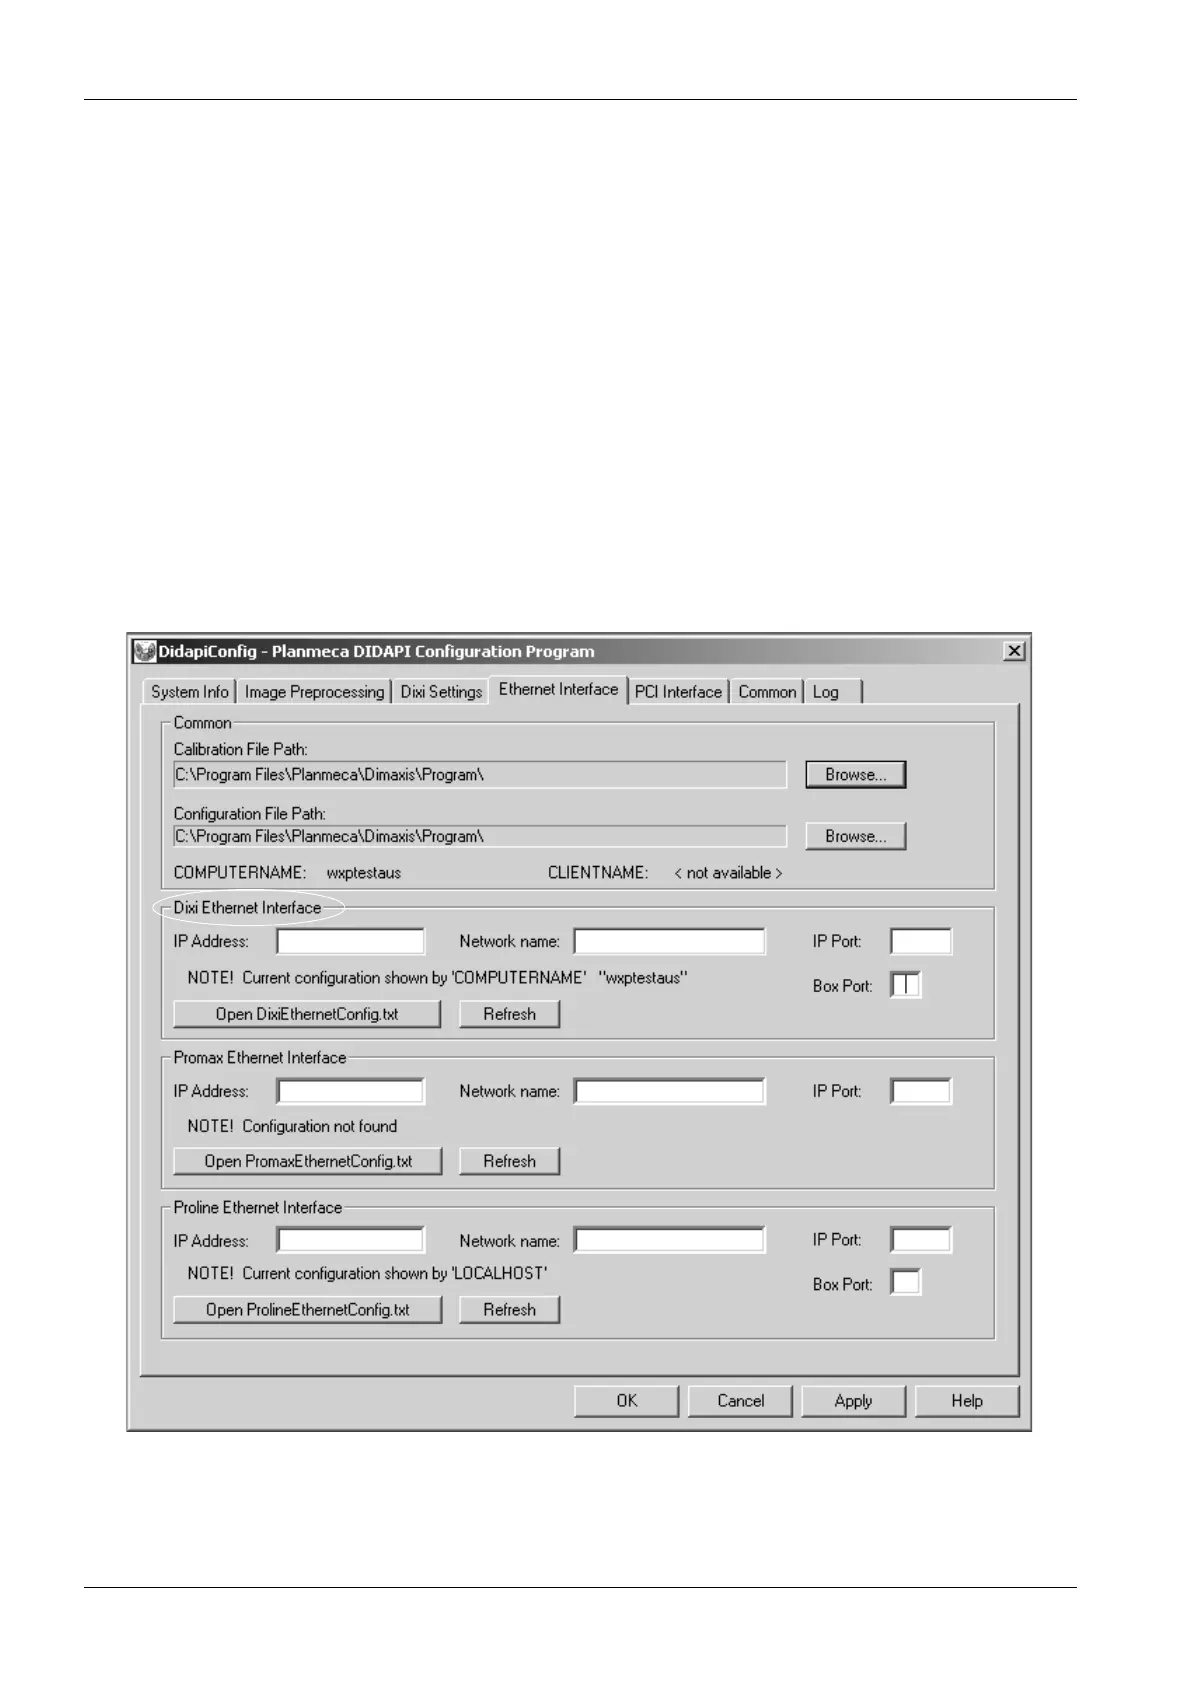
In the
Ethernet Interface
window the Dixi Ethernet Interface, the ProMax Ethernet Interface
and the Proline Ethernet Interface can be configured.
Common:
Select the directory where the configuration and calibration files are located by using the
Browse
button. This directory is selected automatically when Dimaxis is installed in the
default directory.
Configuring the Dixi Ethernet Interface:
There are two possibilities to perform the configuration:
1) Enter the IP Address, the IP Port and the Dixi Port in the correct fields and click
Apply
.
Alternatively you can leave the
IP Address
field empty and enter the Network name in the
Network name
field. It is not necessary to enter the IP address as well as the network name;
by entering the IP address you will get the network name, and vice versa. All IP addresses do
not necessarily have a network name.
2) Click
Open DixiEthernetConfig.txt
and enter the information. By pressing the
Refresh
button the performed modifications will be updated in the address fields. Wait until the
download is completed.