This document provides instructions for setting up and using Plantronics HW510 and HW520 wired headsets, along with troubleshooting tips for common issues like no dial tone, static, and echo. The headsets are designed for communication, allowing users to make and receive phone calls comfortably and clearly.
Headset Overview and Features
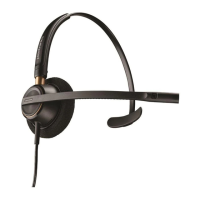
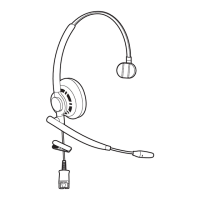
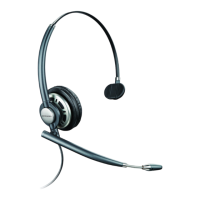
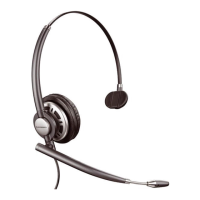
The Plantronics HW510 and HW520 are over-the-head headsets. The HW510 covers one ear, while the HW520 covers two ears. Both models offer flexibility in wear, with the HW510 being wearable on either the right or left ear, and both models allowing the microphone to be positioned on either the right or left side of the user's face. These headsets come with a 2-year warranty, ensuring reliability and support.
Key features of the headset itself include:
- Microphone Volume Adjustment: This allows users to control how loud their voice is heard by callers, ensuring optimal clarity on the other end of the line.
- Hearing Volume Adjustment (without amplifier base): When not connected to an amplifier base, users can adjust how loud they hear their callers directly through the headset.
- Microphone Mute Function: A crucial feature for privacy, the mute function allows the user to hear callers while preventing callers from hearing them. This is useful for private side conversations, coughing, or other interruptions.
- Proper Microphone Positioning: For the best sound quality, the microphone should be positioned approximately two fingers' width from the corner of the user's mouth.
- Adjustable Headband: The headband can be adjusted to ensure a comfortable and secure fit for various head sizes.
Amplifier Base Features and Adjustments
For telephones without a dedicated headset port, a headset amplifier/adapter is required to connect the HW510 or HW520 headset. The amplifier base enhances the headset's functionality and provides additional controls.
Key features and adjustments related to the amplifier base include:
- Hearing Volume Adjustment (with amplifier base): When using an amplifier base, users can adjust how loud they hear their callers through the amplifier's controls.
- Microphone Mute Function: The amplifier base also typically includes a mute function for the headset microphone, serving the same purpose as the headset's built-in mute.
- Switching Between Headset and Handset: The amplifier base allows users to easily switch between using their headset and the traditional telephone handset.
- Microphone Volume Adjustment: The amplifier base provides controls to increase or decrease the microphone volume, ensuring callers hear the user at an appropriate loudness.
- Phone Compatibility Adjustments: Amplifiers often have compatibility switches or settings that need to be adjusted to work correctly with different telephone systems.
- Battery Replacement: Amplifier bases typically use two AA batteries, which need to be replaced periodically. AC power adapters are also generally available as an alternative power source.
- Amplifier Ports/Connections: The amplifier base has specific ports for connecting the telephone handset coil cord, the telephone interface cable, and the headset's Quick Disconnect (QD) connector. These ports are often marked with icons (e.g., a telephone handset, a phone, a headset) to guide correct connection.
Setup for Phones Without a Headset Port
Setting up the headset with a phone that lacks a headset port involves connecting the amplifier base.
The setup process includes:
- Battery Installation: Ensure the amplifier base has fresh AA batteries installed, or use an AC power adapter if available.
- Disconnect Handset Coil Cord: Unplug the telephone's handset coil cord from the phone.
- Connect Handset Coil Cord to Amplifier: Plug the clear plastic clip end of the handset coil cord into the amplifier base port marked with a telephone handset icon. A click should be heard, indicating a secure connection.
- Connect Telephone Interface Cable: Plug the telephone interface cable (which came with the amplifier base) into the amplifier port marked with a phone icon. This connection should also click into place.
- Connect Interface Cable to Phone: Plug the other end of the telephone interface cable into the handset port on the telephone. Ensure it clicks securely.
- Connect Headset to Amplifier: Locate the black, flat Quick Disconnect (QD) connector on the HW510 or HW520 headset cord. Plug this into the QD connector on the amplifier's coil cord. This connection is designed to fit only one way to prevent incorrect attachment. If the amplifier's coil cord is not already attached, plug its clear plastic clip end into the amplifier port marked with a headset icon.
Once these steps are completed, the headset is set up and ready for use.
Using the Headset with an Amplifier Base
To make a call using the headset with an amplifier base:
- Wear Headset and Connect QD: Put on the headset and securely plug the Quick Disconnect (QD) into the QD at the end of the amplifier coil cord. Position the microphone two fingers' width from the corner of your mouth.
- Turn On Headset Button: Ensure the headset button on the amplifier is turned on.
- Remove Handset: Take the telephone handset receiver out of its cradle and place it on the desk.
- Check for Dial Tone: A dial tone should be heard in the headset earpiece.
- Make Call: Dial the phone number and proceed with the conversation.
- End Call: When finished, pick up the telephone handset receiver and hang it up.
For multiple calls, repeat steps 3 through 6. To switch back to using the handset during a call, deactivate the headset button on the amplifier base and pick up the telephone handset.
Setup for Phones With a Headset Port
For phones equipped with a dedicated headset port, a lower control cable (also known as a direct connect cable) is used, eliminating the need for an amplifier/adapter base. This cable has a Quick Disconnect (QD) on one end and a clear plastic modular connector on the other.
The setup process involves:
- Wear Headset: Put on the headset and position the microphone two fingers' width from the corner of your mouth.
- Locate Lower Control Cable: Find the lower control cable / direct connect cable.
- Connect Headset to Control Cable: Plug the Quick Disconnect (QD) from the headset into the Quick Disconnect connector on the lower control cable.
- Locate Headset Port: Identify the headset port on your telephone.
- Connect Control Cable to Phone: Plug the clear plastic modular clip on the end of the lower control cable into the telephone's headset port.
At this point, the headset is set up and ready to use.
Using the Headset with a Headset Port
To make a call using the headset with a phone that has a headset port:
- Wear Headset: Put on the headset and ensure the microphone is two fingers' width from the corner of your mouth.
- Leave Handset in Cradle: Do not remove the telephone handset receiver from its cradle.
- Press Headset Button: Locate the headset button on your telephone and press it once.
- Check for Dial Tone: A dial tone should be heard in the headset earpiece.
- Make Call: Dial the phone number and proceed with the conversation.
- End Call: When finished, press the headset button again to end the call.
For multiple calls, simply return to step 3 and proceed to step 6.
Troubleshooting
The document also provides troubleshooting steps for common issues:
No Dial Tone
If no dial tone is heard after setup:
- Check Connections: Double-check all connections to ensure they are secure and correctly plugged in according to the setup instructions.
- Full Cord Attachment: Verify that all cords are fully attached or connected.
- Compatibility Switch (with amplifier): If using an amplifier/adapter base, locate the compatibility switch. While on a call, move it to different positions until a dial tone is heard. As a precaution, keep the headset several inches away from your ear to avoid unexpected feedback.
Static
If static is heard during a test call:
- Compatibility Switch (with amplifier): If using an amplifier/adapter base, locate the compatibility switch and move it to different settings while on a call. Again, keep the headset several inches from your ear to prevent unexpected feedback.
- Replace Batteries (with amplifier): Replace the two AA batteries in the amplifier/adapter base with fresh ones.
- Check Connections (without amplifier): If not using an amplifier base, double-check all connections to ensure they are fully plugged in.
- Other Causes: Static can also be caused by a bad port on the telephone, a defective direct connect/lower control cable, a defective amplifier/adapter base, or a defective headset. A simple way to diagnose these issues is to replace components one by one (lower cord, amplifier, or headset) to see if the static disappears. If the problem persists after replacing headset-related components, the issue might be with the telephone port.
Echo
If echo is heard during a call:
- Telephone Volume Adjustment: Locate the volume adjustment on your telephone and set it to approximately the midpoint (halfway between high and low).
- Microphone Volume on Amplifier (with amplifier): If using an amplifier base, locate the microphone volume adjustment (often marked with a microphone icon) and slowly lower it.
- Microphone Positioning: Ensure the headset microphone tip is approximately two fingers' width from the corner of your mouth. Incorrect positioning (too close or too far) can affect sound quality and contribute to echo.
If echo or other issues persist after these adjustments, users are advised to contact support for further assistance.