5
i-TTL AUTO FLASH FOR NIKON™
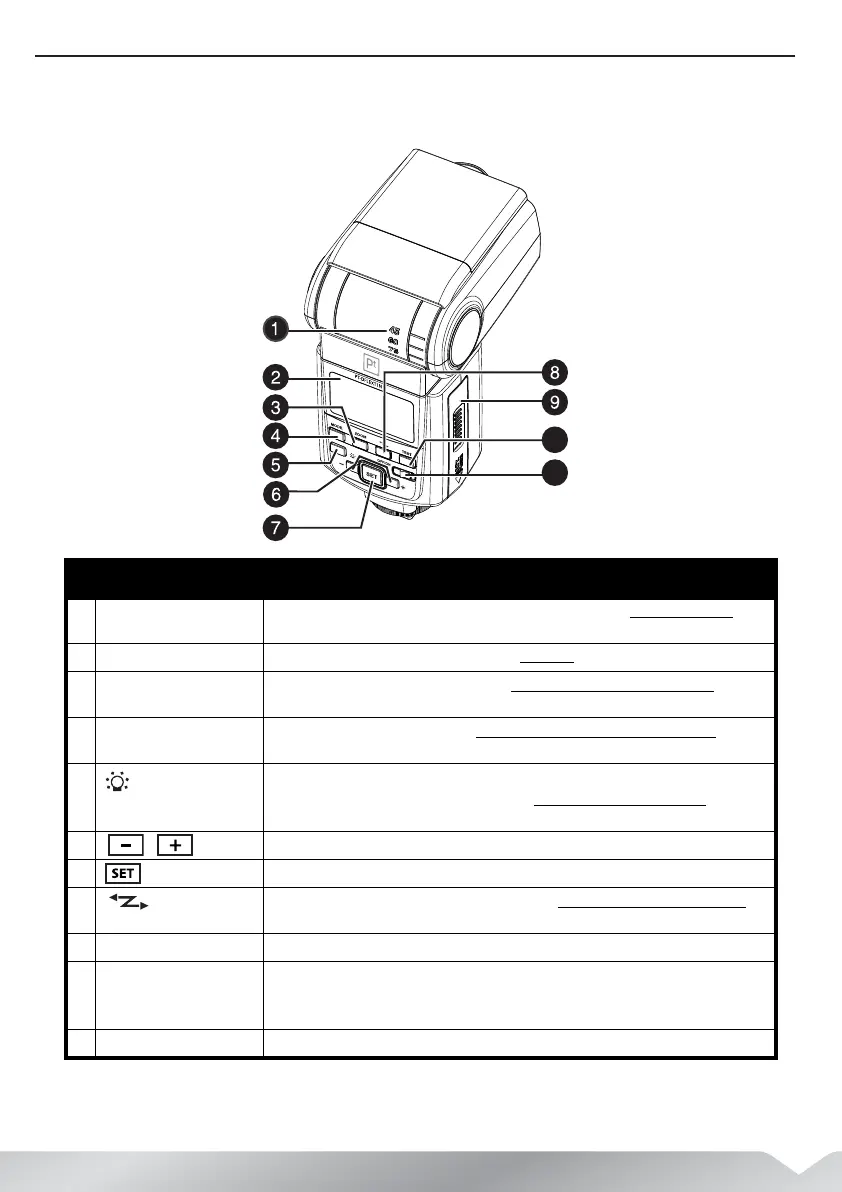
Back view
# Item Description
1 Bounce angle indicator Indicates the angle of head tilt, when used for bounce flash. See “Using bounce flash” on
page 15.
2 LCD panel Displays setting and status information. See “LCD panel” on page 6.
3 ZOOM button Press to zoom the flash head out or in. See “Using ZOOM to set the flash coverage
” on
page 16.
4 MODE button Press to change the flash mode. See “Using i-TTL autoflash in the shooting modes” on page
11.
5 Press once to light the panel.
Press and hold to access custom functions. See “Setting custom functions (C.Fn)
” on
page 22
6 / Press to select the previous or next item. Also press to decrease or increase the setting.
7 button Press to set or select an option after it has been selected.
8
button Press to set the S1 or S2 slave triggering mode. See “Using S1/S2 slave triggering mode” on
page 21.
9 Battery compartment cover Slide open to install or replace the batteries.
10 Flash-ready indicator/TEST
button
Lights red when the flash is ready to use. Press to fire a test flash.
Caution: Do not look closely at the flash window or point it at someone’s eyes at close
range.
11 Power switch Slide to the right to turn the flash on. Slide to the left to turn the flash off.
PT-DFLEXT1N_14-0805_MAN_V2_ENG.fm Page 5 Friday, August 22, 2014 12:36 PM
 Loading...