5.5
CLEANFIRE FUEL INJECTION
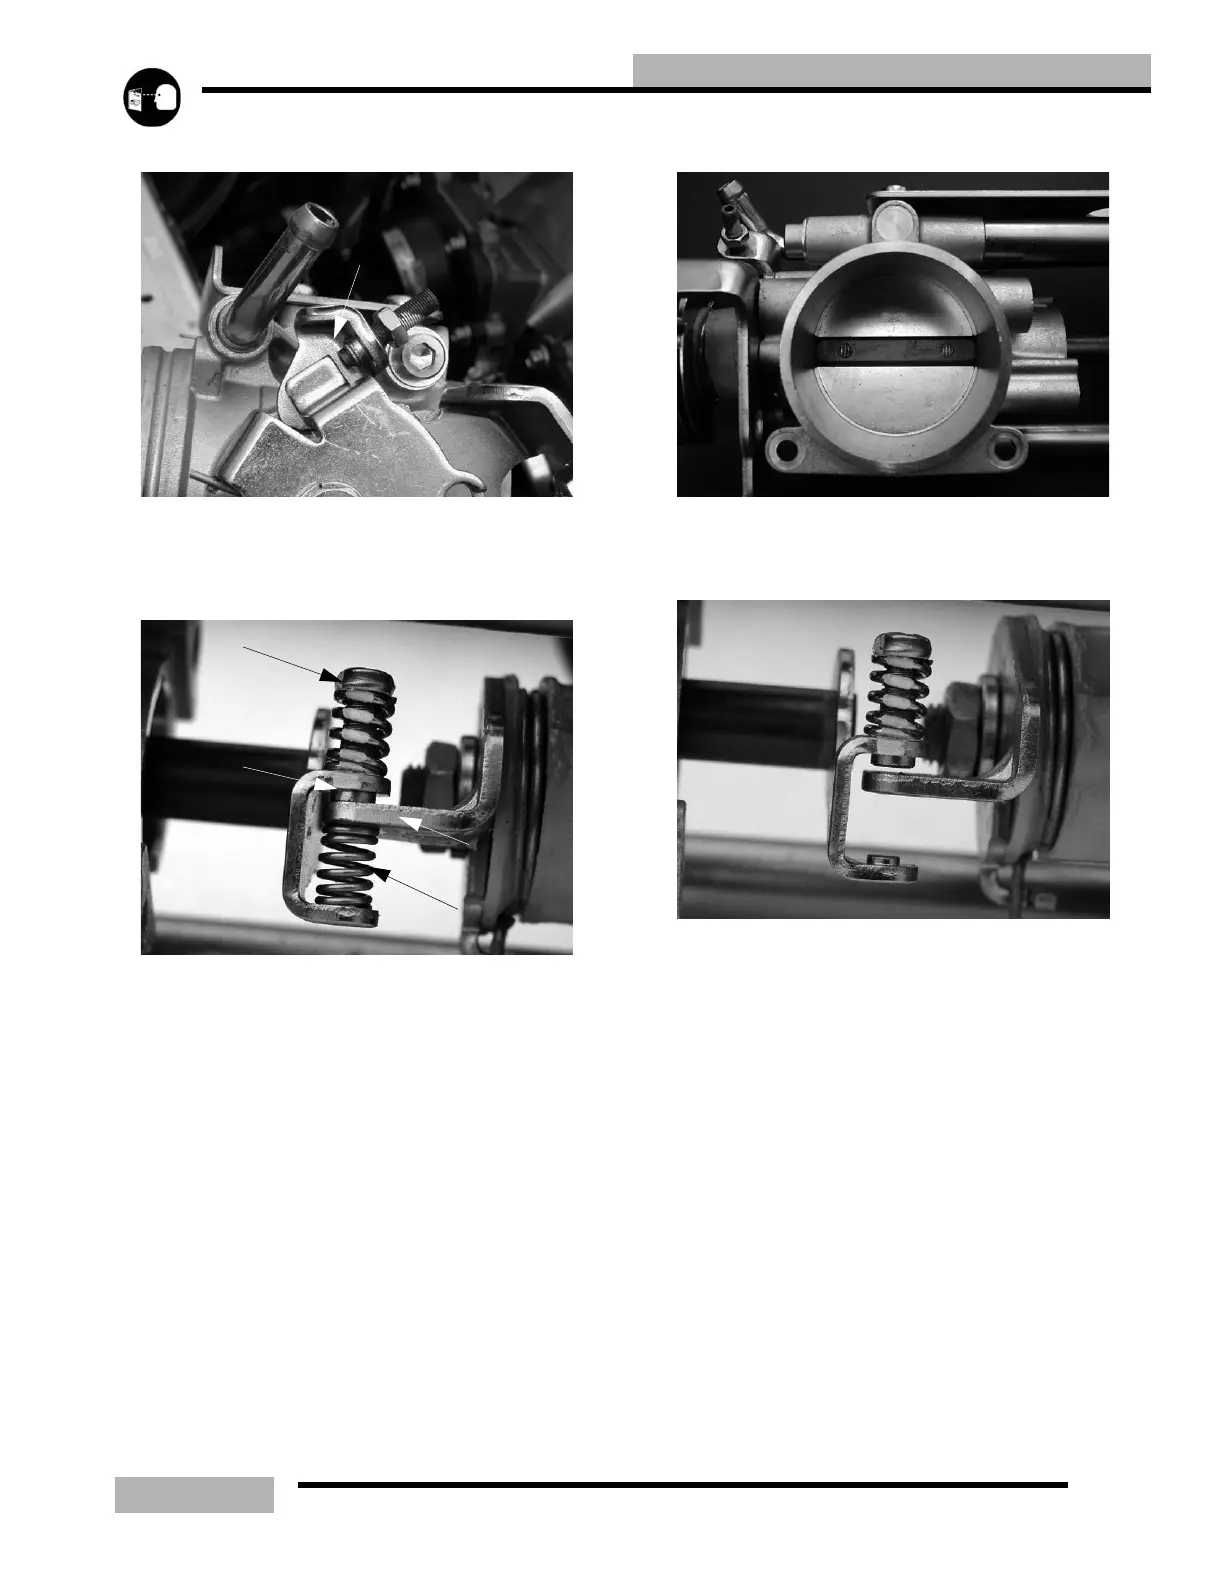
the tip separates from the lever tab.
6. Turn the synchronization screw out (counterclockwise)
until the synchronization lever is touching the
synchronization screw tab. You do not need to remove the
synchronization screw.
7. Carefully remove the synchronization spring from the
throttle body. Place a shop towel around the spring area to
keep from losing the spring. You may even thread a thin
wire around the spring.
8. Gently open and close the throttle plates with the throttle
lever. Make sure that both throttle plates are full closed.
9. Connect the TPS tool. Make sure it is set up correctly
before it is connected See “TPS SET UP” on page 13.16.
NOTE: Note the voltage at this point.
10. If you are replacing the TPS sensor, set the TPS so that it
reads around the .700 voltage range.
11. Tighten the TPS screws into place.
12. Insert the synchronization spring.
13. Turn the synchronization screw clockwise until your meter
read .710 volts.
14. Turn the idle set screw until the meter reads the correct
voltage for your elevation. See Table 5-4 for voltage.
Idle screw separated
form the lever
Sync spring
Sync screw tab
Sync Lever
Sync screw
Both throttle plates should be evenly closed

 Loading...