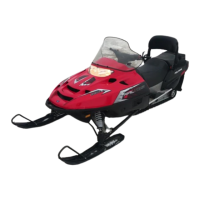
EasyManua.ls Logo

Polaris 340 Touring

Polaris 340 Touring
153 pages
To Next Page IconTo Next Page
Loading...

Table of Contents

Questions and Answers:

Polaris 340 Touring Specifications

General IconGeneral
BrandPolaris
Model340 Touring
CategoryOffroad Vehicle
LanguageEnglish

Summary

Introduction

Vehicle Identification Numbers

Record vehicle identification numbers and key number for future reference.

Important Notes for Owners and Drivers

Store the manual in the snowmobile and follow maintenance for safe operation.

Preservation of the Environment

Polaris supports environmental education and responsible operation for conservation.

Noise Level

Operate snowmobiles responsibly to minimize noise impact on others.

Air Pollution

Polaris engineers work to reduce emission levels and encourage collaboration on environmental topics.

Safety

Operator Safety

Understand signal words and symbols for safe operation and hazard awareness.

Stay Clear of Track

Avoid entanglement with the track; do not stand behind the snowmobile while warming it up.

Stay Clear of Engine

Always stop the engine before attempting adjustments to avoid contact with moving parts.

Riding Position

Maintain skill and balance for proper control by using correct rider positions.

Riding Apparel

Be prepared, warm, and comfortable when riding; dress according to weather.

Helmet

Always wear an approved helmet that meets or exceeds established safety standards.

Eye Protection

Wear shatterproof goggles or a face shield for eye protection.

Survival Preparation

Carry survival equipment when traveling in remote areas for safety.

Disabled Operators

Safe operation requires judgment and physical skills; disabled operators may have increased risk.

Cargo Overload

Do not exceed weight limits; overloading affects steering and stability.

Rider Capacity

Operate within the designed rider capacity; two-up riding requires more space.

Excessive Speed

Reduce speed at night or in inclement weather; always be able to stop within headlight range.

Driver Awareness

Be alert for obstacles, wire fences, and approaching vehicles; check railroad crossings carefully.

Avalanches

Snowmobilers in mountainous terrain should be trained and equipped for avalanche safety.

Ice and Snow Build-up

Ice and snow build-up can interfere with steering; keep the underhood area clear.

Driving on Slippery Surfaces

Reduce speed and use extra caution on ice or hard-packed snow due to reduced control.

Driving Downhill

Shift weight to the rear and use minimum speed; pump brakes to avoid overheating.

Driving in Hilly Terrain

Use extra caution, keep weight low and forward, and be prepared for crests.

Drive Belt

Do not operate the engine with the drive belt removed.

Intake Silencer

Do not operate the engine with the intake silencer or filter removed.

Clutch Guard

Do not operate the engine with the clutch guard removed to protect from clutch failure.

Clutches

Do not attempt to service clutches; all clutch service must be performed by your dealer.

Cold Weather Drive-Away

Loosen skis and track from ice and snow before driving.

Maneuverability

Control and maneuverability depend on body weight shifting and steering system.

Inadequate Snow Conditions

Adequate snow cover is required for lubrication and cooling; avoid driving on insufficient snow.

Driving Responsibly

Acquaint yourself with the machine, teach new riders safely, avoid jumping, and be courteous.

WindchillTemperature Charts

Charts to help determine when temperatures become dangerous for riding.

Safety Decals and Locations

Warning decals are placed on the snowmobile for your protection; read and follow their instructions.

Features

Operating Controls

Illustrates operating controls and special feature controls for snowmobiles.

Passenger Seat

Features adjustable lumbar support; removable for open storage on Touring models.

Cargo Rack

Secure cargo before operating; do not exceed rack weight limit.

The Perfect Fit

Front Suspension Adjustments

Break in suspension before fine-tuning; adjust settings for rider preference and conditions.

Shock Damping (Indy Select Shock)

Adjust compression stiffness by turning the screw near the shock base.

Spring Preload

Adjust spring preload for ski-to-ground pressure; ensure springs are adjusted equally on both sides.

Rear Suspension Adjustments

Adjust rear suspension for rider preference and conditions, involving compromises.

Suspension Performance Tips

Rider weight, experimentation, and rail slides affect performance.

Track Tension

Track adjustment is critical for proper handling; maintain correct tension and alignment.

EDGE 136 Rear Suspension Adjustments

Set up EDGE 136 rear suspension torsion spring preload using the sag method.

Initial Spring Preload Setting (Sag Method)

Measure distance between ground and bumper to determine sag and adjust torsion spring preload.

Rear Spring Tension

Adjust rear torsion spring tension using the three-position cam.

Indy Select Rear Shock

Adjust compression valving on Indy Select rear shocks by turning the adjustment screw.

Optional Coil Springs

Different rate coil springs are available for shocks if a firmer ride is desired.

Suspension Coupling

Rear suspension coupling links front and rear torque arms for controlled movement.

Front To Rear Coupling and the Front Rear Scissor Stop (FRSS)

FRSS couples torque arms to compress suspension as one unit.

Rear To Front Coupling and the Rear Rear Scissor Stop (RRSS)

RRSS couples torque arms to adjust weight transfer and cornering performance.

Weight Transfer During Acceleration

Adjust RRSS to control weight transfer during acceleration for improved cornering or ski lift.

WideTrak Rear Suspension Adjustments

Adjust rear spring settings for riding comfort and ski-to-ground pressure.

Rear Spring Settings

Adjust rear spring eye bolt length for riding comfort and ski pressure.

Handlebar Adjustment

Adjust handlebar angle at the handlebar block for desired height and smooth operation.

Traction Products

Studs

Be aware of local laws for traction products; use only Polaris products for warranty.

Carbide Skags

Skags assist in turning and prevent ski wear; use with studded tracks for control.

Wear Strips

Install tunnel wear strips when track studding is used to avoid excessive tunnel wear.

Accessories

Polaris Accessories

Offers a wide range of accessories to help make each ride more enjoyable.

Pre-Ride Inspections

Pre-Ride Checklist

Inspect all items on the checklist for proper operation before each use.

Before Starting the Engine

Perform critical checks including reading the manual, throttle, brakes, steering, and hood latches.

Read and Understand Your Owners Manual

Read and refer to the manual often for a safe and enjoyable experience.

Throttle Lever

Ensure throttle lever returns to idle position smoothly; do not start if it malfunctions.

Throttle Safety Switch

Test the throttle safety switch daily to ensure it stops the engine when pressure is removed.

Hydraulic Brakes

Check brake lever travel; a spongy feel indicates low fluid or air.

Mechanical Brakes

Check brake lever travel; adjust cable if distance is greater than recommended.

Parking Brake Lever Lock

Use the parking brake lever lock only when stationary; ensure it's disengaged before riding.

Steering System

Check skis for ice/snow interference; inspect track for damage.

Track

Inspect track for damage, lubricate slide rails, and check track tension and alignment.

Hood Latches

Ensure hood latches are secure before operating; never operate with the hood open.

Seat Latches

Ensure seat latches are secure before every use if equipped with a removable seat.

Recoil Rope

Inspect recoil rope and handle for excessive wear; ensure the knot is secure.

Transmission

Make sure the transmission is not in reverse before starting the engine.

Start the Engine and Check

Perform checks of engine stop switch, ignition, lighting, and operating area after starting.

Operation

Starting the Engine

Follow steps for starting the engine, including fuel valve, ignition, choke, and starter operation.

Engine Break-In

Proper break-in ensures long engine life; vary throttle and speed during the first three hours.

Oil Injection System

Always check and fill the oil tank when refueling; use recommended oils.

Oil Recommendations

Polaris recommends specific 2-cycle engine oils based on engine cooling type.

Slide Rail and Track Cooling

Inadequate cooling leads to overheating; reduce speeds and drive in fresh snow.

Track Warm-Up

Warm up engine, drivetrain, and track to ensure proper operation, especially in cold weather.

Fuel Valve

Turn the fuel valve clockwise to OFF to shut off supply, counter-clockwise to ON.

Fuel

Use recommended octane gasoline; avoid fuel with more than 10% ethanol.

Fuel Reserve Capacity (Mechanical Gauge)

Approximate fuel remaining when the gauge reads RES.

Fuel System Deicers

Use isopropyl-based deicer for non-oxygenated fuel; never use deicers containing methanol.

Oil

Check the low oil indicator light and oil level; add oil as needed to prevent engine damage.

Low Oil Indicator Light

Alerts the operator if the oil level is low.

Low Oil Level

Maintain oil level to prevent system aeration and possible loss of pumping action.

Carburetion

Proper carburetor adjustment is critical for engine performance and preventing damage.

Jetting Guidelines

Carburetors must be calibrated for altitude and temperature; re-calibration may be necessary.

Engine Stop Switch

Push the switch down to stop the engine quickly; pull up to restart.

Throttle Safety Switch

Test the throttle safety switch daily to ensure it stops the engine when pressure is removed.

Throttle Lever

Ensure throttle lever returns to idle position smoothly; do not start if it malfunctions.

Emergency Stopping

Chart lists methods for stopping the snowmobile in an emergency using various systems.

Emergency Starting

Use the tool kit and emergency start strap for starting if the recoil system fails.

Reverse Operation

Shift to or from reverse only when stopped and at idle; look behind while backing.

Mechanical Reverse

Ensure the shift lever is fully in forward or reverse; do not force if resistance is felt.

Electronic Reverse (PERC)

Engage electronic reverse below 4000 RPM; adjust ignition for altitudes over 6000 feet.

Engaging Reverse

Stop the snowmobile, idle the engine, push the reverse button, and apply throttle slowly.

Disengaging Reverse

Stop the snowmobile, idle the engine, push the reverse button, and apply throttle to ensure forward gear.

Altitude Setting

Adjust ignition setting for higher altitudes to improve reverse system success.

Daily Storage

Park on a level surface, support the rear, remove the key, and cover the machine.

Towing

Use a rigid tow bar or tow rope attached to ski spindles; remove the drive belt before towing.

Maintenance

Emission Control Information

Snowmobiles have emission control labels and requirements per EPA regulations.

Emission Control Label

The ECI label is affixed to the tunnel or recoil cover and should not be removed.

Emission Control Maintenance Requirements

Operate on 87 octane gasoline; take to dealer if check engine light comes on.

Owners Responsibilities

Responsible for ensuring specified maintenance, including air intake system inspection and cleaning.

Polaris Recommended Maintenance Program

Follow recommended regular maintenance and service checks for trouble-free operation.

Periodic Maintenance Interval Table

Guide based on riding conditions for inspections, cleaning, adjustments, and replacements.

Lubrication

Lubricate suspension and steering components with premium grease at specified intervals.

Suspension and Steering

Grease left/right spindles, ski pivots, jackshaft/driveshaft bearings, and steering pivots.

Driveshaft Bearing

Inject grease into the speed sensor housing fitting until grease purges.

Jackshaft Bearing

Inject grease into the flangette fitting until grease purges from the bearing seal.

Coupler Greasing (WideTrak)

Grease couplers on the driveshaft and jackshaft.

Throttle Cable

Lubricate throttle cable lightly with grease or oil.

Choke and Choke Cable

Lubricate choke slide and cables lightly with oil or grease.

Gearcase Oil Level (WideTrak)

Check gearcase oil level; change oil after first 500 miles, then every 1000 miles or seasonally.

Chaincase Oil

Check chaincase oil level; change oil after first 500 miles, then every 1000 miles or seasonally.

Spark Plugs

Check spark plug condition as an indicator of engine operation; replace if fouled or worn.

Normal Plug

Normal insulator tip is gray, tan, or light brown, indicating proper type and heat range.

Wet Fouled Plug

Wet fouled tip is black, indicating issues like excessive oil or improper choke use.

Spark Plug Removal and Replacement

Follow steps to remove and replace spark plugs, ensuring correct torque and gap.

Intake Filters

Intake foam filters limit snow ingestion; check and remove snow accumulation periodically.

Fuel FilterFuel Lines

Replace in-tank fuel filter every 1000 miles or annually; inspect fuel lines for damage.

Oil Filter

Change oil filter annually or every 1000 miles; use Polaris oil filters.

Carburetor

Check carburetor adjustments for proper synchronization and balance for optimal performance.

Carburetor Adjustments

Adjust carburetors if experiencing hard starting, poor idle, or poor response.

WaterSediment Trap Service

Drain and inspect carburetor bowl water/sediment traps every 2000 miles for contamination.

Exhaust System

Check exhaust system for wear or damage at approximately 2000 miles; inspect muffler and pipes.

Variable Exhaust System (VES)

VES maintenance includes periodic inspection and cleaning of system components.

Cooling System (WideTrak)

The cooling system consists of components like the coolant bottle, water pump, and heat exchangers.

Coolant

Use a 50/50 mixture of ethylene-glycol and distilled water or a 60/40 premix coolant.

Coolant High Temperature Indicator Light

The high temperature light indicates the engine coolant has reached a certain temperature.

Coolant Level

Maintain coolant level in the coolant bottle to prevent overheating and engine damage.

Flushing the Cooling System

Drain the system completely every two years and add a fresh coolant mixture.

Bleeding the Cooling System

Bleed trapped air from the cooling system if the coolant level becomes low.

Drive Chain Tension

Check drive chain tension weekly and before each long trip; adjust as needed.

Brakes

Inspect hydraulic brake system, excessive lever travel, and brake components regularly.

Hydraulic Brake Inspection

Inspect brake lever reserve and brake pads; replace pads when worn.

Excessive Lever Travel

If excessive brake pad clearance develops, bring the machine to a dealer for inspection.

Brake Fluid

Check brake fluid level; replace fluid every two years with Polaris DOT 4 fluid.

Bleeding the Hydraulic Brake System

Bleed the hydraulic brake system to remove air and prevent spongy brake lever action.

Lights

Adjust headlight vertical aim and replace bulbs as needed.

Headlight Adjustment

Adjust headlight aim so the most intense part of the beam is aimed below the mark on the wall.

Headlight Bulb Replacement

Follow steps to pinch springs, lift harness, withdraw bulb, and install new bulb.

TaillightBrakelight Replacement

Remove screws securing taillight housing or lens cover to replace the bulb.

Clutch System

Periodically inspect clutch sheaves for damage, wear, or belt residue.

Clutch Alignment Offset

Clutch center distance and alignment are crucial for optimum performance.

Clutch Center Distance

Consult Owner's Manual Supplement for recommended center distance; see dealer if adjustment is necessary.

Drive Belt Condition

Check drive belt condition and tension; replace if signs of excessive wear exist.

Drive Belt Removal

Follow steps to remove the drive belt, ensuring the engine is stopped after forward motion.

Drive Belt Installation

Install drive belt over drive clutch, turning driven clutch sheave clockwise while pushing inward.

Drive Belt Deflection

Measure belt deflection with both clutches at rest; adjust belt tension as needed.

Drive Belt Adjustment

Adjust belt deflection by loosening bolts on the adjustment cam or using the belt width adjuster.

Torque Stop

Periodically check engine torque stop clearance; adjust if necessary.

Reverse Maintenance

Maintain track tension as specified when equipped with reverse or a reverse kit.

Chain Tension

Maintain proper chain tension as outlined on page 96.

Fall Tune-Up

Arrange for a fall service tune-up with your dealer for maximum performance.

Tool Kit

A tool kit is included for emergency and routine maintenance; always keep it with the snowmobile.

Track

Inspect track for damage, lubricate slide rails, and check track tension and alignment.

Track Inspection

Lift rear of snowmobile, rotate track by hand, and check for damage or breakage.

Track Lubrication

Slide rails need snow for lubrication; excessive wear indicates insufficient lubrication.

Track Tension

Check and adjust track tension after warming up and limbering the track.

Track Alignment

Periodically check that the track is centered and running evenly on slide rails.

Steering System

Inspect steering system fasteners weekly or before a long ride; check ski alignment.

Steering Inspection and Adjustment

Check all steering system fasteners and tighten if necessary.

Ski Alignment

Measure ski alignment to ensure proper steering control; consult dealer for adjustments.

Ski Skags

Check skags before each use; replace when worn to half their original diameter.

Skag Replacement

Follow steps to remove and install skags, supporting the front of the machine.

Rail Slide Wear

Replace rail slides if worn to the top of the groove to prevent damage to track or rails.

Pre-Ride Suspension Inspection

Visually inspect suspension mounting bolts, idler wheel bolts, and track tension for tightness.

Extended Storage

Perform preventive measures for off-season storage to aid against deterioration.

Cleaning and Preservation

Clean, wash, and wax the machine; remove corrosive salt and acids before preservation.

Controls and Linkage

Lubricate bushings, spindle shafts, tie rod ends, and cables as outlined in the maintenance table.

Bearings

Grease jackshaft and drive shaft clutch side bearings to prevent corrosion.

Clutch and Drive System

Remove drive belt, lubricate sheave faces, and use acetone/alcohol to remove oil before reinstalling.

Engine and Carburetor Protection

Protect engine and fuel system from rust and corrosion; fog engine with oil if stored over 60 days.

Electrical Connections

Separate and clean electrical connector blocks; replace worn wires.

Battery

Prepare and maintain the battery as outlined; store in a cool dry place.

Track and Suspension

Maintain moderate track tension during storage; support machine off the ground.

Transporting the Snowmobile

Turn fuel valve off, secure fuel/oil caps, tie snowmobile to unit, and remove ignition key.

Battery

Check battery fluid level often; keep terminals clean and free of corrosion.

Battery Fluid

Maintain battery fluid level between upper and lower marks; electrolyte is poisonous.

Battery Connections

Clean terminals and connections with a baking soda solution; coat with dielectric grease.

Battery

Follow steps to disconnect battery cables correctly and carefully lift the battery out.

Battery Removal

Disconnect negative cable first, then positive; carefully lift battery out without spilling electrolyte.

Battery

Follow steps to place battery in holder, install vent line, and connect cables correctly.

Battery Installation

Connect positive cable first, then negative; ensure vent line is properly routed.

Battery

Remove battery for storage over one month; charge to proper level and store in a cool dry place.

Battery Storage

Check and charge battery monthly; batteries may freeze if not fully charged.

Polaris Products

Troubleshooting

Engine Troubleshooting

Consult dealer for engine repair unless experienced; diagnose issues based on probable cause and solution.

Noise in drive system

Address drive clutch issues, bearing failures, or drive chain problems.

Poor low RPM performance

Check for worn drive belt or excessive sheave clearance; inspect torque stop.

Engine doesnt turn

Diagnose seized engine, hydrostatic lock, or wiring connection issues.

Engine doesnt start (electric start models)

Check wire connections for electric start issues.

Engine requires more than normal pulls to start

Check for poor fuel quality or insufficient fuel delivery.

Engine turns but fails to start

Check ignition, fuel supply, choke use, and engine compression.

Engine lacks power

Check spark plugs, fuel filter flow, clutching, and carburetor/fuel pump.

Engine continually backfires

Check spark plugs, fuel system for ice/dirt, or throttle freeplay/switch.

EDGE 136 Suspension

Troubleshoot suspension issues like bottoming out, stiffness, darting, or heavy steering.

Drive Belt Troubleshooting

Diagnose belt wear/burn issues based on causes like low RPM driving or insufficient warm-up.

Warranty

Service and Warranty Information

Contact your Polaris dealer for parts, service, or warranty; provide serial and model numbers.

Obtaining Service and Warranty Assistance

Contact dealer for service, providing required information like serial number and date of purchase.

Polaris Anti-Theft System

The P.A.T.S. monitoring program aids in the recovery of stolen snowmobiles.

Limited Warranty

Provides a one-year limited warranty on all components against defects in material or workmanship.

Registration

Snowmobile must be registered with Polaris via the dealer for warranty coverage.

Warranty Coverage and Exclusions

Excludes failures from normal wear, abuse, improper handling, or unauthorized service.

Limitations of warranties and remedies

Implied warranties are limited to one year; Polaris disclaims liability for incidental damages.

How to Obtain Warranty Service

Take snowmobile to an authorized Polaris dealer for warranty service with proof of purchase.

Conditions and Exclusions

Warranty requires proper setup and maintenance; excludes normal wear, contamination, and abuse.

Polaris Second Year Engine Service Contract

Free contract for eligible new snowmobiles; subject to deductible and requires documented maintenance.

Consumer Exclusions

Excludes repairs after twelve months subject to deductible; tampering voids contract.

Coverage

Covers engine failures due to defects; excludes damage from accidents, improper fuel, or wear parts.

Exported Vehicles

No warranty or service bulletin coverage if sold outside the selling dealer's authorized location.

How to Get Service

Obtain service at an authorized dealer where purchased or abroad with proper documentation.

Notice

Failure to follow procedures for vehicles registered outside the country voids warranty.

Snowmobile Engine Emissions Limited Warranty

Covers engine emissions components for defects in materials/workmanship for a specified period.

Maintenance Log

Related product manuals