FUEL SYSTEM/CARBURETION
4.8
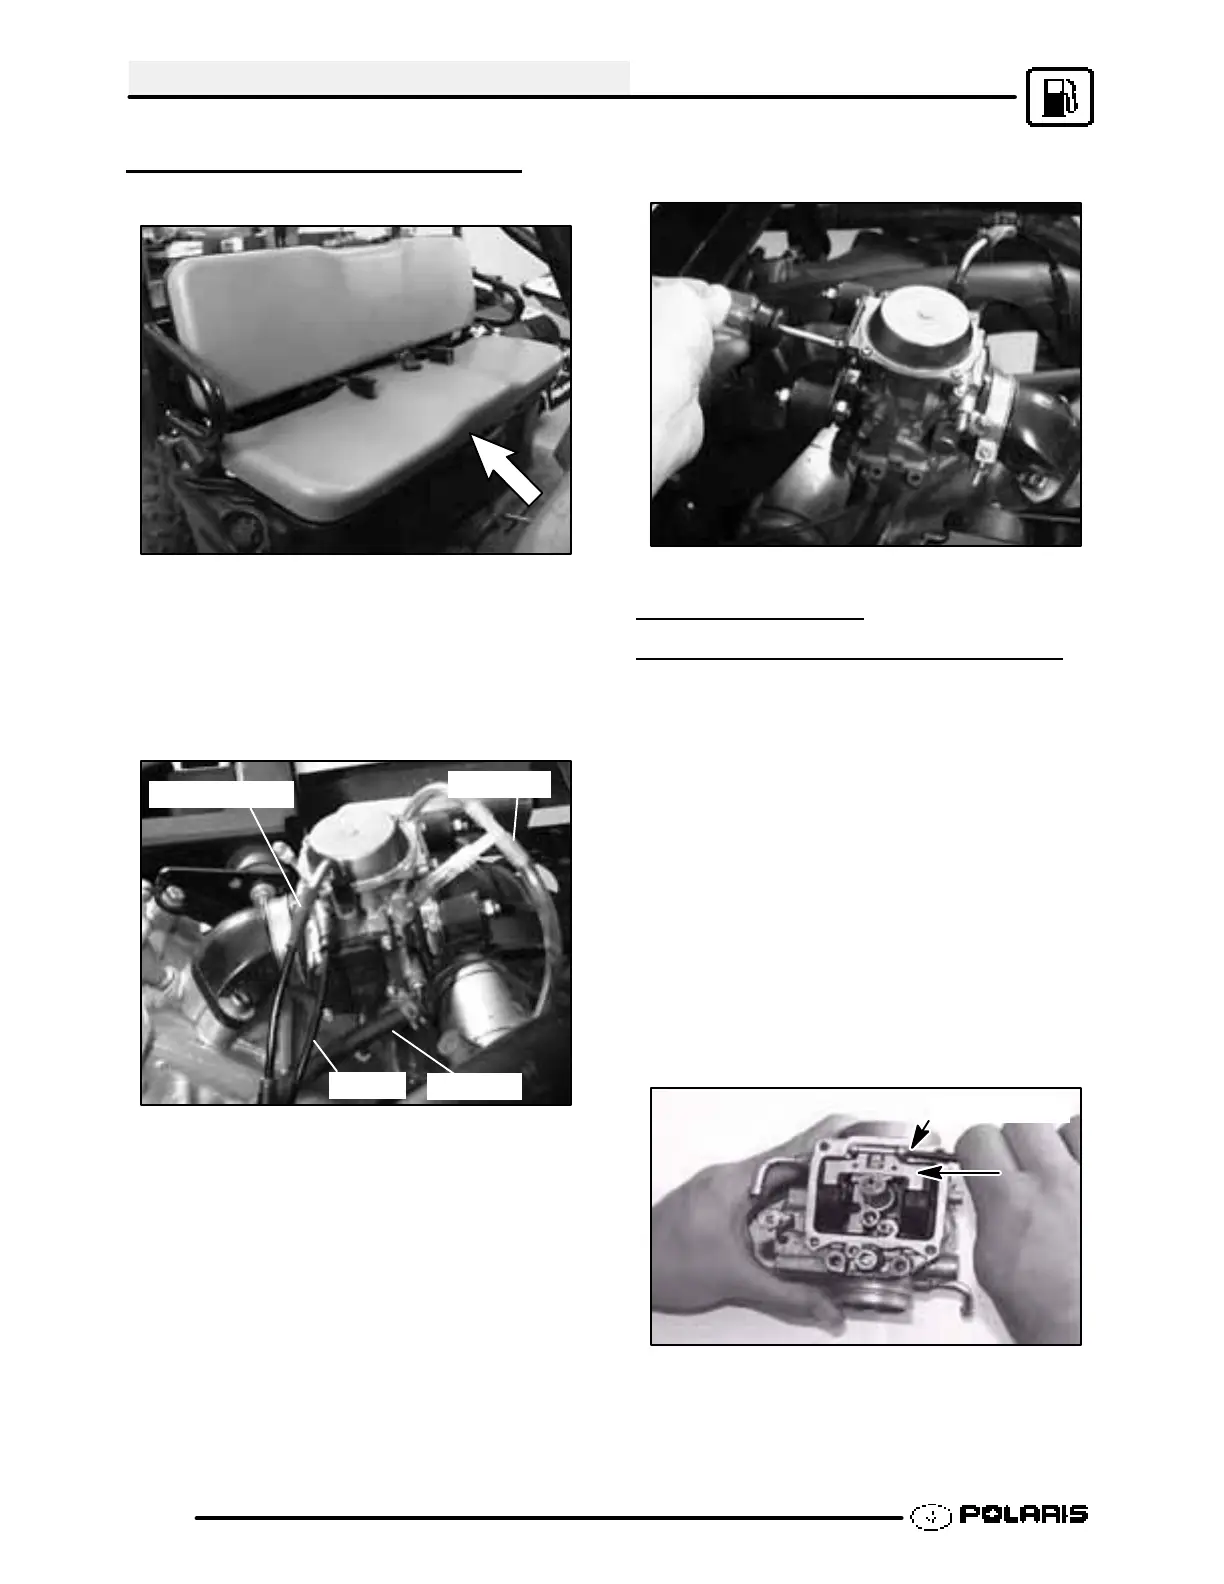
CARBURETOR REMOVAL
1. Remove the seat.
2. Disconnect:
G Vent lines
G Drain line
G Fuel line
G Throttle cable
G Choke cable
Vent Line
Fuel line
Choke
Throttle Cable
NOTE: Drain and dispose of fuel properly
3. Loosen air box carb boot clamp.
4. Loosen carburetor flange clamp at front of
carburetor.
5. Remove the carburetor mounting screws from the
carburetor bracket.
6. Remove carburetor. Place a shop towel in carb
flange to prevent dirt from entering.
CARBURETOR
DISASSEMBLY - MIKUNI
CV
NOTE: Series 11 RANGER 2x4, 4x4 ,and 6x6 will
have tamper resistant screws on Diaphragm Cover
per 2003 CARB standards for LSI (large spark
ignition) engines. All RANGER’s are classified within
LSI. The existence of these tamper resistant screws
will require customers to purchase a complete
carburetor if they desire to replace jet needle or piston
slide.
A main jet change is the only requirement for altitude
adjustment of the carburetor. These tamper resistant
screws will not prevent anyone from adjusting the
main jet size of carburetor when operating at high
altitude.
1. Remove float bowl and carefully remove the
pressed float pin.
Support Here
NOTE: Be careful not to damage the float pin tower
during the float pin removal. Support the float pin
tower while removing the float pin. This helps to
prevent the float pin towers from breaking off.
 Loading...