EasyManua.ls Logo

Polaris Quattro Tune-up Kit - User Manual

Polaris Quattro Tune-up Kit
4 pages
Print Icon
To Next Page IconTo Next Page
Loading...
Installation Manual
Manuel d’installation
Manual de instalación
Quattro Tune-up Kit
These instructions are to be
used with the following Polaris
Tune-up Kit: R0995100
Ces instructions sont destinées
à l’ensemble de misen au point
Polaris suivant : R0995100
Estas instrucciones deben
utilizarse con el siguiente kit de
ajustes de Polaris: R0995100
WARNING AVERTISSEMENT AVERTENCIA
WARNING - This product must be serviced by a qualied
professional with sufficient experience in pool equipment
installation and maintenance so that all of the instructions
in the product’s complete installation and operations
manual can be followed exactly. All safety instructions in
the complete manual must be followed explicitly in order
to prevent injury hazards. Improper installation and/or
operation may void the warranty.
AVERTISSEMENT : Ce produit doit être entretenu par
un professionnel qualifié possédant assez d’expérience
dans l’installation et la maintenance d’équipements de
piscine afin que toutes les instructions du guide complet
d’installation et d’opération puissent être suivies de façon
précise. Toutes les instructions de sécurité du guide
complet doivent être suivies de façon explicite pour éviter
les risques de blessures. L’installation ou l’utilisation
inappropriée pourrait annulera la garantie.
ADVERTENCIA: Este producto debe ser reparado por
un profesional calificado con suficiente experiencia en
la instalación y mantenimiento de equipos para piscinas
de forma tal que todas las instrucciones del manual de
instalación y operaciones completo se sigan al pie de
la letra. Deberá respetarse en forma expresa todas las
instrucciones de seguridad del manual para prevenir
riesgos de lesiones. Una instalación u operación
incorrectas podría dar lugar a la anulación de la garantía.
Question and Answer IconNeed help?

Do you have a question about the Polaris Quattro Tune-up Kit and is the answer not in the manual?

Overview

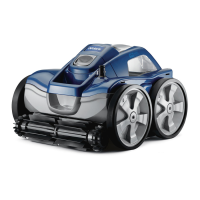
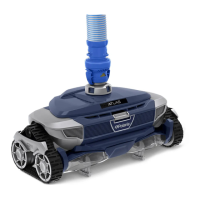
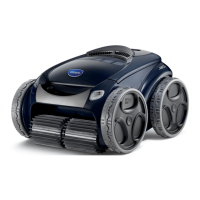
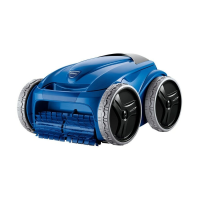
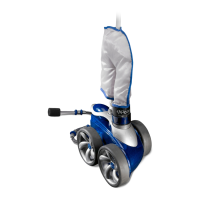
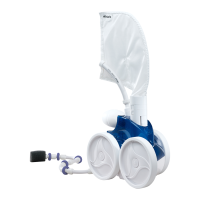
This document provides an installation and maintenance guide for the Polaris Quattro Tune-up Kit, specifically identified by part number R0995100. The kit is designed for the Polaris Quattro pool cleaner, a robotic device used for automated pool cleaning.

Function Description

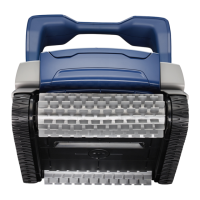
The Polaris Quattro is an advanced robotic pool cleaner designed to autonomously clean various types of swimming pools. It operates by moving across the pool floor and walls, scrubbing surfaces, and collecting debris into an internal filter canister. The tune-up kit R0995100 provides replacement parts to restore the cleaner's optimal performance, addressing wear and tear on critical mechanical components.

Important Technical Specifications (Implied from the manual)

While explicit technical specifications like motor power or battery life are not provided in this tune-up kit manual, the components included and their replacement procedures imply certain design characteristics:

  • Drive System: The cleaner utilizes a geared drive system with multiple axles and wheels, indicating a robust mechanism for propulsion and maneuverability within the pool. The replacement of axles, wheel bearings, and gearboxes suggests a focus on durable, low-maintenance operation.
  • Brushing/Scrubbing System: The inclusion of side scrubbers, brush/roller assemblies, and associated gearboxes highlights a dedicated scrubbing mechanism for dislodging dirt and debris from pool surfaces.
  • Filtration System: The initial step of removing a filter canister indicates an onboard filtration system, allowing the cleaner to capture debris directly.
  • Modular Design: The step-by-step replacement of components like the filter canister, body panels, axles, wheels, gearboxes, engine, and drive shaft points to a modular design, facilitating easier maintenance and part replacement.
  • Material Composition: The mention of "silver retaining screws," "black mounting brackets," "white gear bushing," and "blue side" of wheel bearings suggests the use of various materials, likely plastics and corrosion-resistant metals, suitable for a submerged environment.

Usage Features (Implied from the device's nature)

As a robotic pool cleaner, the Polaris Quattro offers several usage features:

  • Automated Cleaning: The primary feature is its ability to clean a pool without constant human intervention.
  • Debris Collection: It collects debris into an internal filter canister, which needs to be periodically emptied.
  • Surface Agitation: The scrubbing and brushing mechanisms help dislodge stubborn dirt and algae from pool surfaces.
  • Maneuverability: The multi-axle and wheeled design, combined with a drive system, allows it to navigate the pool floor and potentially climb walls.

Maintenance Features (Detailed in the tune-up kit manual)

The R0995100 tune-up kit is specifically designed for comprehensive maintenance, focusing on the mechanical drive and scrubbing components. The manual details the following maintenance procedures:

  • Disassembly and Reassembly of Body Panels: The process begins with removing the filter canister and then the top and front body panels, providing access to internal components. This indicates a design that allows for relatively straightforward access for maintenance.
  • Wheel and Axle Replacement:
    • Removal: Remove 3 screws per axle, then remove the 4 axles.
    • Replacement: Replace all 4 axles and secure them with screws.
    • Wheel Bearings: Remove silver retaining screws, slide off wheels, and replace wheel bearings, ensuring the blue side faces outwards. This detail is crucial for correct installation and performance.
  • Side Scrubber and Gear Bushing Replacement:
    • Removal: Remove the black retaining screw and slide off the side scrubber and white gear bushing.
    • Replacement: The manual implies replacement of these components as part of the tune-up.
  • Side Brush Gearbox Assembly Replacement:
    • Removal: Remove 2 screws and pull out the side brush gearbox. Remove 1 screw, then pull off the brush/roller and brush guard.
    • Replacement: Attach a new brush guard to a new gearbox, reattach the brush/roller with 1 screw. Slide the entire side brush gearbox assembly into the chassis, aligning it with the center roller support, then secure with 2 screws. Slide on the side scrubber and secure with a black retaining screw. This procedure is repeated for the other side, emphasizing the dual-sided design of the cleaner's scrubbing system.
  • Gear Box, Engine, and Drive Shaft Replacement (Sequential Order): This is a critical multi-step replacement process, highlighting the interconnectedness of these components.
    • Removal Sequence:
      • Remove 4 screws from the gear box and pull it off.
      • Remove 5 screws from the engine and pull it off.
      • Remove 8 screws from the drive shaft and pull it off.
    • Reassembly Sequence:
      • Replace with a new drive shaft and secure with 8 screws, aligning them to the black mounting brackets.
      • Slide the mounted axle gear to the far end and reattach the engine with 5 screws, ensuring the standpipe O-ring is in place. This detail about the O-ring is important for sealing and proper function.
      • Replace the new gear box and secure with 4 screws.
  • Turbine and Turbine Housing Maintenance:
    • Alignment and Removal: Align the body and turbine arrows to access the screw hole. Loosen a screw and pull up on the cyclonic turbine to remove it.
    • Replacement: Seat the new turbine and align the body and turbine arrows, then secure with a screw. This process is repeated for the other side.
  • Wheel and Bearing Plate Installation:
    • Removal: Slide off the white gear bushings onto the black spur pinions from the front scrubbers on both sides.
    • Installation: Slide on the wheels and secure each with a silver retaining screw, ensuring the blue flat side of bearings faces out from the wheels. This reiterates the importance of correct bearing orientation.
  • Front Panel and Top Body Panel Reassembly:
    • Installation: Place the front panel into the tab slots and align the top body panel pins to the chassis holes, then secure both panels with 4 screws.
    • Final Step: Attach the filter canister to complete reassembly.

The manual strongly emphasizes the need for a "qualified professional with sufficient experience in pool equipment installation and maintenance" to perform these procedures, underscoring the complexity and precision required for proper repair and to avoid voiding the warranty. Safety instructions from the complete manual must be followed explicitly.

Polaris Quattro Tune-up Kit Specifications

General IconGeneral
BrandPolaris
ModelQuattro Tune-up Kit
CategorySwimming Pool Vacuum
LanguageEnglish

Related product manuals