Do you have a question about the Polaroid PDC 3030 and is the answer not in the manual?
View the camera LCD screen to check active settings. Undisplayed feature icons indicate they are not activated.
Instructions on how to capture a photo using the shutter button, including visual and audio feedback indicators.
Adjusts image quality based on resolution and JPEG compression, affecting file size and print/email suitability.
Select image resolution (e.g., 2048x1536) affecting file size and number of pictures stored.
Configure flash operation (On, Off, Auto) for optimal lighting conditions, with a flash range of 4-8 feet.
Utilize 3X digital zoom to enlarge the central area of a photo during capture or playback.
Activate a 10-second countdown timer for self-portraits or group shots, indicated by LCD icon and beeps.
Enable or disable the date and time stamp overlay on captured images.
Adjust exposure value (EV) from -1.5EV to +1.5EV for better results in challenging lighting conditions.
Select appropriate white balance settings (Auto, Outdoor, etc.) for natural color reproduction under different lighting.
Adjust image sharpness (Normal, Sharp, Soft) to highlight or blend edges for desired visual effects.
Set lighting frequency (50Hz/60Hz) for optimal indoor picture quality, especially for reducing flicker.
Navigate and view captured pictures in playback mode using previous and next buttons.
Magnify images during playback to examine details by pressing the Up or Down buttons.
View pictures at different angles (0, 90, 180, 270 degrees) during playback for better viewing.
Lock individual pictures to prevent accidental deletion, indicated by a lock icon.
Remove selected pictures or all unprotected files from the camera's memory.
Capture audio recordings using the camera's built-in microphone, with recording time displayed on the LCD.
Record video clips with sound, displaying recording time and status LED, subject to internal memory limits.
View recorded video clips on the camera's LCD screen after confirming playback selection.
Prevent accidental deletion of audio or video clips by applying a protection lock, indicated by an icon.
Remove specific audio or video clips from the camera's memory, excluding protected files.
Procedure to delete a single video clip, ensuring only unprotected files are removed.
Properly insert a SmartMedia card into the camera slot, ensuring correct orientation.
Safely remove a SmartMedia card from the camera by gently pushing it inwards and releasing.
Erase all data from internal memory or SMC card to restore factory settings or prepare for new use.
Steps for installing camera drivers and bundled software on Windows and Macintosh systems.
Details on bundled software like PDC 3030 Driver, ArcSoft PhotoImpression, NetMeeting, and Acrobat Reader.
Minimum hardware and software specifications for Windows and Macintosh to ensure optimal camera functionality.
Ensure necessary software is installed from the CD before connecting the camera for data transfer.
Connect the camera to the PC or Mac using the provided USB cable.
Transfer media files from the camera's '100MEDIA' folder to your PC via USB, using Windows Explorer.
Copy media files from the camera's 'untitled' drive to your Mac's hard disk via USB.
Connect camera, microphone, and speakers, and set to Capture mode for NetMeeting operation.
Launch NetMeeting software and follow on-screen instructions for video conferencing.
Access online support, FAQs, and product information via the Polaroid website.
Contact Polaroid customer support via phone for assistance during specified hours.
Find technical support and FAQs for ArcSoft software through regional contact centers.
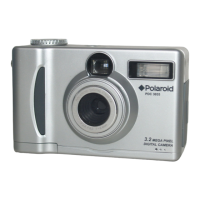
Detailed specifications including memory, resolution, video/audio formats, connectors, and power.
Table showing approximate picture storage capacity based on SMC card size and quality settings.
| Brand | Polaroid |
|---|---|
| Model | PDC 3030 |
| Category | Digital Camera |
| Language | English |