18
ENGLISH
quence below.
• Place the flange matching it to the rows of the gear shaft with the
projecting side toward the engine
• Place the centering nut with left threat and hand-screw it till the
end on the flange. (the nut will be tightened at all at a later
stage)
• Place the propeller, the plate and the 6 M8 screws, hand-screw
the 6 crews without tightening them at all but leaving them
unscrewed just a little bit. (about one turn less before the first
beat).
• Tighten the centering nut at 80Nm counter clockwise.
• Finish the mounting by tightening the propeller screws crosswise
(follow the propeller manufacturer’s instructions about the proper
tightening torque)
! CAUTION! Before each flight always check that the propeller screws
and centering nut are firmly tightened.
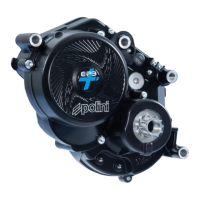
11.7- GEAR REDUCTION
Thor 303 engines are available with 1-2.8 or 1-3.2 gear reduction.
1-2.8 reduction is ideal for 140cm max propeller diameter
1-3.2 reduction is ideal for 160cm max propeller diameter
correct engine mounting. For this reason there is a special plate (cod.
928.004.002) which grants the right connection of the engine with
tractor configuration. This plate requires different connection points on
the frame (drawing available on www.polinithor.com).
11.1- ELECTRIC STARTER (single-ignition model)
Firmly fix the battery which is supplied already charged (anyway we
suggest you should charge it one time before using it). Connect the relay
to the frame. Connect the two red cables to the battery positive pole, the
black cable to the negative pole while the yellow/green cable must be
connected to a NA switch (normally open) to earth which it is necessary
to switch the engine on.
11.2- FUEL LINE
The engine is supplied with fuel pump and manual pump already con-
nected. Prearrange the frame with a proper tank and fuel filter. Connect
the fuel pipe to the union on the manual pump and fix the fuel line
properly and safely and verify that there is no air coming in.
11.3- PRESSURE REGULATOR
The pressure regulator has been developed to improve the fuel system
from the petrol pump to the carburetor. Its function is to set the pressure
by transmitting a constant petrol flow in every condition.
N.B.: the usage of the pressure regulator is compulsory for VDS devices
(ultralight aircrafts) which have the tank upper the engine height and
for which it is mandatory that the regulator is matched to the 3 mm
connection (311.0101) connected to the vacuum tube. For all the other
VDS devices (paramotors) which have the tank under the engine height
(usually 20-50 cm under the engine), it is highly recommended. The
pressure regulator is used for Thor 202, 260 and 303 engines.
The pressure regulator is delivered with a preset pressure of 0.2 bar. If
you want to change the petrol pressure, it is enough to remove the blind
nut, the safety nut and turn the screw (1/4 of turn at a time) clockwise
to increase pressure or anticlockwise to decrease pressure. It is recom-
mended equipping themselves with a pressure gauge (to be put between
the pressure regulator and the carburetor) to check the correct desired
pressure. Finally, tighten the safety nut and reassemble the blind nut.
11.4- THROTTLE
Fix it to the carburetor by using the proper support (not supplied). After
assembling the throttle control, check that its travel is enough to reach
the carburetor throttle valve opening and check that recovery is good in
order to avoid the engine remaining accelerated. Connect the electrical
wires of the throttle, one on the mass wire of the coil and the other on
the + of the coil (female connector)
11.5- PROPELLER
The propeller is a key component to ensure the proper engine operation.
For this reason it is a must to use Polini Motori propellers only.
The use of a no-proper propeller may compromise the engine working
and make the guarantee null.
Instructions to fix the propeller flange
! CAUTION: tight the propeller flange following carefully the se-