Page 33
I
I
I
measurement again with the rider on the bike. The difference between the measure-
ments is the fork sag. Add shim washers under the fork caps if the fork sag is too
great, switch to a softer spring if there is too little sag. If the front tire seems to skitter
and wash out in bumpy corners, consider using a lighter weight oil to reduce damp-
ening forces. If the bike bottoms harshly on jumps, but the suspension works well
otherwise, increase the oil level to reduce bottoming. If the suspension rides too low,
increase spring preload, or change to a stiffer spring.
After making a change, evaluate the new settings. If they are worse than before,
change back to the previous settings and perhaps make a change in the opposite
direction. Front tire pressure will affect cornering and braking performance also, try
various tire pressures in addition to adjusting the suspension.
Fork disassembly and service
Note: It is not necessary to disassemble fork to change fluid or adjust spring preload.
Do not clamp body of fork slider or fork tube in a vise! Clean fork thoroughly, espe-
cially around seals and bottom bolt to prevent dirt from entering the fork.
Loosen cap at top of fork tube (21mm) before loosening fork tube pinch bolts.
Remove front wheel (section III-19), brake caliper and cable clamp from the lower
right fork slider. Loosen pinch bolts and remove forks from motorcycle. Remove
fork tube cap carefully, it may be under spring tension. Do not allow cap to spring
off with force as it may cause severe injury. There may be a spacer (not shown) at the top of the spring if the fork was adjusted for a
heavier rider. Remove the fork spring and invert the fork to drain oil. Pump the fork a few times to remove most of the oil.
To disassemble the fork slider from the fork tube, an impact wrench or impact driver will be needed because there is no way to
prevent the inner dampening tube from turning. Clean any dirt from around bolt, then remove the socket head bolt at the bottom
using a 10mm hex bit. See photo III-54. Holding the fork horizontally, slowly remove the fork tube from the slider. Use care that the
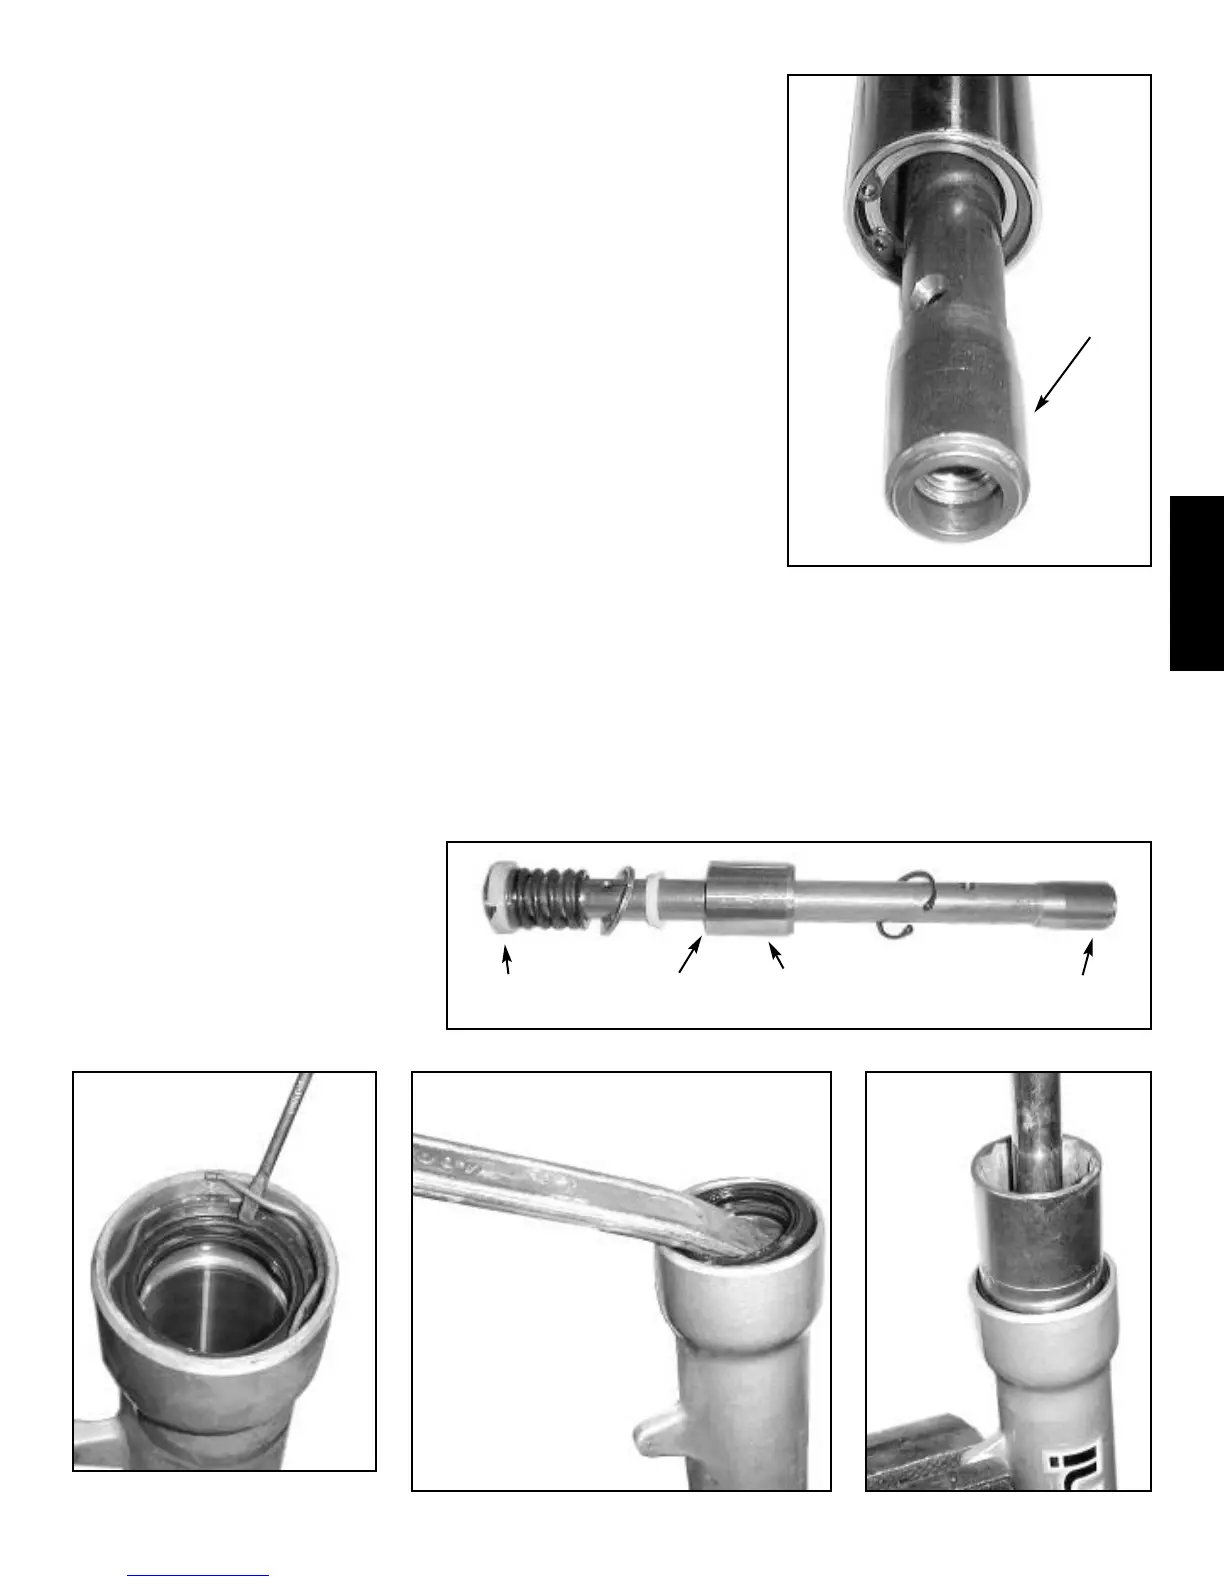
damper rod and bottoming cone do not fall out of the fork tube. Remove the bottoming cone from the bottom of the tube. Using
internal snap ring pliers, remove the snap ring from the bottom of the fork tube and pull the dampening rod to remove the bottoming
bushing, rebound spring and related parts. Inspect all parts for wear and damage. Replace as needed. See photos III-55 & III-56.
Fork seals do wear out and will require periodic replacement. If the fork seals are to be replaced, pry the dust seal from the tube
using a blunt pry bar or tire iron. Remove
the wavy retaining ring by prying out one
end with a small screwdriver. Then remove
the fork seal by prying it out with the blunt
pry bar. See photos III-57 - III-58.
Clean all parts thoroughly with solvent
and blow dry. Make sure no dirt, lint or
other debris remains.
Use snap ring pliers to remove retaining ring.
bottoming
cone
Use screwdriver to remove seal
retaining ring.
Use blunt tool to remove inner seal.
Installing oil seal into fork slider.
Damper rod assembly & bottoming cone.
recess
bushing
bottoming
cone
sealing
ring
III
III
.57
.57
III
III
.58
.58
III
III
.59
.59
III
III
.56
.56
III
III
.55
.55