OWNER′S MANUAL
9
EN
EN
CAUTION: ALWAYS FOLLOW THE CHEMICAL MANUFACTURER'S DIRECTIONS, AND THE HEALTH AND HAZARD WARNINGS.
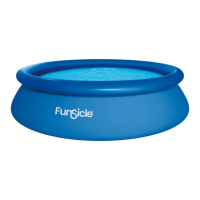
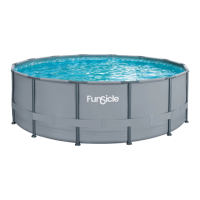
POOL MAINTENANCE & DRAINAGE
Do not add chemicals while the pool is occupied. This can cause skin or eye irritation. Concentrated chlorine solutions can damage the pool liner. In no event is
Polygroup
®
, our buyer/retailers, or any other party liable for costs associated with the loss of pool water, chemicals, or water damage. Keep spare filter cartridges on
hand. Replace cartridges every two weeks. We recommend the use of Polygroup
®
Filter Pump with all of our aboveground pools. To purchase a Polygroup
®
Filter
Pump or other accessories, visit our website at support.polygroupstore.com or call Polygroup
®
Customer Service.
EXCESSIVE RAIN: To avoid damage to the pool and overfilling, immediately drain rain water that causes the water level to be higher than the FILL LINE.
How to Drain Your Pool and Long-Term Storage
1. Check local regulations for specific directions regarding disposal of swimming pool water.
2. Remove the protective foam ring on the drainage cap.
3. Follow these steps for water drainage:
1
2
a) Turn the drain cap
counterclockwise
b) Return the drain
cap from the valve
c) Flip the drain cap
and reinsert it to
the drain valve
e) The drain valve is
now open, water will
begin to flow out.
f) Attach a 5/8” garden
hose to the drain valve
d) Push and turn the
drain cap clockwise
for about a quarter
turn (90
o
) to unlock
1
5 6 7
4
2 3
Repair
1. Use a mix of liquid dish soap and water in a spray bottle, and spray over suspicious areas. Any leak will produce bubbles that will pinpoint the location of the leak.
2. Thoroughly clean the area surrounding the leak to remove any dirt or grime.
3. Cut a piece of repair patch (included) with a margin of 0.8” (2cm) larger than the damaged area, rounding the corners with scissors.
4. Place the patch over the center of the leak, press down firmly, and squeeze out all air bubbles to the edges. You may want to put a weight on top to keep it in place.
5. Do not inflate for one hour after patching.
NOTE: if the patch does not hold, you can use the patch with silicone- or polyurethane-based glue designed for repairing camping mats, tents or shoes. Consult your
local household/camping supply stores, and follow the instructions of the glue you’ve chosen.
4. Place the other end of the garden hose in an area where the water can be safely drained away from the house and other nearby structures.
5. When the water stops draining, start lifting the pool from the side opposite to the drain valve to drain any remaining water and empty the pool completely.
6. After drainage, lock the drain valve and close the drain cap.
NOTE: NEVER step on the drain valve.
7. Deflate the top ring completely and remove all connecting parts (if there are any).
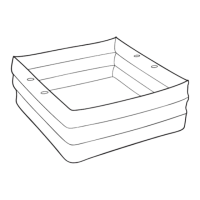
8. Be sure that the pool and all parts are completely dry before storage. Air-dry the liner in the sun completely before folding (see drawing 1). Sprinkle some
talcum powder to prevent the vinyl from sticking together and to absorb any residual moisture.
9. Create a square shape. Starting at one side, fold one-sixth of liner into itself twice. Do the same on the opposite side (see drawings 2 & 3).
10. Once you have created two opposing folded sides, simply fold one over the other like closing a book (see drawings 4 & 5).
11. Fold the two long ends to the middle (see drawing 6).
12. Fold one over the other like closing a book, and finally compact the liner (see drawing 7).
13. Store the liner and accessories in a dry, temperature-controlled storage location above 32°F (0°C) and below 104°F (40°C).
14. The original packing can be used for storage.
a) Flip the drain cap
and reinsert it to
the drain valve
c) Close the drain cap
b) Push and turn the drain
cap counterclockwise
for about a quarter
turn (90
o
) to lock
1
2