8
SETTING MORTISER FOR LENGTH OF CUT
CAUTION: Disconnect tool from power source.
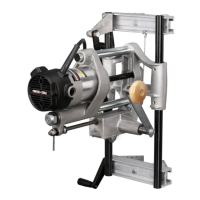
See Fig. 6 to set mortiser for length of cut. Loosen crank pin nut (T) and turn
adjusting knob (U) until the correct graduation mark on the slide lines up with
the line on crank pin indicating washer. If it is difficult to turn the adjusting
knob (U), turn the crank (E) Fig. 8, until most of the tension is relieved.
Tighten crank pin nut (T), Fig. 6, securely.
EXAMPLE: If the mortise is to be 4" long, turn adjusting knob (U)
until the figure 4 graduation mark lines up with the line on the crank
pin indicating washer.
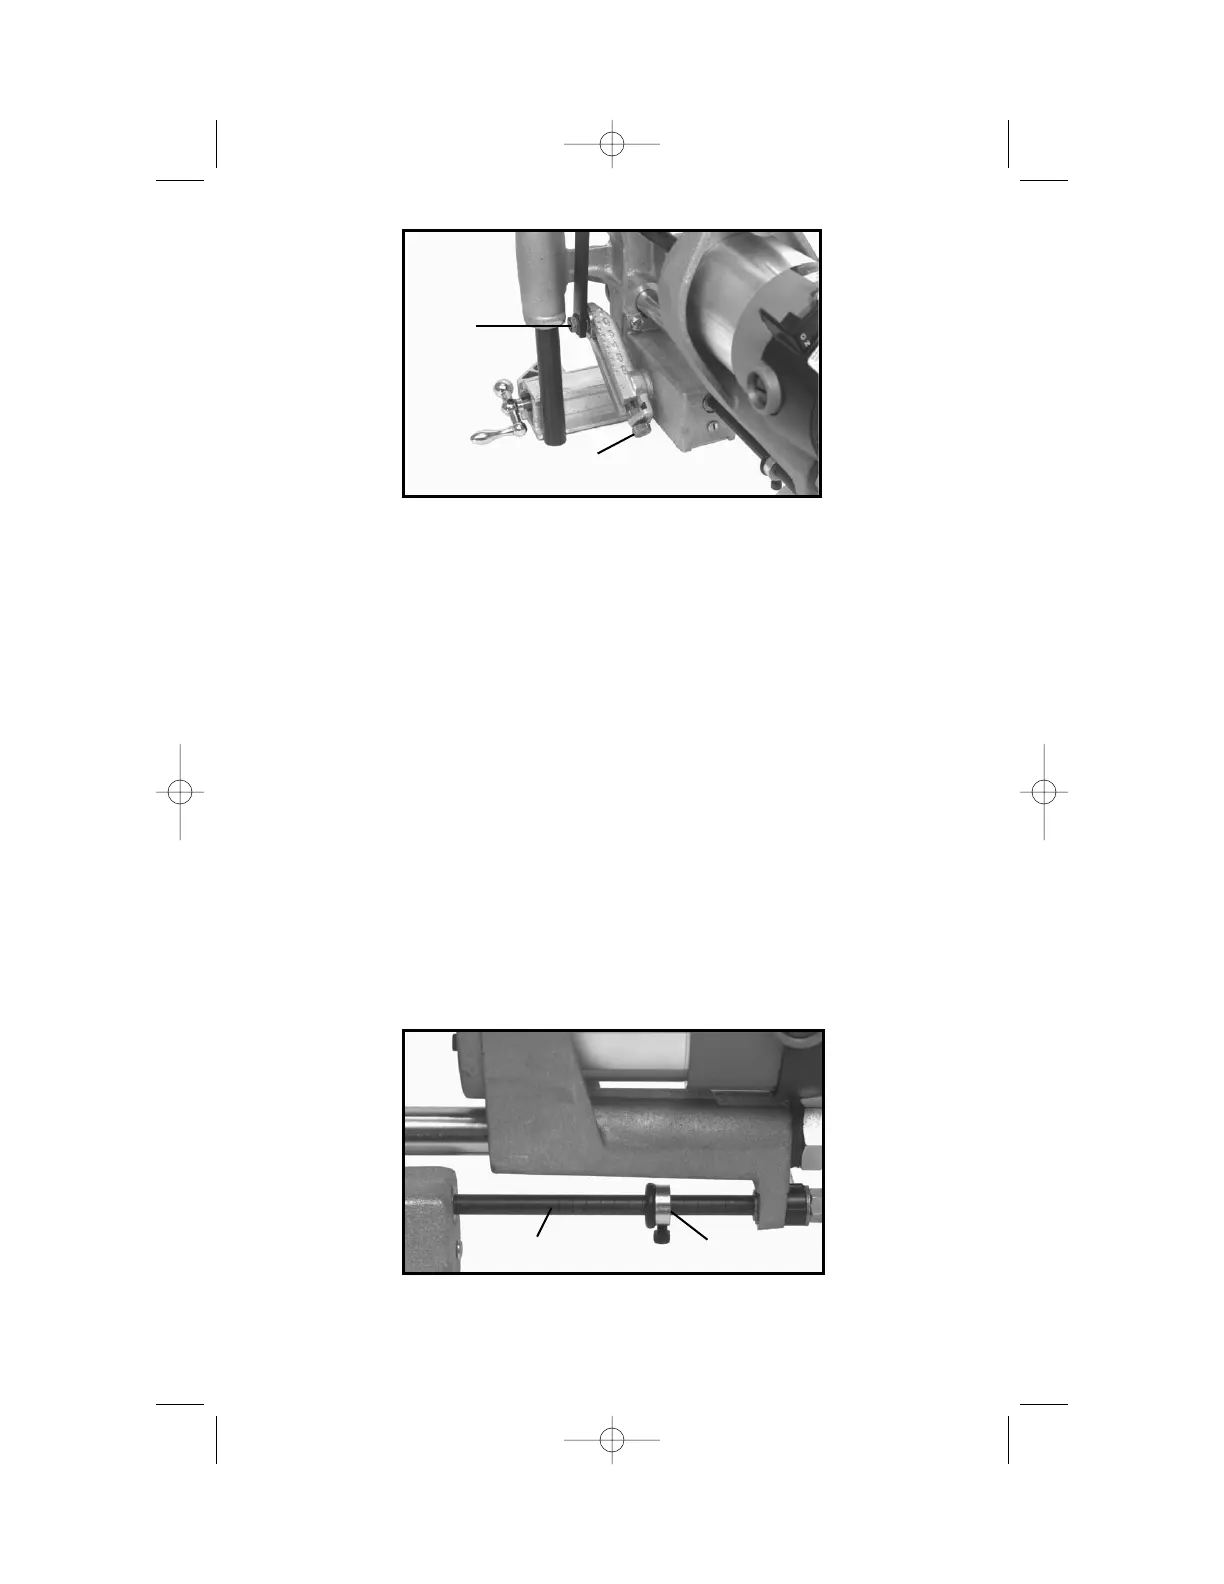
SETTING MORTISER FOR DEPTH OF CUT
CAUTION: Disconnect tool from power source.
Measure the lock box at its deepest part, including the thickness of the lock
face, and add
1
/4" to this dimension for clearance. The depth of cut is
controlled by the feed rod (W) Fig. 7 which is marked in
1
/4" increments.
Loosen the collar (X) and move it to the determined depth requirement and
lock in place.
Fig. 6
T
U
Fig. 7
W
X