9
• Green light (A) continues to flash after battery pack is inserted in charger:
indicates that the battery pack temperature is either too high or too low for
charging. If left alone, the charger will continue to monitor the battery pack
temperature and will begin charging when the temperature reaches an
acceptable level.
• Green light (A) glows continuously and red light (B) flashes: indicates that the
battery pack is receiving a “Fast Charge”, but the battery pack voltage is
low. It is not unusual for a new, or a fully discharged battery pack to give this
indication for the first several minutes of charge. If the red light continues to
flash throughout the charge cycle, it indicates that the pack is weak and will
provide reduced performance (the pack is still useable, but will not provide
maximum power or work per charge). This battery pack will probably require
replacement in the near future.
• Green light (A) continues to flash and red light (B) flashes: indicates that the
battery pack has failed (pack is not chargeable and requires replacement).
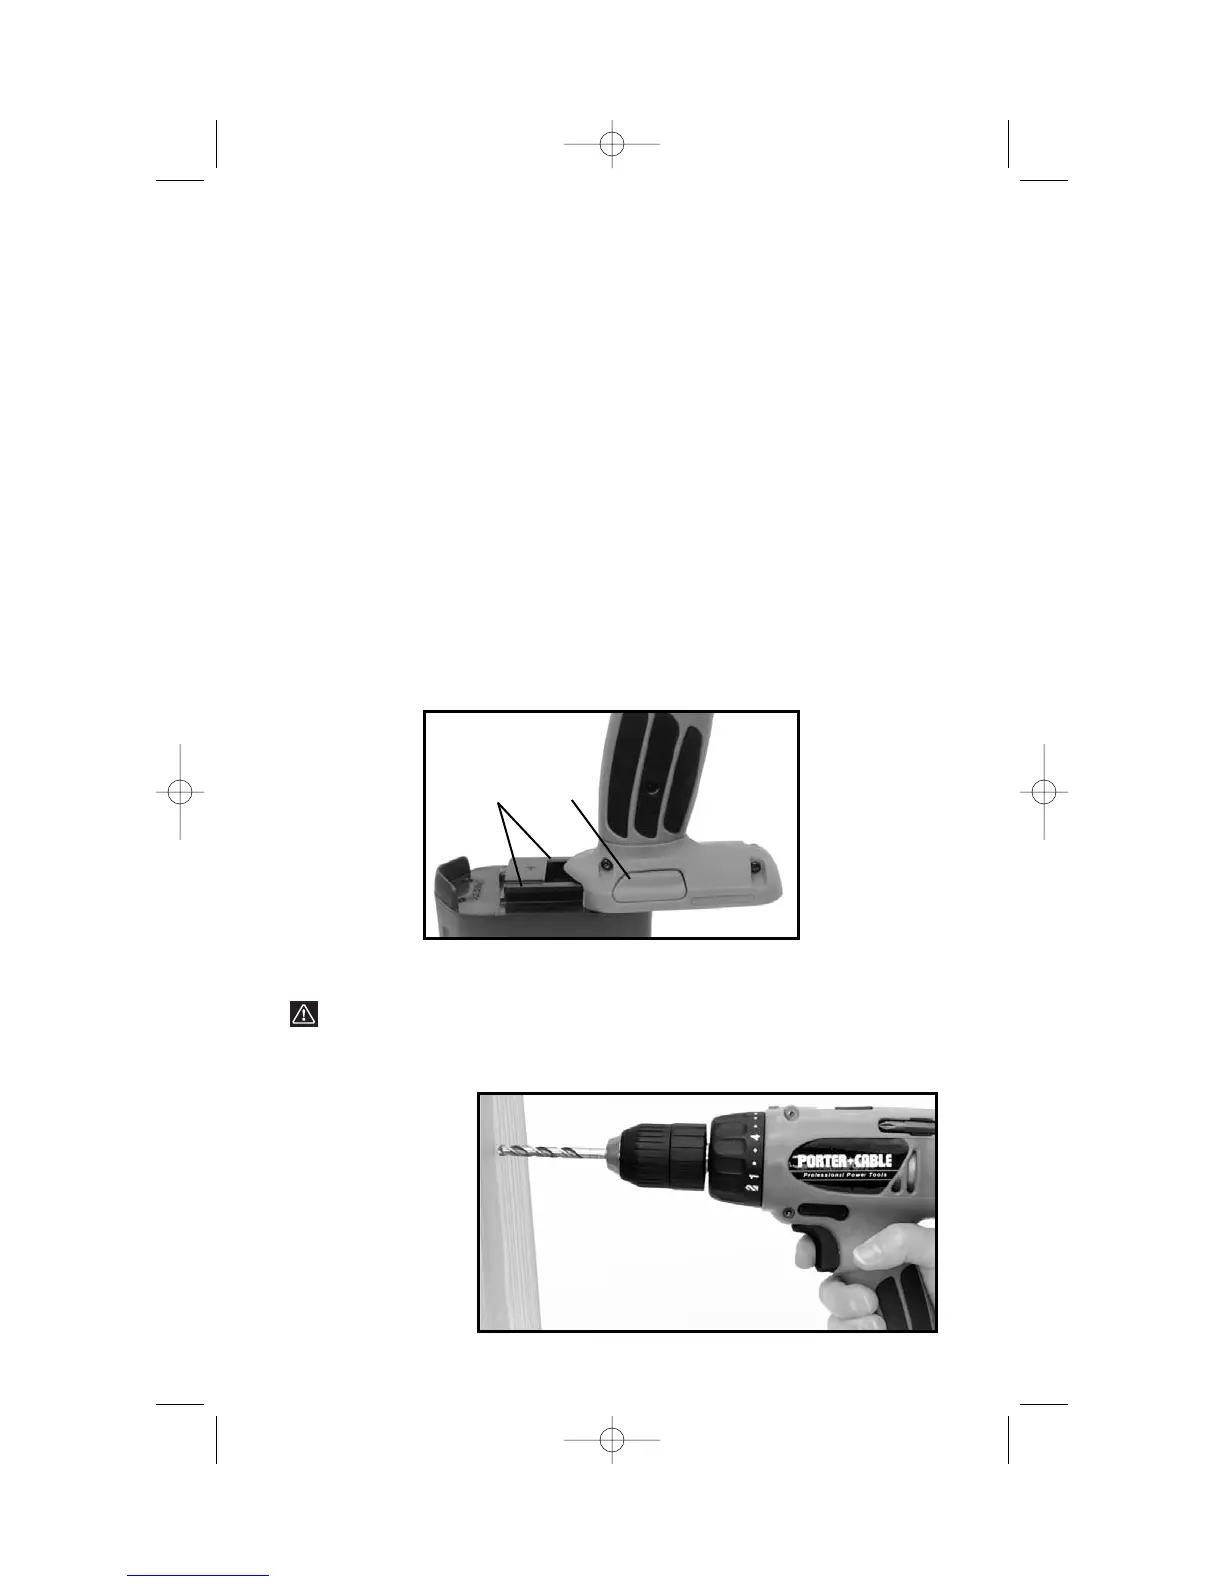
INSTALLING OR REMOVING BATTERY PACK
TO REMOVE BATTERY PACK: Depress the battery release button (B) Fig. 6,
and pull battery pack out of tool.
TO INSTALL BATTERY PACK: Align rails (A) Fig. 6, on battery pack with slots
on tool and push battery pack onto tool until it locks in place.
HOW TO HOLD THE DRIVER/DRILL
WARNING: The front end of the Driver/Drill may be made live if the
tool drills into live wiring in the wall. TO PREVENT ACCIDENTAL
ELECTRICAL SHOCK, DRIVER/DRILL MUST BE HELD AS SHOWN
IN FIG. 7.
Fig. 6
A
B
IT’S
A DRILL
Fig. 7