12
13. Turn the laser square on and check the position of the beam to see if it is
at a height exactly halfway between the first and second markings made
on Surface A (where you started). Repeat steps 11 to 13 until the dot is
halfway between the two markings.
14. Once the front beam has been calibrated proceed to the next step.
15. Rotate the laser square around 90 degrees and position the side laser
beam on Surface A. Compare the height of this beam with the height of
the calibrated front beam. If the height of this beam matches the height
of the front beam, calibration is complete. If the side beam does not
match the front beam, proceed to the next step.
16. Turn the laser square off.
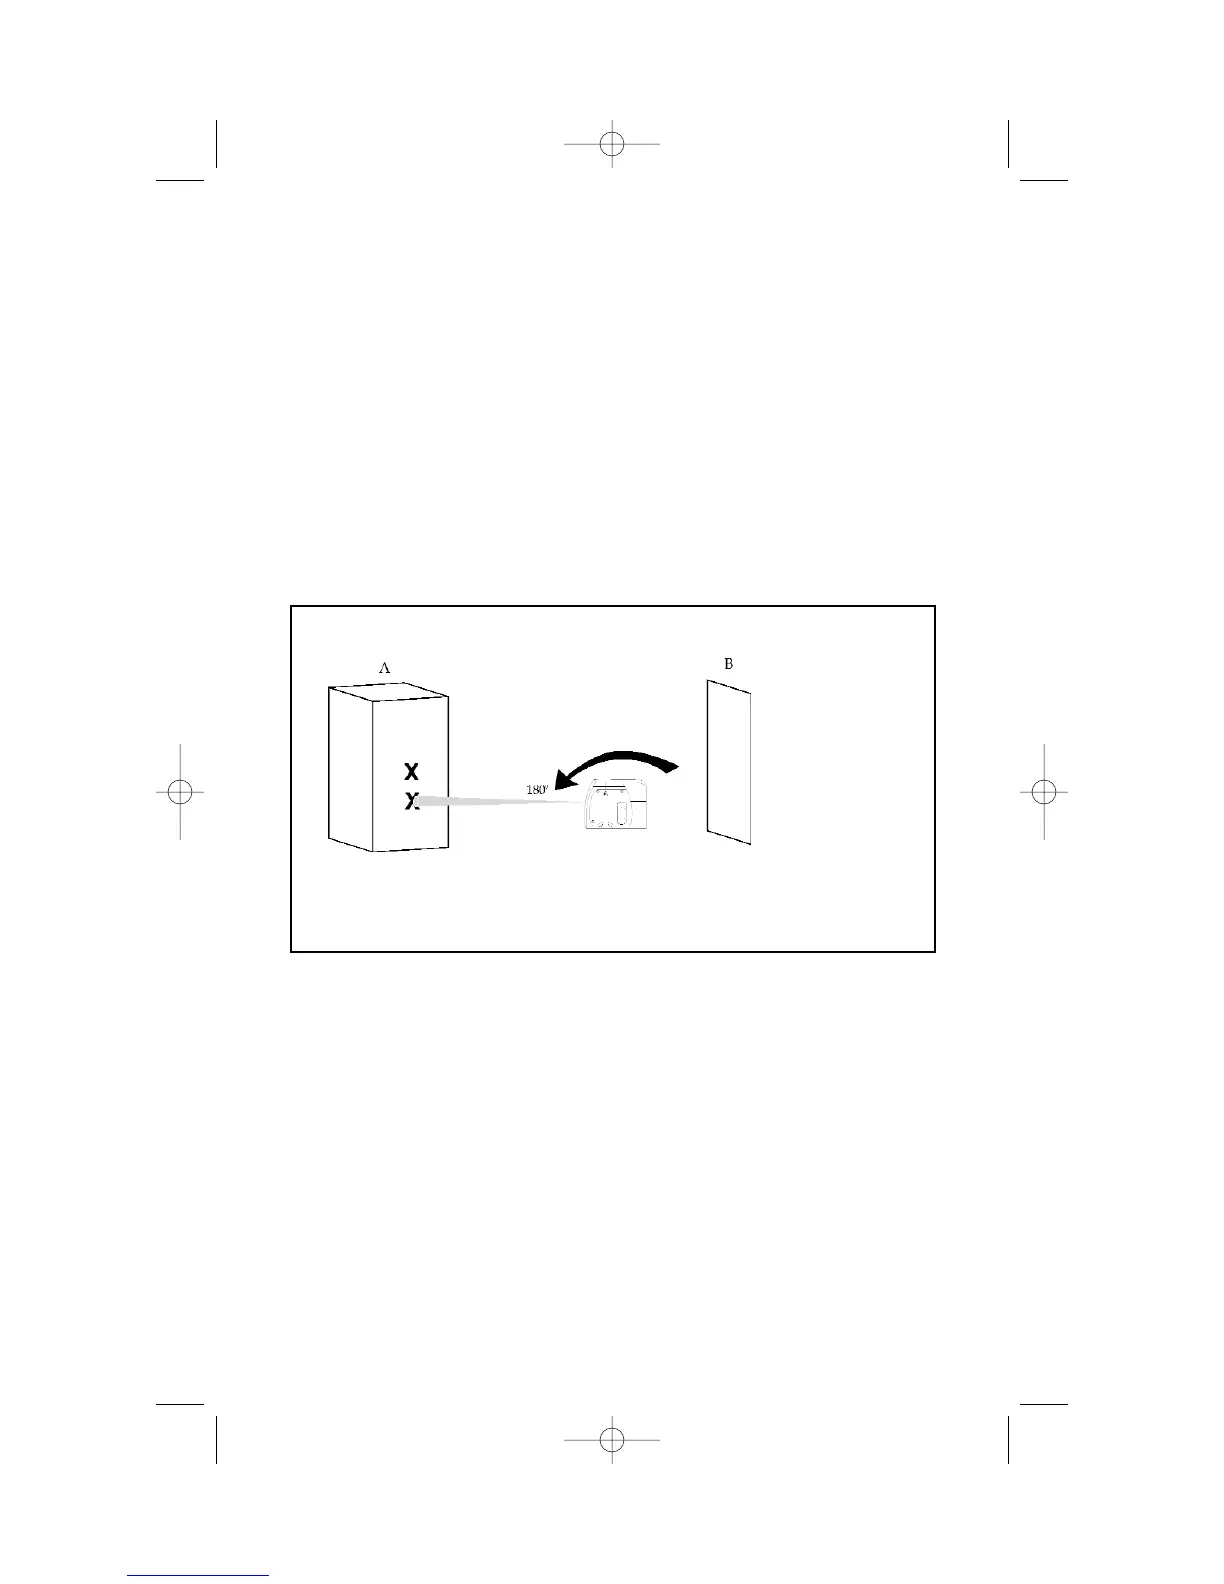
9. Move the laser square to about 5' from Surface B (the location you just
marked). Raise or lower the laser square so that the laser dot hits the
spot you have already marked.
10. Turn the laser square 180 degrees (make sure you do not change the
height) so that the front laser beam is now visible on the opposing
surface, Surface A. Mark this new spot. You should now have two spots
marked on Surface A. Any difference in height between the two marks is
equal to twice the error in calibration. If the two marks are at the same
point, the unit does not need to be calibrated. If the two marks are not
on the same point, proceed to step 11.
11. Turn the laser square off.
12. Insert the 2mm Allen wrench (provided in the kitbox) into the front
calibration port). Locate the calibration screw and rotate it in a clockwise
direction to lower the beam or in the counter-clockwise direction to raise
the beam.
 Loading...