12
up mode which equals or balances the
individual cells in the battery pack to allow
it to function at peak capacity. Battery
packs should be tuned up weekly or
whenever the battery no longer delivers
the same amount of work. To use the
automatic tune-up mode, place the battery
pack in the charger and leave it for at least
8 hours.
INSTALLATION AND REMOVAL OF
THE BATTERY PACK
TO
INSTALL BATTERY PACK: Figure
C-
Insert battery pack onto the tool until an
audible click is heard. Make sure battery pack
is fully seated and fully latched into position.
TO REMOVE BATTERY PACK: D
epress
the battery release button as shown in figure
D and pull battery pack out of the tool.
OPERATING INSTRUCTIONS
WARNING:
Always use proper eye
protection that conforms to ANSI Z87.1(CAN/
CSA Z94.3) while operating this power tool.
WARNING: Use clamps or another
practical way to secure and support the
work piece to a stable platform. Holding the
work by hand or against your body leaves it
unstable and may lead to loss of control.
NOTE: Before cutting any type of
material, be sure it is firmly anchored or
clamped to prevent slipping.
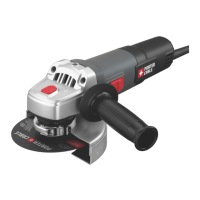
TRIGGER SWITCH
The tool is equipped with a switch lock-off
feature to prevent unintentional operation.
•Toswitchthetoolon,pressthelockoff
button(2),
then squeeze the on/off switch (1).
•
Releasing the trigger turns the motor OFF.
NOTE: This tool has no provision to lock
the switch in the ON position, and should
never be locked in the ON position by any
other means.
These utilize a carbon steel back welded
to high speed steel teeth making the blade
more flexible and less prone to breaking
ASSEMBLY
WARNING: To prevent accidental
operation, turn off tool and remove
battery before making any adjustments or
removing or installing attachments or
accessories. Failure to do this could result
in serious personal injury.
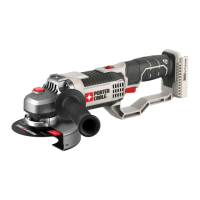
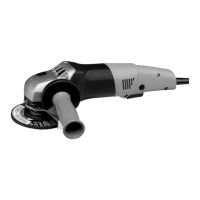
ATTACHING THE SIDE HANDLE
• Athreepositionauxiliaryhandle(5) is
furnished with your grinder and can be
screwed into either side of the grinder
housing as well as into the top.
WARNING: This handle
SHOULD BE USED AT ALL TIMES to
maintain complete control of the tool.
Always make sure the handle is tight.
ACCESSORIES
It is important to choose the correct
guards, backing pads and flanges to use
with grinder accessories.
CAUTION: Accessories must be rated
for at least the speed recom mended on the
tool warning label. Wheels and other
accessories running over their rated
accessory speed may fly apart and cause
injury.Threadedaccessoriesmusthavea5/8
inch-11 hub. Every unthreaded accessory
musthavea7/8inch(22mm)arborhole.Ifit
does not, it may have been designed for a
circular saw. Use only the accessories shown
onpages10and11ofthismanual.
Accessory ratings must always be above tool
speed as shown on tool nameplate.
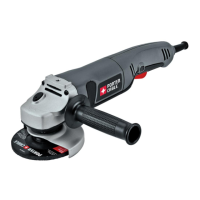
MOUNTING GUARD
MOUNTING AND REMOVING GUARD
Turn off tool and remove battery before
making any adjustments or removing or
installing attachments or accessories.
Guards must be used with all grinding
wheels, sanding flap discs, wire brushes,
cut-off wheels and wire wheels. The
tool may be used without a guard only
when sanding with conventional sanding
discs.PorterCablemodelPCC671is
provided with a guard intended for use with
depressedcenterwheels(Type27)and
hubbedgrindingwheels(Type27).Thesame
guard is designed for use with sanding
flapdiscs(Type27and29)andwirecup
brushes. Grinding and cutting with wheels
otherthanType27and29requiredifferent
accessory guards included with tool. A Type
1 guard is provided for use with a Type 1
wheel and is shown in figures E and F.
Both Type 27 and Type 1 guards attach
and are removed in the same way as
described in figures E and F.
FIGURE E
1.
ATTACHING-Opentheguardlatch(10),
and align the lugs on the guard (9) with
the slots on the gear case cover.
2. Pushtheguarddownuntiltheguard
lugs engage and rotate freely in the
groove on the gear case hub.
3. With the guard latch open, rotate the
guard (9) into the desired working
position. The guard body should be
positioned between the spindle and the
operator to provide maximum operator
protection.
4. F
igure F - Close the guard latch to
secure the guard on the gear case. You
should not be able to rotate the guard
by hand when the latch is closed. Do
not operate the grinder with a loose
guard or the clamp lever in open