Do you have a question about the Porter-Cable PCE300 and is the answer not in the manual?
Maintain a clean, well-lit work area and keep children and bystanders away.
Ensure proper plugs, avoid contact with grounded surfaces, and protect from water.
Stay alert, use protective equipment, prevent unintentional starting, and maintain balance.
Follow instructions for tool usage, maintenance, storage, and repair to ensure safety.
Have tool serviced by qualified personnel using identical replacement parts for safety.
Keep hands away from the cutting area and blade; use second hand on auxiliary handle.
Do not reach underneath the workpiece as the guard cannot protect you.
Set the cutting depth so that less than a full tooth of the blade is visible below the workpiece.
Secure the workpiece to a stable platform; do not hold it by hand or leg.
Hold tool by insulated surfaces when cutting tool may contact hidden wiring or cord.
Use a rip fence or straight edge guide when ripping for accuracy and to prevent binding.
Use blades with correct size and shape arbour holes to prevent loss of control.
Never use damaged or incorrect blade washers or bolts; use specially designed parts.
Understand kickback causes and follow procedures to avoid it, such as firm grip and proper body position.
Check lower guard for free movement and instant closing before each use.
Ensure lower guard spring operates properly; service if sluggish or damaged.
Retract lower guard manually only for special cuts; release immediately once blade enters material.
Ensure lower guard covers blade before placing saw down; be aware of coasting time.
Secure and support the workpiece to a stable platform to prevent loss of control.
Position body to either side of the blade, not in line, to resist kickback.
Inspect lumber for and remove all nails before cutting to prevent damage or injury.
Ensure nothing interferes with the movement of the lower blade guard.
Use accessories rated for at least the tool's recommended speed to prevent them flying apart.
Ensure the saw is clean before use for safe operation.
Stop use and service if unusual noise or abnormal operation occurs.
Ensure all components are mounted properly and securely before using the tool.
Handle saw blades with care during mounting, removal, or when removing diamond knockout.
Wait for the motor to reach full speed before starting a cut.
Keep handles dry, clean, and free of oil/grease for a firm grip.
Remain alert at all times, especially during repetitive operations, and be aware of hand positions.
Stay clear of falling end pieces after cutting; they may be hot, sharp, or heavy.
Replace or repair any damaged electrical cords immediately.
Use good condition 3-wire extension cords with 3-prong grounding plugs.
Use adequate wire size (AWG) for cord length and ampere rating to prevent voltage drop.
Be aware of chemicals in dust from construction activities and use safety equipment.
Use NIOSH/OSHA approved respiratory protection and work in ventilated areas to reduce dust exposure.
Understand tool symbols for electrical units, safety alerts, and recommended practices.
Support large panels to prevent blade pinching and kickback; avoid sawing overhead.
Use sharp blades and ensure depth/bevel adjustments are tight to prevent binding and kickback.
Use extra caution when sawing into blind areas where protruding blades may cause kickback.
Do not force the tool; reduce speed if wood variables cause stalling or kickback.
Do not remove the saw from work during a cut while the blade is moving.
Allow blade to reach full speed before contacting material to avoid stalling or kickback.
Never attempt to lift saw when making a bevel cut to prevent blade binding.
Always secure work to prevent workpiece movement during cuts.
If cut goes off line, stop saw, withdraw, and restart on the line to prevent kickback.
Set depth adjustment so one tooth projects below the workpiece.
Do not back up a rotating blade in the cut to avoid kickback.
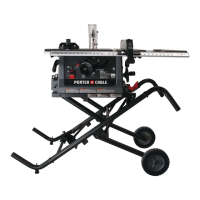
Identify key components of the circular saw, including switches, handles, and guards.
Loosen lever, adjust shoe position for desired depth, and tighten lever to lock.
Designed for wood cutting; do not use with water, abrasive wheels, or in wet/flammable conditions.
Loosen knob, move shoe for desired angle (0-45°), and tighten knob to lock.
Depress spindle lock, loosen bolt, remove washer, and then remove the blade.
Depress spindle lock, align blade arrow, secure bolt, and release lock.
Follow assembly, adjustment, and setup instructions; ensure guard operates and use proper blade.
Depress trigger to operate, release to stop; no locking mechanism is provided.
Follow setup, check guard, hold tool with both hands, and allow blade to reach full speed.
Use sharp, correctly rated blades; be aware of material buildup risk.
Use rip guide or straight edge for ripping; hold tool with both hands.
Adjust depth, tilt saw, retract guard, start motor, lower saw, and advance smoothly.
Check power connection, fuses, circuit breakers, cord, and switch for starting problems.
The hex wrench can be stored on the cord as illustrated.
Unplug tool before any maintenance, adjustment, or repair.
Clean with mild soap and damp cloth; use authorized service centers for repairs.
Contact PORTER-CABLE for service center information, repairs, and part details.
Use only PORTER-CABLE recommended accessories for safety.
Visit website or contact for nearest service center or supplier.
Device complies with FCC rules; subject to conditions to prevent harmful interference.
Try reorienting antenna, increasing separation, or changing outlet to correct interference.
Warranties product against defects for three years in home environment; excludes abuse.
Return to retailer or send to authorized service center for repair or replacement.
Warranty does not apply to accessories, commercial use, or unauthorized repairs.
| Brand | Porter-Cable |
|---|---|
| Model | PCE300 |
| Category | Saw |
| Language | English |