7
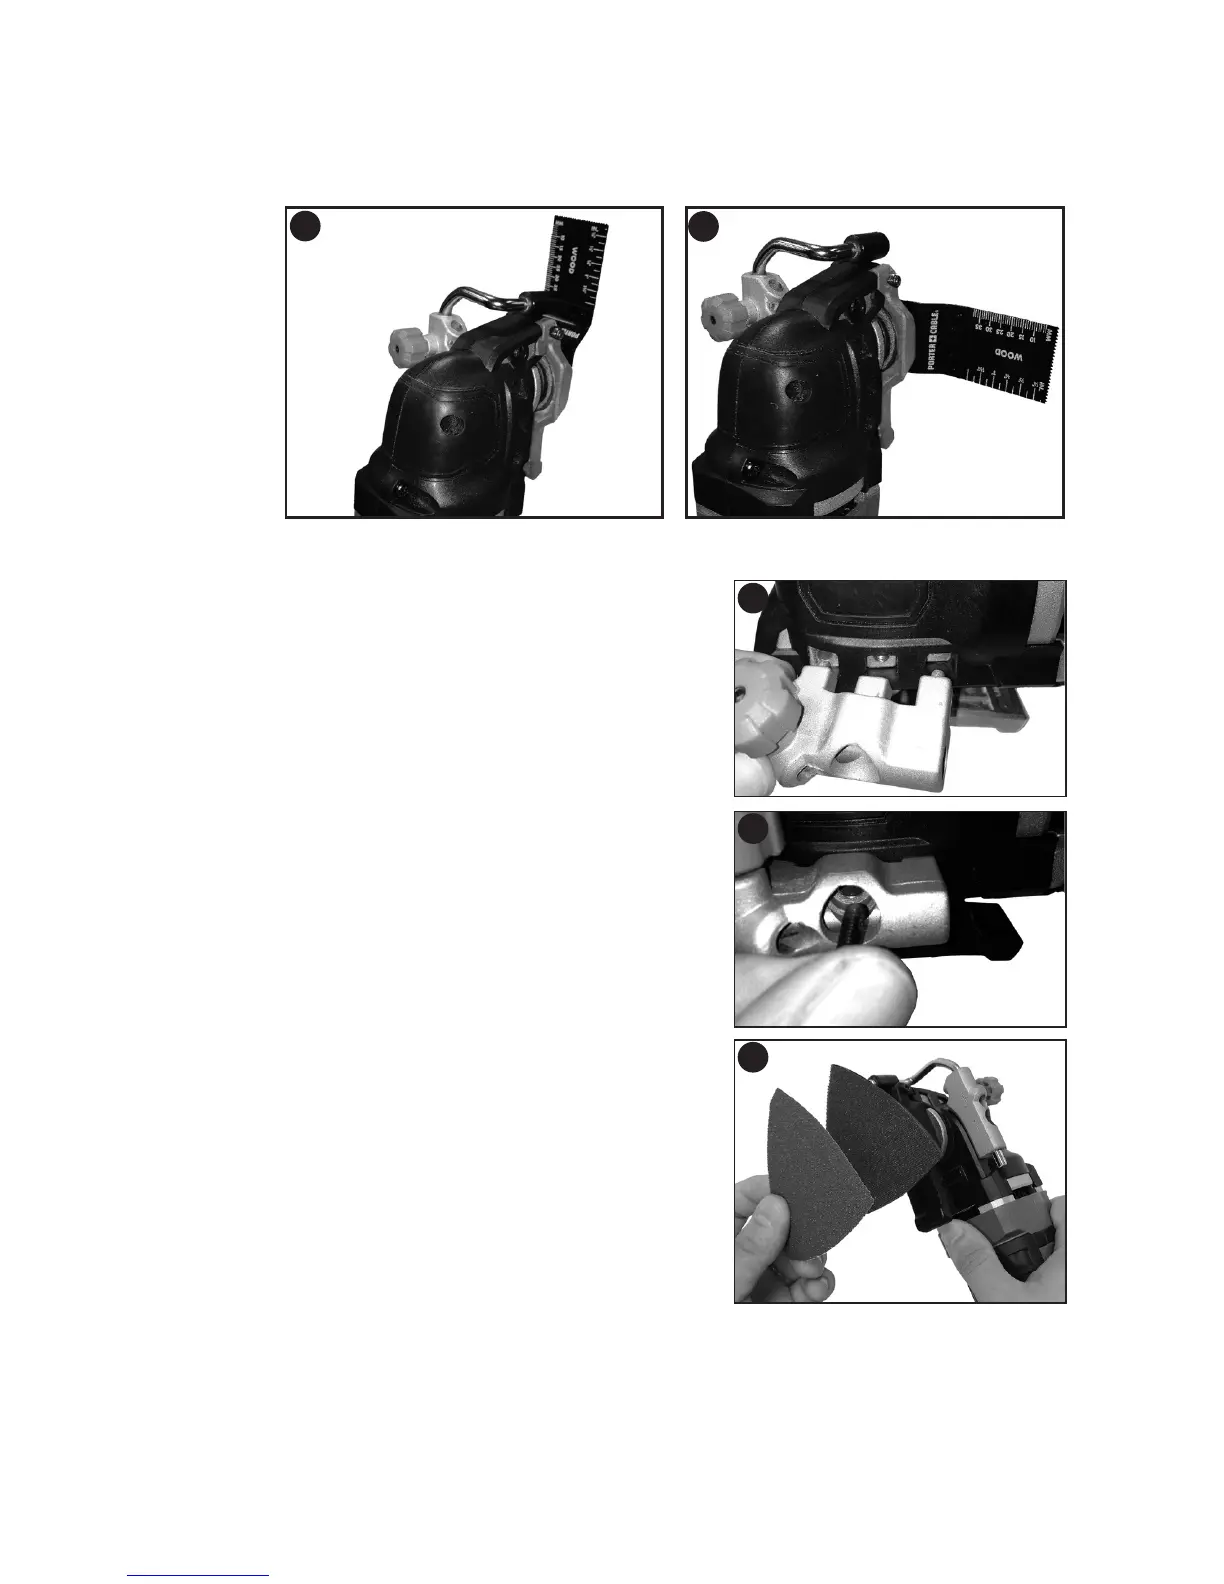
•Slidetheaccessorybetweentheshaftandtheaccessoryholdermakingsurethe
accessory engages all of the pins on the holder and is flush with the shaft (figure 3).
•Releasetheaccessoryclamplever.
•Someaccessories,suchasscrapersandbladescanbemountedatanangleif
required as shown in figure 4.
INSTALLING/REMOVING DEPTH/CUT BLOCK
The depth/cut guide allows you to precisely cut
material at a specified depth and more accurately
track a marked cut line.
•Attachthedepth/cutblockbyinsertingthetabson
the guide into the slots on the main body as shown in
figure 5.
•Securetheblocktothemainbodywiththesupplied
screw and tighten with the supplied hex wrench as
shown in figure 6.
INSTALLING/REMOVING
SANDING SHEETS
A diamond shaped platen uses a hook and loop
adhesion system to attach the sanding sheets. The
platen allows you to use it on large flat surfaces and
tight spots or corners.
•Attachthesandingplatenasdescribedunder
“Installing/Removing Accessories”.
•Aligntheedgesonthesandingsheet,withtheedge
of the sanding platen and press the sanding sheet
onto the platen as shown in figure 7.
•Firmlypressthebasewiththesandingsheet
attached against a flat surface and briefly switch the tool on. This provides for good
adhesion between the platen and the sanding sheet and also helps to prevent
premature wear.
•Whenthetipofthesandingsheetbecomesworn,detachthesheetfromtheplaten,
rotate and reapply.
3
4
5
6
7