15
Fig. H
PLAIN-END BLADE REMOVAL AND
INSTALLATION
To avoid injury from accidental starting,
always turn the switch OFF and remove
power cord plug from power source before
removing or replacing the blade.
This scroll saw accepts 5 in. (127 mm) plain-
end or pin-end blades to cut a wide variety of
materials.
Plain-end type blades are recommended
whenever ne, accurate and intricate work
is being performed on 3/4 in. (19 mm) or
thinner material. It will take slightly longer to
assemble and tension the blade, but you will
also be able to use ner blades for cutting a
thinner kerf.
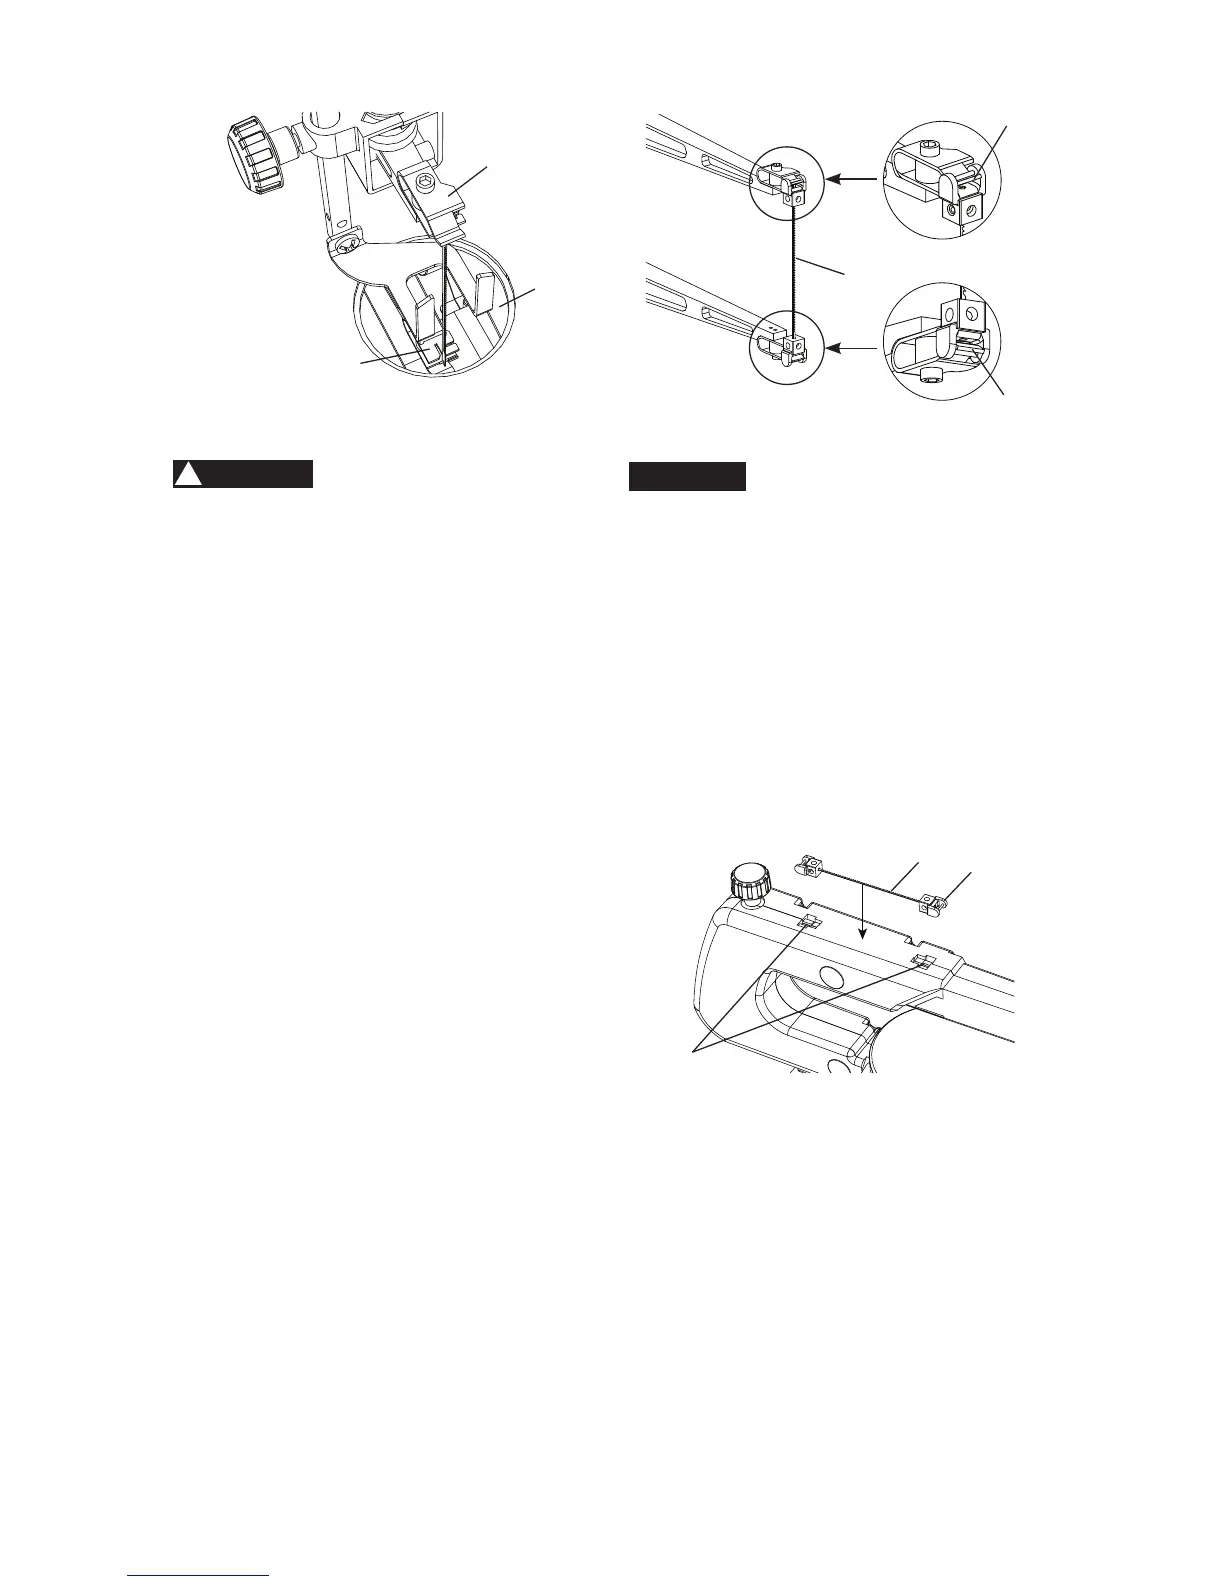
Plain-end blade removal (Fig. D, E, I)
1. Remove the table insert (1) by pushing it
up from under the worktable. (Fig. D)
2. Loosen the blade tension by trurning the
blade tension knob (2) counterclockwise.
(Fig. E)
3. Tilt the table to the 0° and tighten the
table lock knob (7). (Fig. D)
4. Apply slight downward pressure on the
upper arm to remove the blade adaptor
set from the upper blade holder clip (8)
and then from the lower blade holder
clip (10). (Fig. I)
5. Remove the plain-end blade (9) from the
upper and lower blade adaptor set.
Fig. I
Plain-end blade installation (Fig. D, E, I, J)
In order to avoid uncontrollable lifting
of the workpiece, the teeth of the blade
should ALWAYS point downward.
1. Insert the plain-end blade (9) into the
blade adaptors (11). (Fig. J)
2. Put the blade adaptor set into the
recesses (12) on the rear top of the saw
to adjust the blade length, and then
secure the blade by xing the inner
screws of the blade adaptors with 2.5 mm
hex wrench.
Fig. J
3. Remove the table insert (1) by pushing it
up from under the worktable. (Fig. D)
4. Loosen the blade tension by trurning the
blade tension knob (2) counterclockwise.
(Fig. E)
5. Tilt the table to the 0° and tighten the
table lock knob (7). (Fig. D)
6. Hang the blade adaptor set on the lower
blade holder clip (10). (Fig. I)
7. Apply slight downward pressure against
the upper arm when hanging the other
end of the blade adaptor set on the upper
blade holder clip (8).
WARNING
!
10
8
9
5
6
8
11
9
12
CAUTION