OPERATING THE COUPLER
This model is equipped with a coupler which
enables optional attachments to be installed.
The optional attachments are:
MODEL:
Edger ....................... PP1000E
Cultivator .................... PP2000T
Blower ...................... PP3000B
Brushcutter .................. PP4000C
WAR NIN G: Always stop unit and dis-
connect spark plug before removing or instaF
ling attachments.
REMOVING PRUNER ATTACHMENT
(OR OTHER OPTIONAL ATTACH-
MENTS)
CAUTION: When removh_g or installing at-
tachments, ptace the unit on a flat surface for
stability.
1. Loosen the coupler by turnh_g the knob
counterclockwise.
Upper Shaft
Coupler
Lower \
Attachment
LOOSEN
TIGHTEN Knob
Press and hold the locking/release button,
Locking/Release
Button
/
Lower Attachment
Upper Shaft
3. While securely holding the engine and
upper shaft, pull the attachment straight
out of the coupler.
INSTALLING OPTIONAL ATTACH-
MENTS
1. Remove the shaft cap from the attach-
ment (if present).
2. Position locking/release button of attach-
ment into guide recess of coupler.
3. Push the attachment into the coupler until
the locking/release button snaps into the
primary hole.
4. Before using the unit, tighten the knob se-
curely by turning clockwise.
CouPle r Primary Hole
Guide Recess
Upper Locking/ Attachment
Shaft Release
Button
="=WARNING: Make sure the locking/
release button is locked in the primary hole
and the knob is securely tightened before op-
erating the unit. All attachments are designed
to be used in the primary hole unless otherwise
stated in the applicable attachment instruction
manual Using the wrong hole could lead to seri-
ous injury or damage to the unit.
Secondary Hole
Locking/Release
Button in Primary Hole
INSTALLING ATTACHMENT
HANGER
An attachment hanger is provided for storage
when attachment is not in use.
To install hanger on attachment:
1. Remove the shaft cap from the attach-
ment (if present) and discard.
2. Press and hold the locking/release button.
3. Push hanger onto the attachment until the
locking/release button snaps into the hole.
OPERATING INSTRUCTIONS
It is recommended that the engine not be
operated for longer than 1 minute at full
throttle.
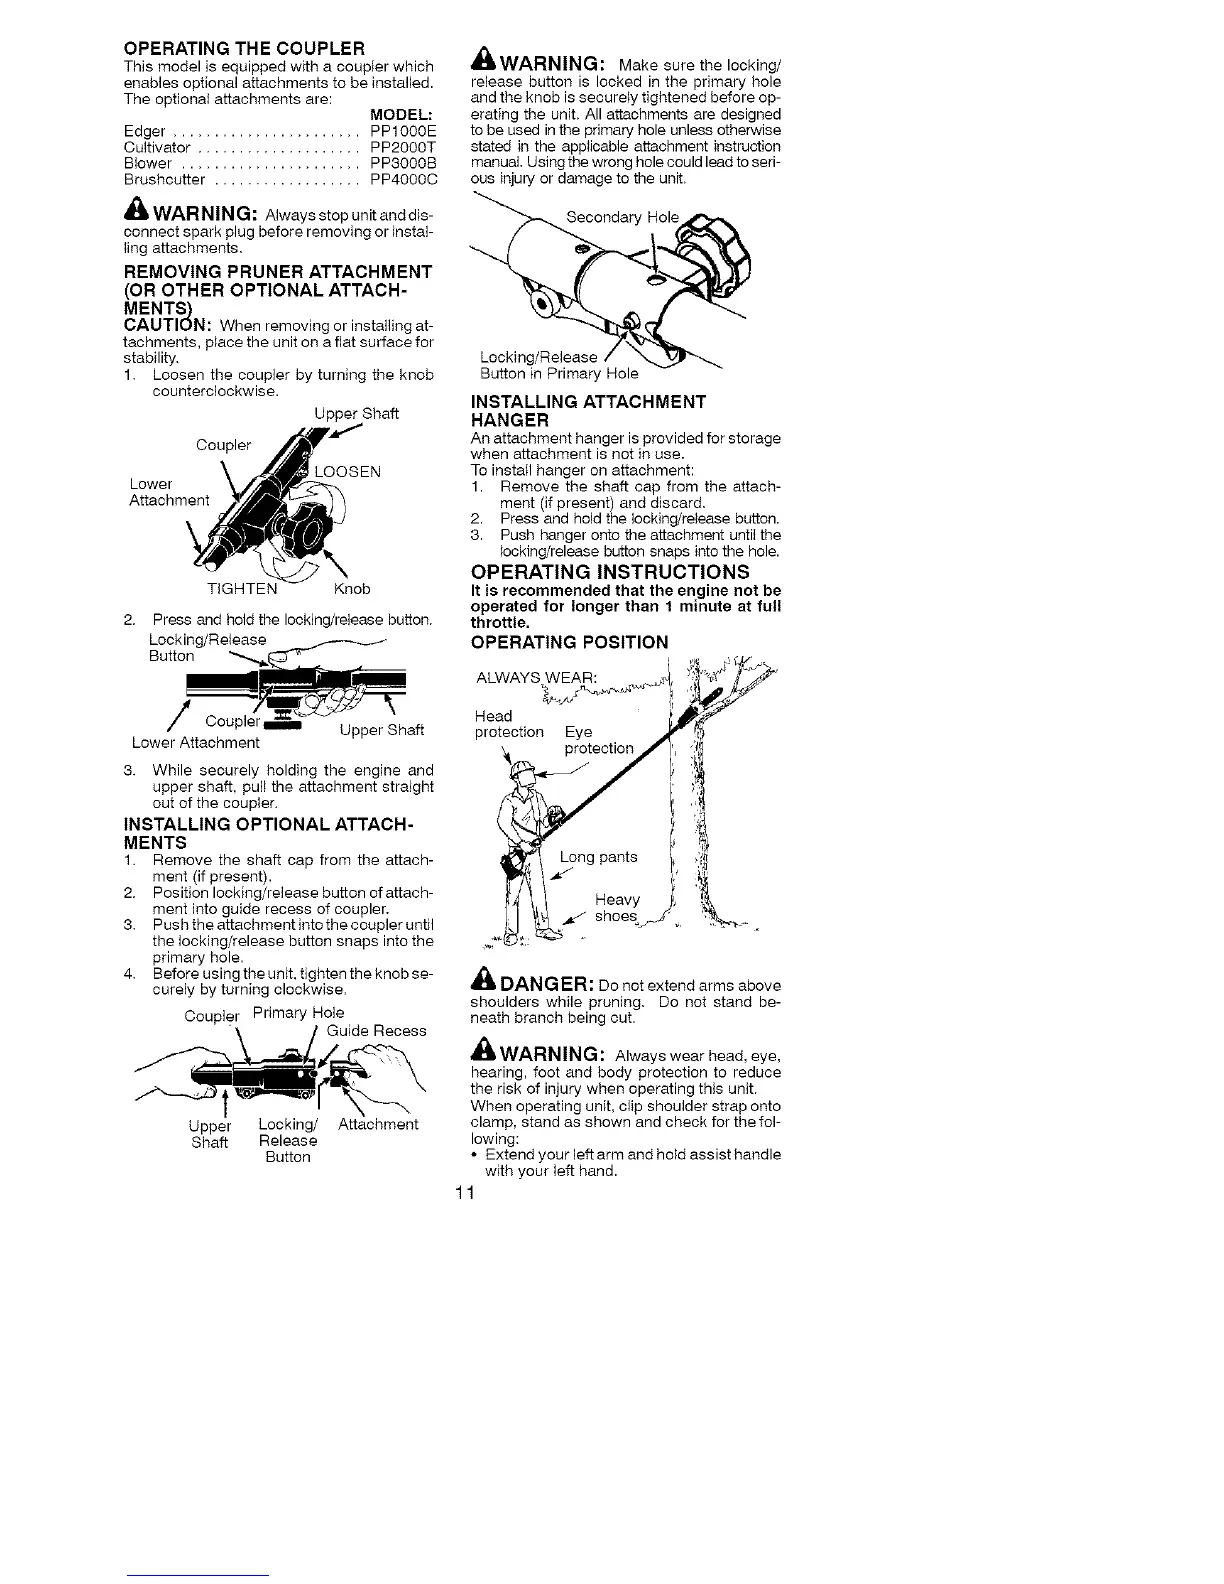
OPERATING POSITION
ALWAYS WEAR: ...._,
Head
protection Eye
protectionJ
;Y
I 1, / Heavy _,
A
_t_ DANGER: Do not extend arms above
shoulders while pruning. Do not stand be-
neath branch being cut.
WARNING: Alwayswearhead,eye,
hearing, foot and body protection to reduce
the risk of injury when operating this unit.
When operating unit, clip shoulder strap onto
clamp, stand as shown and check for the fol-
lowing:
• Extend your left arm and hold assist handle
with your left hand.
1