18
MAINTENANCE
CHARGING PROCEDURE
NOTE: The battery is not shipped fully
charged. It is recommended to fully charge
before rst use to ensure that maximum
run time can be achieved. This lithium-ion
battery will not develop a memory and may be
charged at any time.
1. Plug the charger into an AC power
outlet.
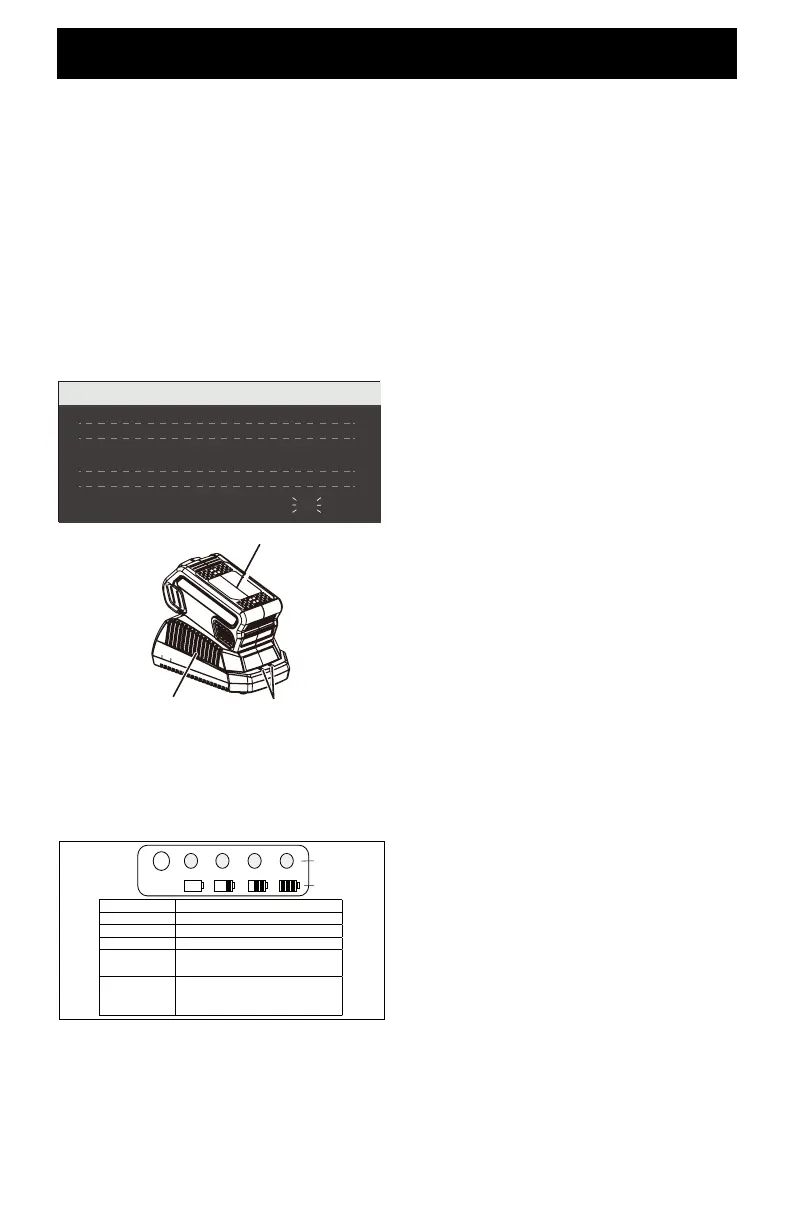
2. Insert the battery pack (1) into the
charger (2). This is a diagnostic
charger. The Charger LED Lights
(3) will illuminate in specic order to
communicate the current battery status.
They are as follows:
CHECKING BATTERY CAPACITY
Press the Battery Capacity Indicator (BCI)
button. The lights will illuminate according to
the battery’s current power level. See chart
below:
CHARGER MAINTENANCE
• Keep the charger clean and clear of debris.
Do not allow foreign material to get into the
recessed cavity or onto the contacts. Wipe
the charger clean with a dry cloth. Do not
use solvents or water, and do not place the
charger in wet conditions.
• Unplug the charger when there is no
battery pack in it.
• Fully charge the batteries before placing
them in storage.
• Store the charger at normal room
temperature. Do not store it in excessive
heat. Do not use the charger in direct
sunlight. Recharge at room temperature
between 45˚F and 104˚F (7˚C and 40˚C).
If the battery pack is hot, allow it to cool
down inside of the charger. The battery
will begin charging once it has returned to
room temperature.
BATTERY PACK
• Store the battery pack fully charged.
• Once the charging light turns green,
remove the battery from the charger and
disconnect the charger from the outlet.
• Recharge the battery pack anytime you
notice there is less power. Never let
the battery pack become completely
discharged.
• After charging, the battery pack may
be stored in the charger as long as the
charger is not plugged in.
3
1
2
BATTERY CAPACITY
INDICATOR (BCI)
BUTTON
Lights Capacity
4 Green Lights The battery is at full capacity
3 Green Lights The battery is at 70% capacity
2 Green Lights The battery is at 45% capacity
1 Green Light The battery is at 10% capacity
and requires charging soon
Lights go out The battery is under 10%
capacity and requires charging
immediately
.
CHARGING PROCEDURE (LED INDICATOR)
BATTERY IS CHARGING:
FULLY CHARGED:
BATTERY IS TOO WARM:
(REMOVE FOR APPROX. 30
MINUTES TO ALLOW TO COOL)
DEFECTIVE BATTERY:
(REMOVE AND REPLACE WITH
NEW BATTERY IF THIS OCCURS)
NO BATTERY PRESENT
RED RED
GREEN
ORANGE
OFF
RED
RED
RED
RED
RED
BLINKING
LIGHT METER
BATTERY METER