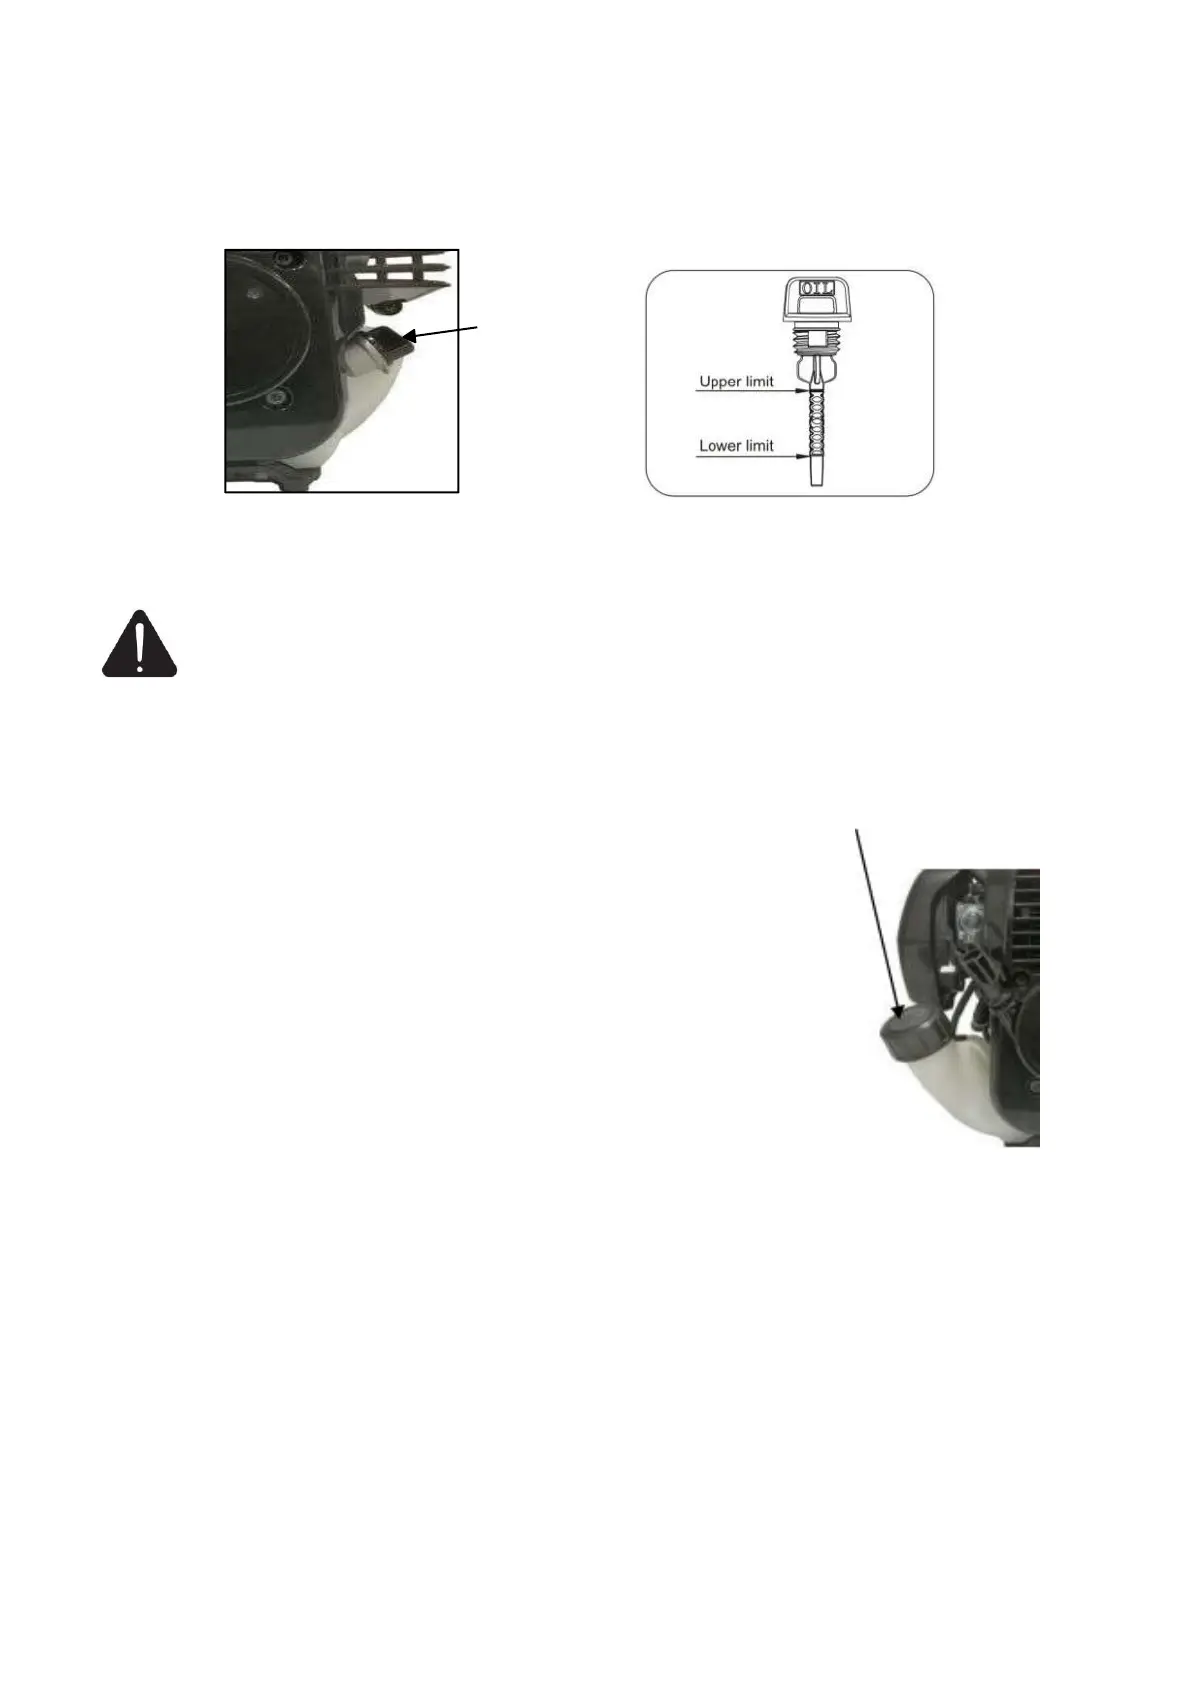
5. Next, insert the dipstick into the oil fill opening without screwing it in. Remove the dipstick to
check the oil level mark.
6. If required, slowly add more oil until the mark reads just below the upper limit line on the dipstick.
Do not overfill the crankcase.
7. Firmly tighten the dipstick and check for any leaks.
Add Gasoline
WARNING: This product may emit highly flammable and explosive gasoline vapors,
which can cause severe burns or even death if ignited. A nearby open flame can lead to
explosion even if not directly in contact with gasoline.
Use fresh (within 30 days from purchase), lead-free gasoline with a minimum of 87 octane rating.
Using a gas/oil mixture with unit will damage the engine. Do not mix oil with gasoline.
To add gasoline, follow these steps:
1. Make sure the product is on a level surface.
2. Unscrew fuel cap and set aside.
NOTE: The fuel cap may be tight and hard to unscrew.
3. Slowly add unleaded gasoline to the fuel tank. Be careful not to overfill.
The capacity of the fuel tank is 22.9 fl. oz.
NOTE: Do not fill the fuel tank to the very top. Gasoline will expand and
spill over during use even with the fuel cap in place.
4. Reinstall fuel cap and wipe clean any spilled gasoline with a dry cloth.
IMPORTANT!
● Never use an oil/gasoline mixture.
● Never use stale or old gasoline.
● Avoid getting dirt or water into the fuel tank.
● Gasoline can age in the tank and make starting difficult. Never store brush cutter for extended
periods of time with fuel in the tank or the carburetor.
● Turn the fuel cock off and drain the fuel from the carburetor.
NOTE: After completing the above preparation, the brush cutter is ready to be started.
Location of oil
fill & dipstick