Replacing The Blade
WARNING: Wear protective gloves when handling or performing maintenance on the blade
to avoid injury. The blade is sharp and can cut you even when it is not moving.
WARNING: Do not attempt to use any blades, washers, nuts, or fastening hardware other than
shown in the following illustrations. These parts must be provided by the manufacturer and
installed as shown below. Failure to use proper parts can cause the blade to fly off and
seriously hurt you or others.
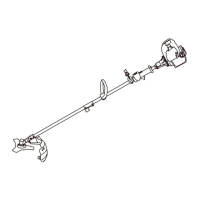
1. Insert the hex key (2) into the specific hole in the angle transmission (3) and rotate the blade (1) by
hand until the hex key enters the inner hole, blocking rotation.
2. Remove the split pin (4) and unscrew the nut (5) in a
clockwise direction.
3. Pull out the washer (6) and the outer ring-nut (7) and
remove blade.
4. Ensure that the grooves in the inner ring-nut (8) mach up
perfectly with the angle transmission (3).
5. Fit the blade (1) and outer ring-nut (7).
6. Refit the washer (6) and the nut (5), fully tightening it in an
anticlockwise direction.
7. Reposition the split pin (4) and refold the two ends.
8. Remove the hex key (2).
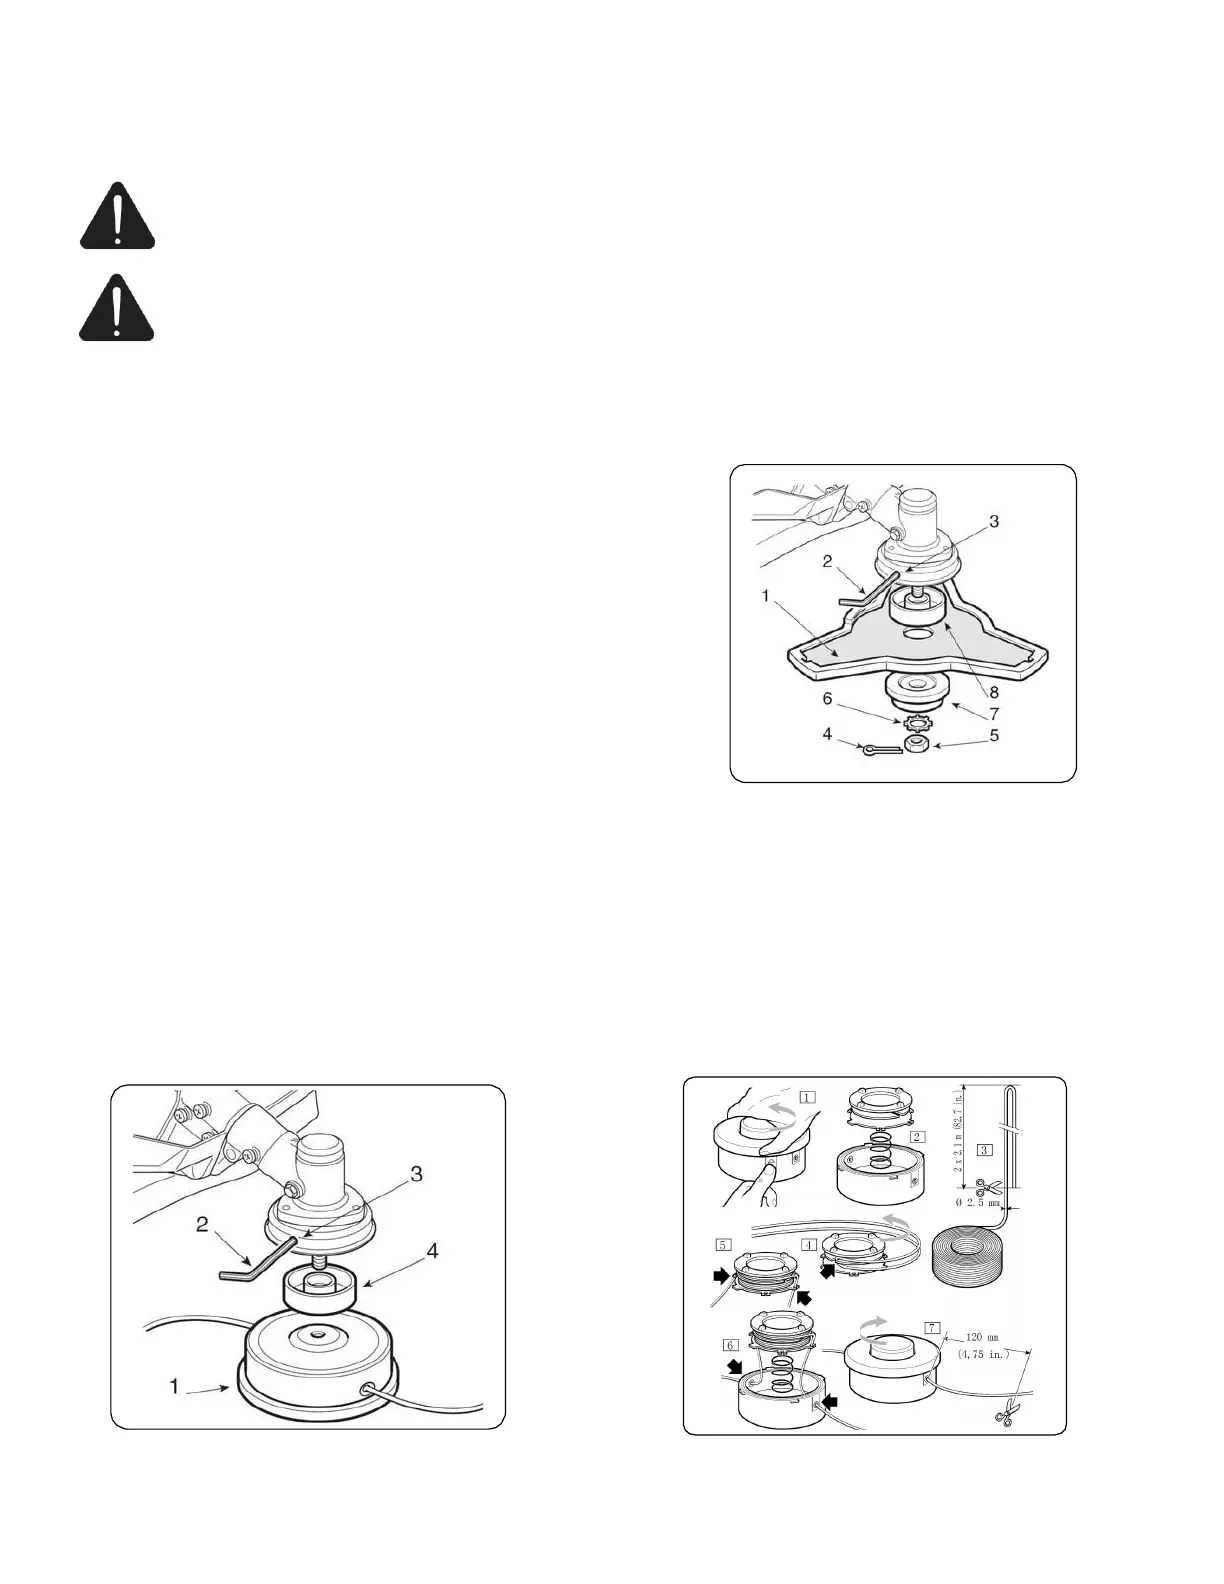
Headline Installation/Replacement
1. Insert the hex key (2) into the specific hole in the angle transmission (3) and rotate the cutting line
head (1) by hand until the hex key enters the inner hole, blocking rotation.
2. Ensure that the grooves in the inner ring-nut (4) mach up perfectly with the angle transmission(3).
3. Fit the cutting line head (1) screwing it up in an anticlockwise direction.
4. Remove the hex key (2).
 Loading...