GB/IE 21
§ Before start of operation
Q
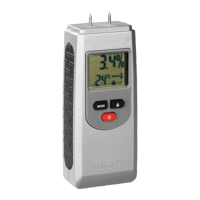
Insert / replace battery
Tip: Flashing numbers indicate a discharged / flat battery.
Tip: When changing the battery, the LCD display
5
may
experience faults. Remove the battery and insert it again after
waiting more then 30 seconds.
j
Push open the lid to the battery compartment
8
(see Fig. B).
j
Remove the old battery.
j
Insert the new battery into the battery compartment and
ensure correct polarity (+ and -). Make sure that the plus
terminal points outwards.
j
Push the lid to the battery compartment
8
shut again (see
Fig. B).
Q
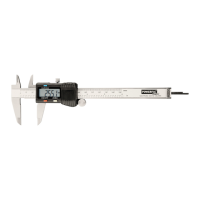
Preparing the calliper
j
Loosen the locking screw
4
so that you can move the
calliper.
j
Clean all measuring surfaces and the calliper rod with a dry
cloth. Otherwise, faulty measuring results may occur due to,
for example, humidity.
j
Check that all keys, switches and the LCD display
5
work
correctly.
§ Starting up the device
Q
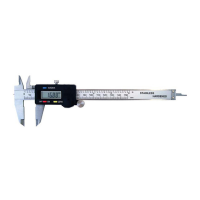
Using the calliper
j
Loosen the locking screw
4
by turning it anti-clockwise.
j
Push the external measuring jaws
11
and the internal
measuring jaws
2
together.
j
Switch the LCD display
5
on by pressing the ON / OFF key
10
.
j
Press the inch / mm key
3
to set the unit of measurement
(inch or mm) you wish to use. Either “mm” or “in” will
appear to the right of the figures in the LCD display
5
.
j
Press the key to obtain the zero setting (ZERO)
9
in order
to reset the LCD display
5
to zero.
Measuring an object from the outside:
j
Move the external measuring jaws
11
apart by turning the
handwheel
7
outwards anti-clockwise. Place the external
measuring jaws
11
against the object to be measured.