Questions? Call Toll Free at 1-800-737-2112 Copyright © 2018 MAT Engine Technologies, LLC
ENG - 7
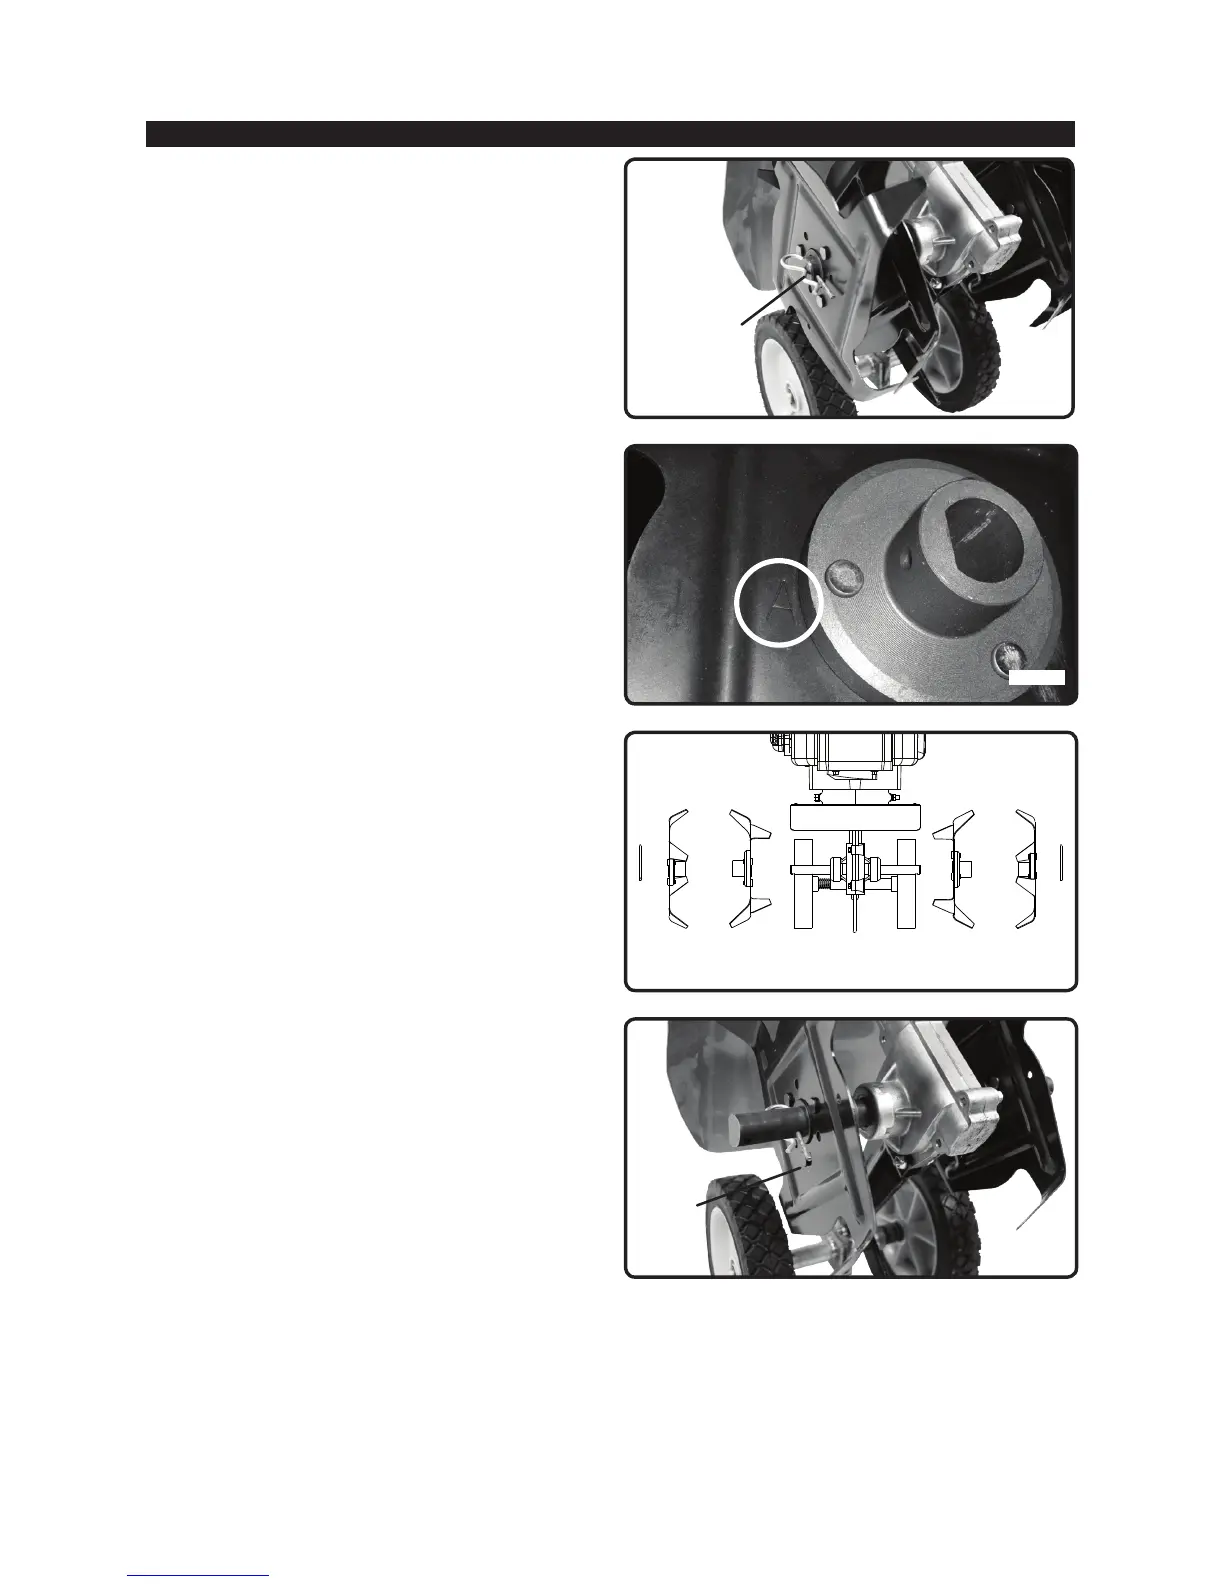
To Remove Tines:
1. Remove the pins from each end of the tine shaft. Refer
to Figure 3.
2. Slide the four tines off the tine shaft.
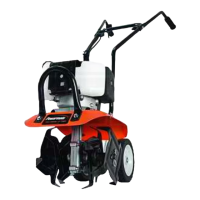
To Install Tines:
The 4 different tines are labeled “A”, “B”, “C”, and “D”. Refer
to Figure 4a for the location of the label.
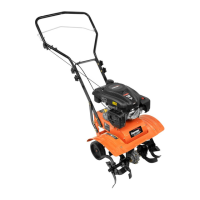
For a 10” tilling width:
1. Assemble the tines as shown in Figure 4b. Make sure
the collars of the tines are facing each other.
2. Insert the pins into the holes at each end of the tine
shaft to lock the tines into place. See Figure 3.
For a 7” tilling width:
1. Only assemble tines B and C (the two inside tines). Do
not assemble tines A and D (the two outside tines).
Refer to figure 4b.
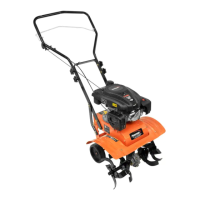
2. Insert the pins into the INSIDE holes of the tine shaft to
lock the tines into place. See Figure 5.
Fig. 3
Pin
D C B A
Fig. 4b
Fig. 4a
Fig. 5
Pin
Assembly (Continued)
• Save all instructions
How to Assemble the Tines