3
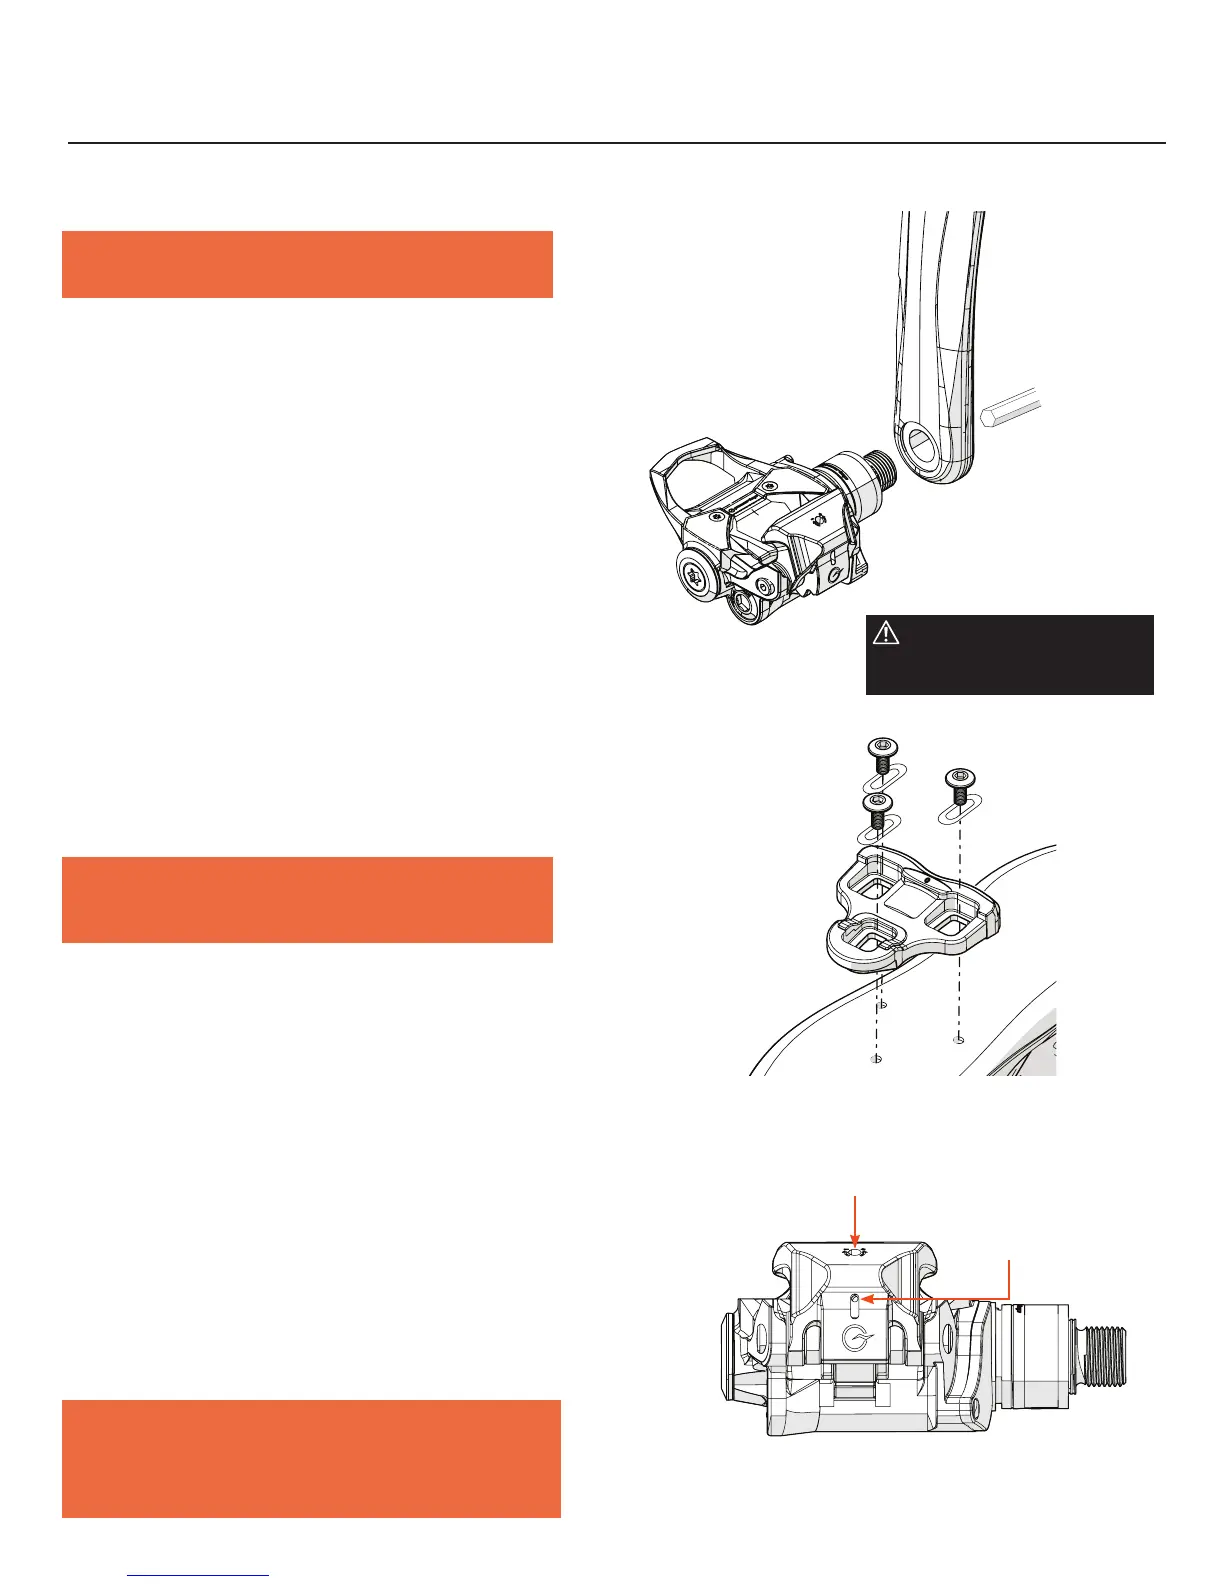
PEDAL INSTALLATION
Note: PowerTap P1 pedals do not have flats on the pedal axle.
An 8mm hex key must be used to secure pedal to the crank.
Before installing the pedals apply a light coat of grease to the
threads on the axle. We recommend a heavier, water repellent
grease like Park Tool’s PPL-1 or Phil Wood’s waterproof grease.
If installing pedals into a carbon crank use the included pedal
washers to reduce the potential for damage to the threads to the
crank. To install the right pedal thread the RIGHT pedal into the
drive side crank arm. The drive side crank arm has a right-hand-
ed thread. Using the 8mm hex, turn the axle clockwise when
viewed from the pedal side of the crank. Tighten the pedal to the
torque specification recommended by the crank manufacturer.
To install the left pedal thread the LEFT pedal into the non-drive
side crank arm. The non-drive side pedal has a left-handed
thread. Using the 8mm hex, turn the axle counter-clockwise
when viewed from the pedal side of the crank. Tighten the pedal
to the torque specification recommended by the crank
manufacturer.
CLEAT INSTALLATION
Note: PowerTap P1 pedals must be used with the included
cleats. They are NOT compatible with other similar looking
cleats like Look Keo.
Align the holes on the cleat with the embedded nuts on the
sole of the shoe. Next, install the rectangular washers and
bolts but do not fully tighten. Align the cleat to your preferred
position and tighten each of the bolts to 4-6 ft lbs.
TENSION ADJUSTMENT
The release tension can be adjusted to suit your needs. Using
a 2.5mm hex wrench adjust the release tension by turning
the release tension adjustment screw as indicated by the
arrows on the pedal claw. Turn the screw counter-clockwise
to increase release tension and clockwise to decrease release
tension. The indicator on the rear of the claw shows relative
position of MIN/MAX release tension. Do not try to turn the
screw past the MIN (bottom) or MAX (top) position as shown
by the indicator.
Note: Cleats need to be replaced periodically based on
individual rider use. If cleats are showing signs of wear or are
not engaging and disengaging from the pedal replace them in
a timely manner.
Tension adjustment port
Indicator window
CHAPTER 2: INSTALLATION AND REMOVAL
8mm
IMPORTANT: Make sure cleats
engage and disengage properly
before riding.