Southern Technologies, LLC • Chicago, IL 60606
Put these instructions and the original sales invoice
in a safe, dry place for future reference.
Visit us on the web at www.powertecproducts.com
WARNING
When servicing, use only identical replacement parts. Use of
any other parts may create a hazard or cause product damage.
To ensure safety and reliability, all repairs should be performed
by a qualied service technician.
WARNING
Keep the Pocket Hole Jig dry, clean, and free from oil and grease.
Always use a clean cloth when cleaning. Never use brake uids,
gasoline, petroleum‑based products or any strong solvent to
clean the Pocket Hole Jig. Chemicals can damage, weaken or
destroy plastic which may result in serious personal injury.
GENERAL MAINTENANCE
4. See Figure 9. Scribe a line on the assembled material.
Reference the Drilling After Assembly chart for distance
from the edge measurement.
5. Align the edge of the Pocket Hole Jig to the scribed line
and clamp rmly in place with the appropriate clamp for
the application.
6. Start drilling the hole. Drill at a slow speed until the stop
collar touches the edge of the Pocket Hole Jig.
Figure 9
DRILLING AFTER ASSEMBLY
Material
Thickness
Distance
from Edge
Drill
Length
Screw
Length
1/2" Not Recommended
5/8" Snap to Edge 3‑1/2" 1"
3/4" 1/8" 3‑1/2" 1‑1/4"
7/8" 3/8" 3‑3/4" 1‑1/2"
1" 5/8" 3‑3/4" 1‑1/2"
1‑1/8" 7/8" 4" 1‑1/2"
1‑1/4" 1‑1/16" 4" 2"
1‑3/8" 1‑5/16" 4" 2"
1‑1/2" 1‑9/16" 4" 2‑1/2"
DRIVE POCKET HOLE SCREWS
1. Reference the Recommended Screw Length chart for the
correct screw length for material thickness used.
Recommended Screw Length:
Material Thickness Screw Length
1/2" 1" *
5/8" 1"
3/4" 1‑1/4"
7/8" 1‑1/2"
1" 1‑1/2"
1‑1/8" 1‑1/2"
1‑1/4" 2"
1‑3/8" 2"
1‑1/2" 2‑1/2"
* Pan‑Head Pocket Screws recommended.
NOTE: Screw length is measured from the bottom of the head
to the tip of the screw.
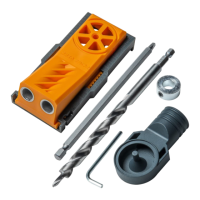
2. Use the R2 Driver Bit (supplied) to drive the wood screws into
the material.
Figure 10