INSTRUCTIONS PW320/PW330
13
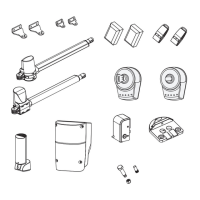
2.3.6 PH-2 Photocells
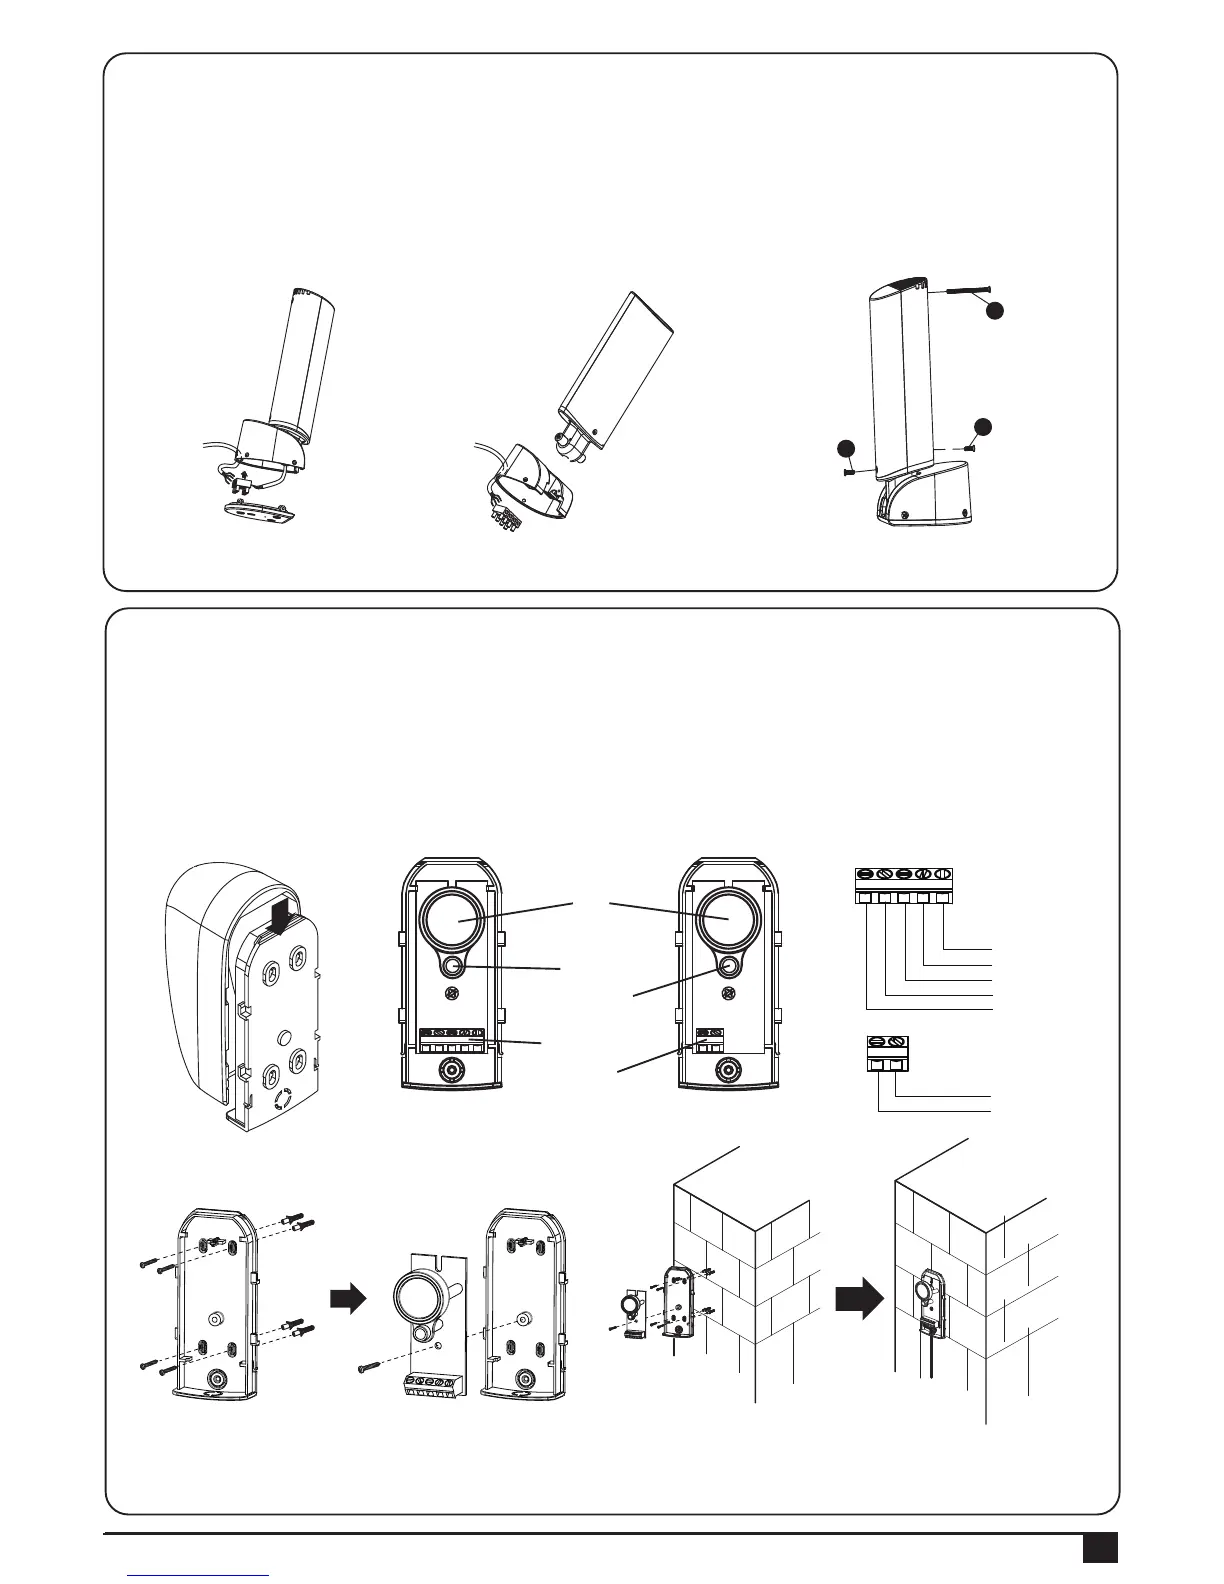
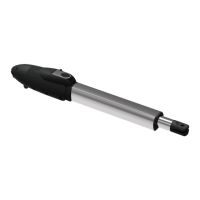
5). Connect the four wires of the light and the antenna to the PCB terminals and place the wires into the conduit if
necessary. See Figure 2.3.5 (5).
6). Tighten the four screws back on the light base. Figure 2.3.5 (6)
7). Replacing the bulb set. See Figure 2.3.5 (7)
7.1) Unscrew the flashing light wires from the PCB terminals and make sure the power of the light is off.
7.2) Release the three screws (A)、(B)、(C) of the flashing light cover.
7.3) Separate the flashing light cover and replace the bulb set with a new one.
7.4) Tighten the three screws (A)、(B)、(C) of the flashing light cover.
Figure 2.3.5 (5) Figure 2.3.5 (6) Figure 2.3.5 (7)
A
B
C
Figure 2.3.6 (1)
Figure 2.3.6 (3)
Figure 2.3.6 (2)
1). Open the cover Figure 2.3.6 (1).and connect wires Figure 2.3.6 (2).
2). Mounted the receiver and transmitter on the proper position Figure 2.3.6 (3).
3). Ensure there are no obstacles between receiver and transmitter.
For optimal efficiency, the receiver and transmitter should be properly aligned.
4). Power-up the photocells and make sure the LED light on receiver and transmitter are ON.
RX
RX
Lens
Beam Alignmnet
Indicator
Power Led
Indicator
Terminal Block
Power
Terminal Block
COM
N.C.
N.O.
GND
DC (12~24V)
GND
DC (12~24V)
TX
TX
1 2 3 4 5
1 2 3 4 5 1 2
1 2