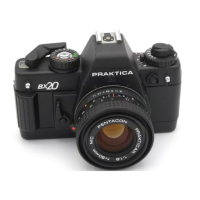
To facilitate operation, several functions have been built into the release button (16). Pressing it slightly down until
resistance is felt switches on the electronics and the shutter speed/flash readiness LEDs (the latter when
computerized flash guns are used).
After making the required exposure settings and cocking the shutter pressing the release button further down
causes the shutter to fire. Letting go of the button switches the electronics off. Relieving the pressure from the
release button during long exposure times has no effect on the exposure; the electronics will not switch off until the
shutter has completed its operation.
Locking the release button
The release button lock (8) is used to prevent unintentional shutter release and unnecessary power consumption
which would occur when the release button is inadvertently pressed, no matter if the shutter is cocked or not Just
turn the lock clockwise to arrest the release button (Figure 9). Unlock by turning it counterclockwise. Attention !
Do not lock the button when it is pressed down.
Self-timer
Cock the shutter and swing the cocking lever for the self-timer (6) down as far as it will go. Press the release
button /7) of the self-timer (Figure 10). The shutter will fire after a delay of about 8s. Attention! Do not cock the
shutter while the self timer mechanism is running.
Flash photography
If the available light is insufficient, for example, to take indoor shots, a flash unit is recommended to be used. All
electronic flash units can be plugged on, computerized or not, if they fit on this camera model.
Just plug the flash unit into the hot shoe (13) to connect it to the camera.
Set the shutter speed dial (15) to "60" When the release button (16) is slightly pressed, the LED next to "60" will
flash. At the same time, the shutter speed is indicated.
When attaching simple electronic flash guns, use the guide number to determine the aperture or distance.
In addition to the shutter speed information, flash readiness of camera and flash unit is indicated when a dedicated
computerized flash gun is plugged on. A green LED will light next to the flash symbol in the finder, also in the "B"
setting.
Changing the film
After shutter operation the frame counter (5) shows the number of frames exposed. When the maximum number of
frames on the film (red markings at 20 and 36) are exposed, the film must be changed.
Press in the rewind release button (30), fold out the rewind crank (2) and turn it not too fast in the direction of the
arrow, i. e. clockwise (Figure 11) until increased resistance followed by easy turning is felt, which indicates that
the film has slipped out of the take-up spool. Then pull the rewind button up to unlock the camera back, and take
the film cartridge out. Do not change the film in full sunlight
If more frames have been exposed than are printed on the film pack, it may happen that the cocking lever cannot
be swung fully out Do not use force in this case but rewind the film as described above.
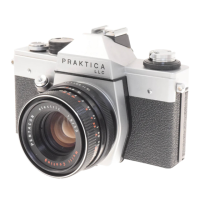
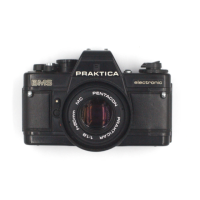
Changing the lens
Press the unlocking key (8), turn the lens counterclockwise and take it out of the body (Figure122).
Insert the PRAKTICAR lens so that the red marks (8/20) on camera and lens match. Then press the lens against the
camera body and turn it clockwise until it clicks in.
All original PRAKTICA lenses with the M 42x1 screw-in thread can be attached to this model by means of the
PRAKTICA adapter. With the exception of the light measurement, which is made at working aperture. there are no
restrictions in camera operation when a screw-in lens is used.4www.butkus.org
 Loading...