EasyManua.ls Logo

Praktica PLC 2 User Manual

Praktica PLC 2
27 pages
To Next Page IconTo Next Page
Page #1 background imageLoading...
Page #1 background image
Bedienleile
der
PRAKTICA
PLC
2
1
FllteransdhIuSgewinde
2
Ruckspulknopf
3
Steckschuh
^
4
Belichtungszeiten-Efnstellknopf
5
Spanmhebel
6
Drahtausloser-AnschluBgewinde
7
Ausidser
8
Ausidser
fur
Seibstausioser
9
Seibstausloser-Spannhebe!
Control
Elements
of
the
PRAKTICA
PIC
2
1
Filter
thread
2
Rewind
knob
3
Accessory
shoe
^
4
Shutter-speed
dial
.
.
:
5
Cocking
lever
I
6
Cable
release
thread
7
Shutter
release
8
Self-timer
release
9
Seif’tinner
cocking
lever
Elements
de
commands
du
PRAKTICA
PLC
2
1
Filetage
pour
le
raccordement
des
fiitres
2
Bouton
de
rebobinage
3
Sabot
de
fixation
4
Bouton
de
reglage
des
temps
de
pose
5
Levier
d’armement
6
Filetage
de
raccordement
du
declencheur
flexible
7
Declencheur
8
Declencheur
pour
le
declencheur
automatique
9
Levier
d'armement
du
declencheur
automotique
Bedieningsdelen
van
de
PRAKTICA
PLC
2
1
Flitersdhroefdraad
2
Terugspoeiknop
3
Insteekschoen
4
Befichtingstijden-instelknop
i
5
Transporthandei
;
6
Aansluiting
voor
droadontspanner
7
Ontspanner
8
Ontspanner
voor
zelfontspanner
9
Zelfontspanner
2
Im
Text
der
Bedienungsanleitung
sind
die
Hinwelszahlen
auf
die
Bedienteile
in
(
)
gesetzt.
In
these
instructions
for
use
the
reference
numbers
for
the
control
elements
have
been
put
in
parentheses.
Dans
le
texte
de
la
presente
notice
d’emploi,
les
dilffres
indiquant
les
elements
de
commande
dont
il
est
question
sont
mis
entre
parentheses.
In
de
lekst
zijn
de
verwijzingsgetalten
tussen
(
)
gezet.
van
de
lent

Other manuals for Praktica PLC 2

Question and Answer IconNeed help?

Do you have a question about the Praktica PLC 2 and is the answer not in the manual?

Praktica PLC 2 Specifications

General IconGeneral
BrandPraktica
ModelPLC 2
CategoryDigital Camera
LanguageEnglish

Summary

Closing the Camera Back

Cocking the Camera

Inserting the Film

Setting the Film Speed

Setting the Shutter Speed

Setting the Diaphragm Number

Automatic Exposure Control

Open Aperture Metering with Preset Shutter Speed

Open Aperture Metering with Preset Diaphragm Number

Taking Aperture Metering with Preset Shutter Speed

Taking Aperture Metering with Preset Diaphragm Number

PRAKTICA PLC 2 Metering Range

Focusing

Microprism Screen Focusing

Using the microprism grid in the viewfinder for precise image sharpness adjustment.

Circular Groundglass Focusing

Using the groundglass ring in the viewfinder for image sharpness adjustment, especially for close-ups.

Depth of Field Indicator

Shutter Release and Cocking

Self-Timer

Film Loading and Unloading

Lens Mounting and Removal

Using Flash Units

Flash Bulb Unit Operation

Specific settings and usage for cameras with flash bulbs, including synchronization.

Electronic Flash Unit Operation

Specific settings and usage for cameras with electronic flash units, including synchronization.
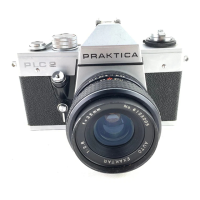
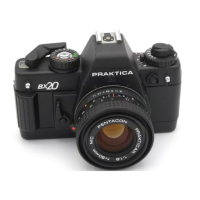
Battery Replacement

Camera Maintenance and Care

Related product manuals