PrecisionTemp
Cincinnati, Ohio
(513) 641-4446 Fax (513) 641-0733
www.precisiontemp.com
Rev 04/07
2
Please read these instructions thoroughly before starting your installation
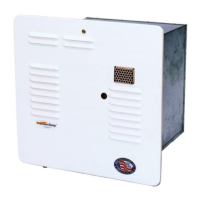
Installation Instructions For The RV-500 Water Heater
The RV-500 water heater is designed to be installable and removable from the exterior of the
vehicle. The mounting instructions are for the PrecisionTemp flush mount and surface ac-
cess doors. No other door should be used. Doing so will void the warranty and cause the
heater to malfunction and could cause damage or injury.
Please read these instructions before making any modification to the construction of your RV.
Selecting Installation Location
The water heater must not be installed in an area where the vent can be covered when any
door or access panel on the coach is opened. The water heater should be located in an area
where leakage will not result in damage to other items of, or in the structure. If such an area
cannot be avoided, it is recommended that a suitable pan and drain be installed under the
heater.
Install the heater as close to the gas supply as practical to minimize length of the gas line.
There must be a minimum of 8" of clearance between the vent cover and any other surface.
Do not install where the vent is closer than one foot from any window or opening into the
coach.
Although the RV-500 can be mounted with zero clearance around the sides, top and bottom,
be sure that the installation does not interfere with any wiring, plumbing or cabinets inside the
coach. Do not install the water heater or any other appliance where it can vent into an area
covered by an awning, canopy or any other enclosure. For better support and ease of instal-
lation, install where the bottom of the heater case rests on a floor.
Installing Heater In The Side Wall Of A Coach
The RV-500 can be installed as a flush mount or a surface mount. The model RV-500 refers
to the heater ordered with the flush mount door kit. The model RV-500-1 refers to the heater
ordered with the surface mount door. The RV-500 flush mount can retrofit an Atwood ten
gallon flush mount water heater without side wall modification regardless of side wall framing.
If the side wall framing is steel or aluminum rather than wood framing and the original water
heater is anything other than an Atwood ten gallon flush mount water heater, it is recom-
mended that only the surface mount configuration be used unless done by the RV
manufacturer or dealer.
Surface Mount Installation
Surround the opening on the skin of the coach with four to six inches of masking tape to pro-
tect the skin of the side wall.
The rough opening for the RV-500-1 should be 13.75” wide x 14.625” high. This is about
2.75 inches taller than an Atwood six gallon tank heater. If the opening needs to be enlarged
by cutting the internal side wall structural member, a 2”x2” wood support should be installed.