PrecisionTemp
Cincinnati, Ohio
(513) 641-4446 Fax (513) 641-0733
www.precisiontemp.com
Rev 04/07
4
• You are now going to mark the setback cut-out. Place the door frame over the opening.
Center the frame on the skin. Use the inside edge of frame to draw a corner radius on
each corner. Mark the .5” setback and remove the frame. Now check the markings to
make sure they are 18.5” wide by 18.25” tall and adjust the markings to this dimension.
(Note: Do not cut the setback as a square! The rounded corners of the frame will
not cover the square opening setback corner!)
• Cut 0.5” deep on the lines with a circle skill saw being careful not to cut past the radius.
Use a narrow chisel, a .125” drill bit, or router to cut around the radii.
• Use a wide wood chisel to cut 0.5” from the opening back to the cut you just made with
the saw. Clean the radii out with a smaller chisel. Now place the frame in the opening
and check to see that the flange part of the frame is flush with the skin of the coach. The
side wall opening is now prepared to accept the door frame.
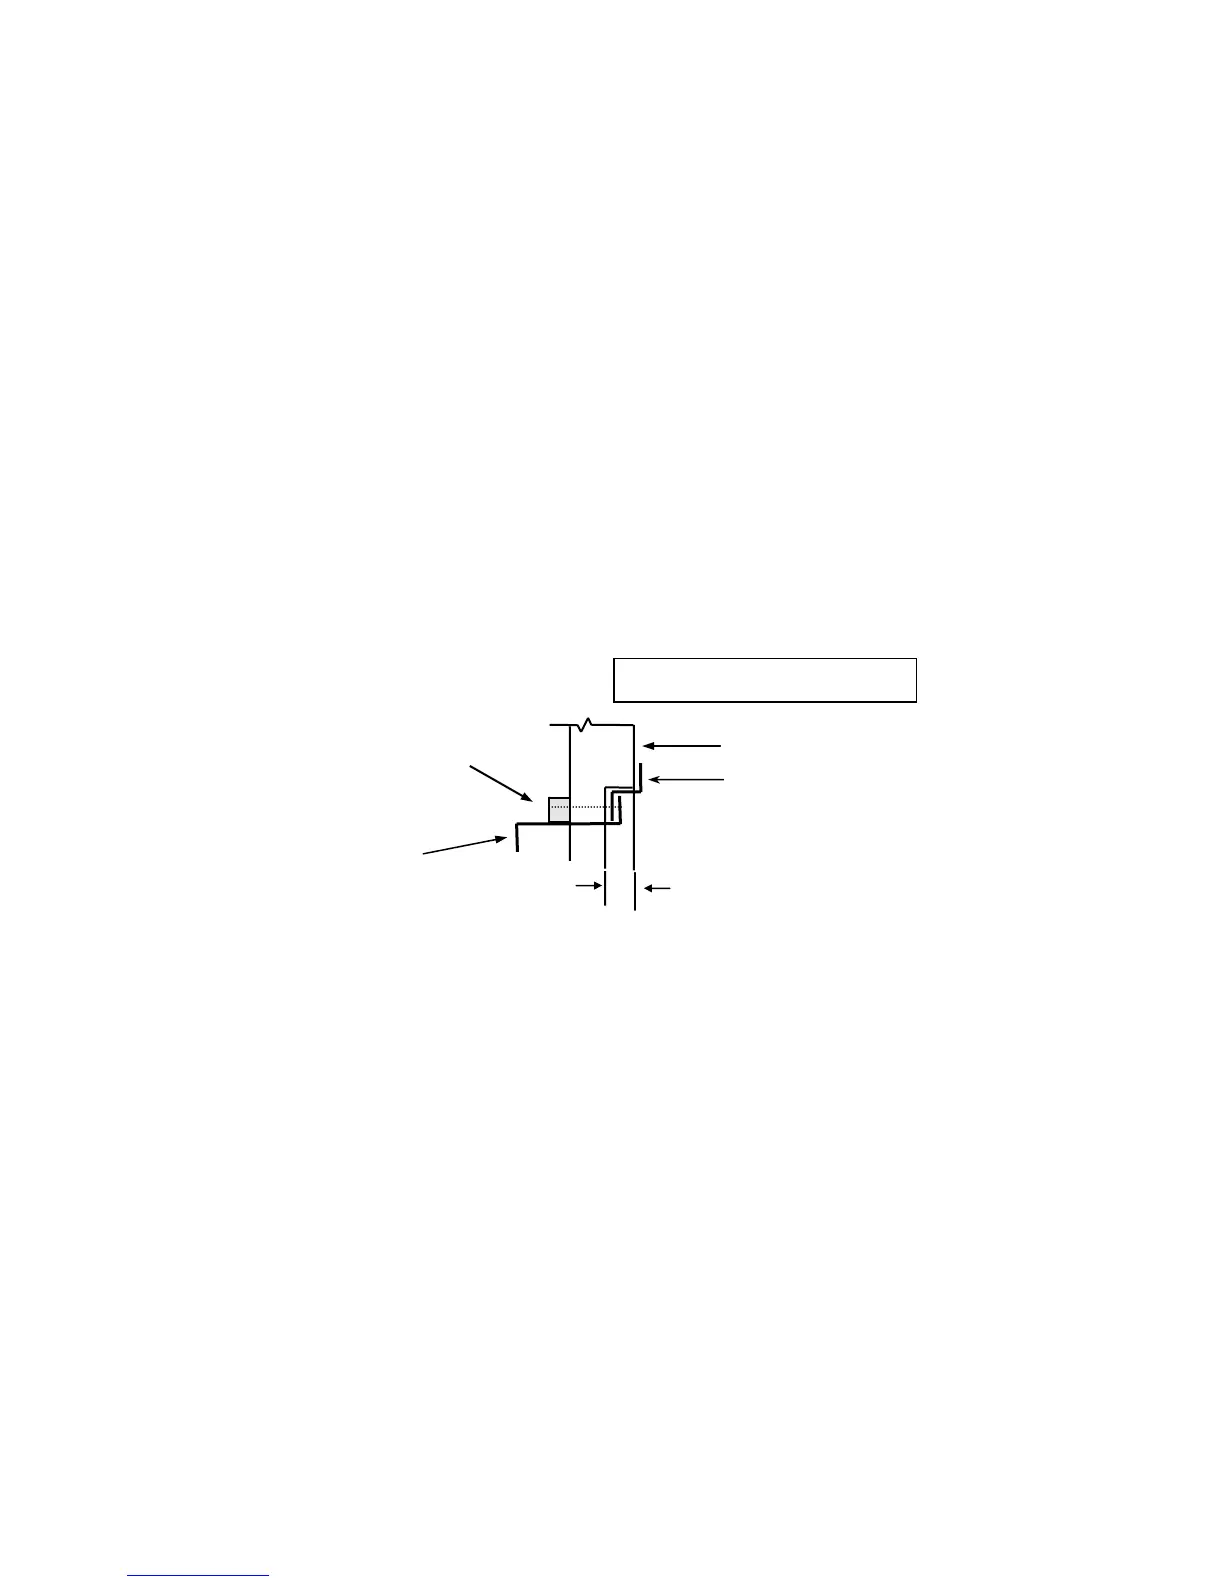
• The rough opening for the RV-500 case should be 13.75” wide x 14.625” high. If the
opening needs to be altered and the internal side wall structural member is cut through, a
2 x 2 wood support should be installed on the inside of the side wall. Do this so that a
screw would go through the screw hole on the RV-500 case flange, through the side wall
and into the 2 x 2 support sandwiching the side wall between the flange and the 2 x 2
support.
• Place sealant on the back of the door frame and push it into opening.
• Put flush door adapter ring over back of heater and bring forward to the mounting flanges.
• Slide the RV-500 and adapter ring into door frame already mounted into opening.
• Tilt the water heater back and feed the gas line through the gas line grommet. (Note: If
there is no access from the inside of the coach to the back of the water heater
compartment the water lines and electrical must be connected at this stage. Refer
to those sections of this manual).
• Push the RV-500 into the opening. Center the heater in the opening and start a screw in
the top center hole.
• Run the screw down but not tight. Back the screw off enough to put silicone or other ap-
propriate sealant on the frame under the RV-500 flange.
Frame
2” x 2”
Support
1/2” cut back
Side of coach
RV500 case
Flush mount ed
e view