page 4
3. Pick up and rotate the lift column so that the crossbar is at a 90 degree angle to the base of
the treadmill. The guide tube, on the M9.1 only, should align with the grommet hole in the
crossbeam. Refer to Diagram 2. If necessary, remove the lower cable connector from inside
the crossbar.
4. Slide the crossbar a few inches out of the lift column. Insert the top of the lift column into the
crossbeam. Push the lift column through until the base plate is flush with the crossbeam. See
Diagram 2. Have your assistant support the far end of the lift column.
5. Align the five holes in the lift column’s base plate with the studs in the crossbeam. Have your
assistant slide and hold the lift column into place while you put a flanged nut (A) on each of
the five studs. Finger-tighten the nuts onto the studs.
6. Using your 7/16" socket wrench (a 3" extension rachet is helpful), begin to tighten the flanged
nuts. Alternate between each one, until the base plate is snug up against the crossbeam. Do
not overtighten the nuts.
Note — M9.1 owners: Skip steps 7 and 8 if you have an M9.1 treadmill. Continue to step 9.
7. On the M9.2s, clip the tie wrap holding the clevis pin in the elevation tube. Remove the clevis
and hitch pins. Due to the sensitivity of the lift calibrations, do not rotate the elevation tube
more than 90 degrees in either direction.
8. Carefully align the mounting holes on the crossbar and elevation tube and slide the crossbar
onto the elevation tube. Insert the clevis pin (head of the clevis pin should be toward the rear
of the treadmill) through both holes and re-attach the hitch pin.
Note: The M9.2s lift is elevated to a 1 percent incline for ease of assembly. The functioning
and accuracy the lift mechanism depends on properly installing the clevis and hitch pins.
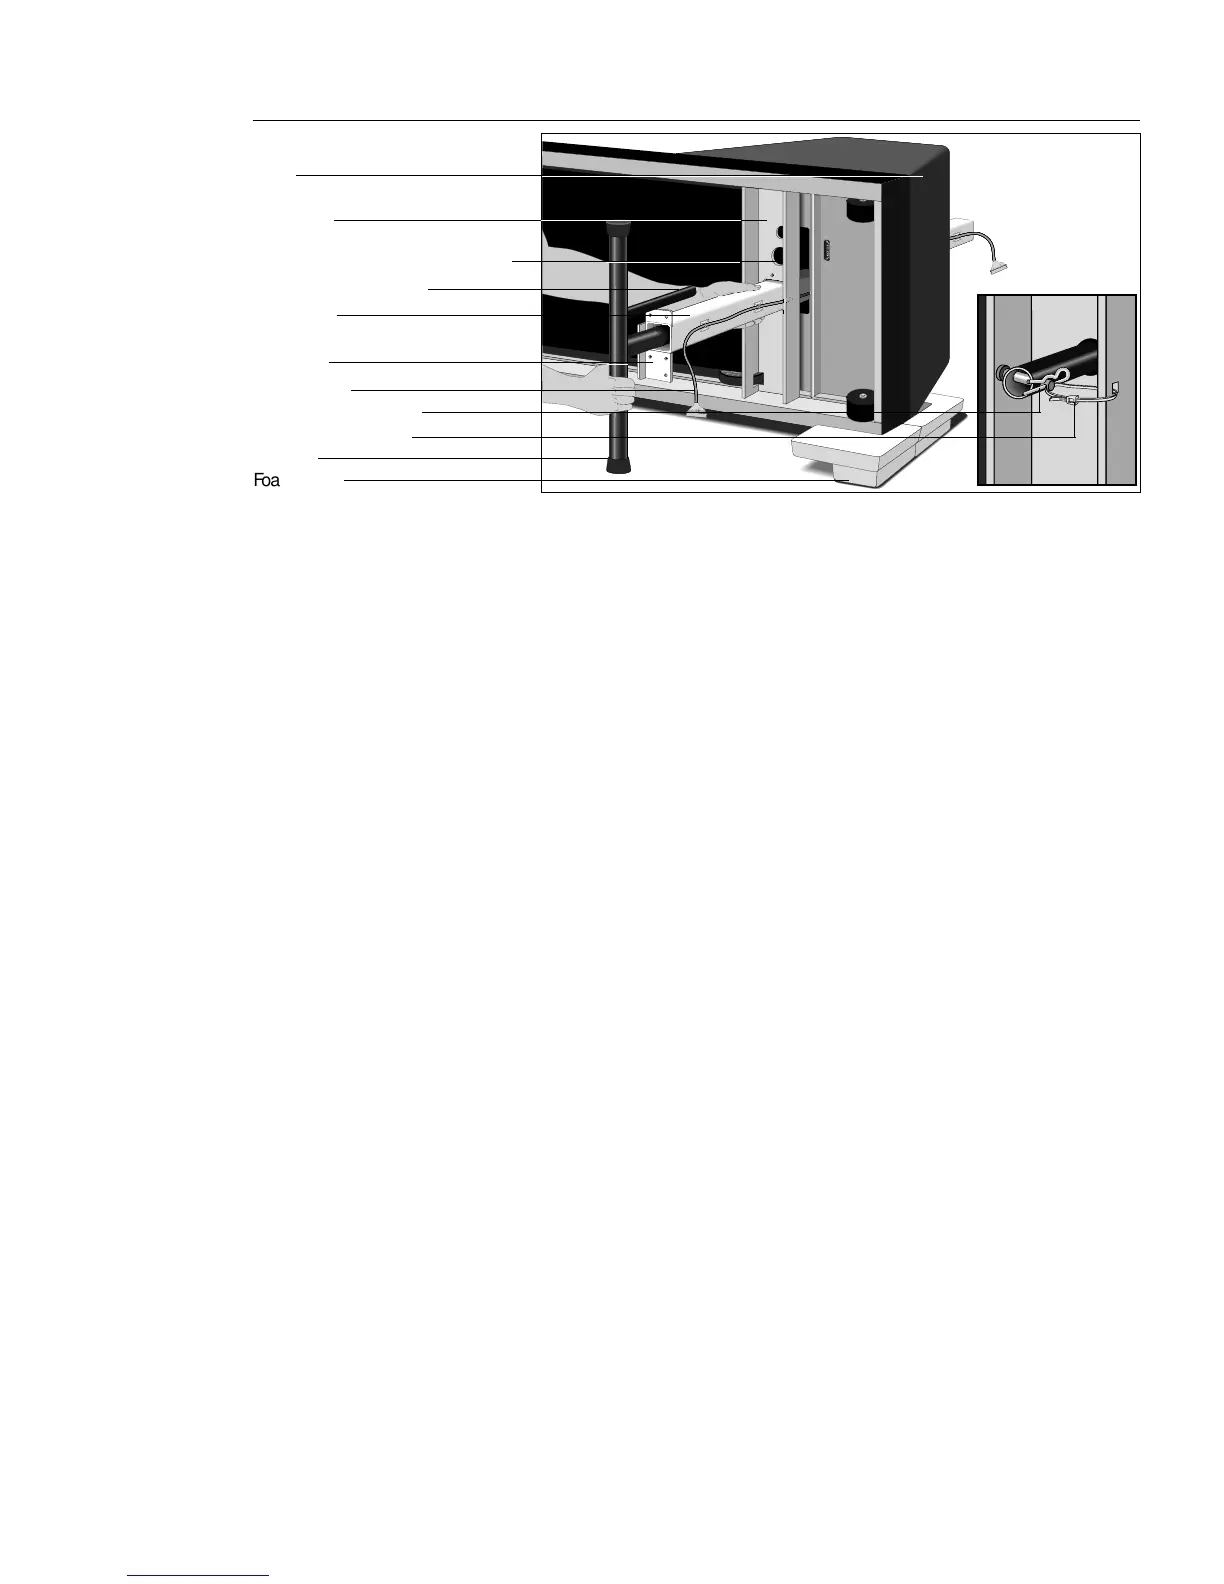
Install lift
column
Diagram 2
Crossbeam
Elevation tube location (M9.2s only)
Foam blocks
Crossbar
Ribbon cable
Base plate
Lift column
Guide tube (M9.1s only)
Hood
Tie wrap (M9.2s only)
Clevis pin (M9.2s only)