Installation Instructions Visit Premier Mounts website at http://www.premiermounts.com Page 5
UNI-SPKR/UNI-SPKRB
Installing the On-Wall Speakers
The Premier Mounts On-Wall Speakers are designed for use with Premier Mounts’ Universal Short-Throw Projector
Arm Mounts, Universal Digital Signage Mounts and GearBox™ Audio Mounts. All parts, metal plates, screws, and
bolts required to complete the assembly are provided with the speakers. Please read through the safety instructions
before installation.
The CPA-50 Compact Power Amp is sold separately.
Introduction
Wiring
Strip the speaker wires evenly and split the positive
and negative wires rst, if needed. Keep exposed
wire ends short after stripping. If the speaker wires
touch, they may short the amplier.
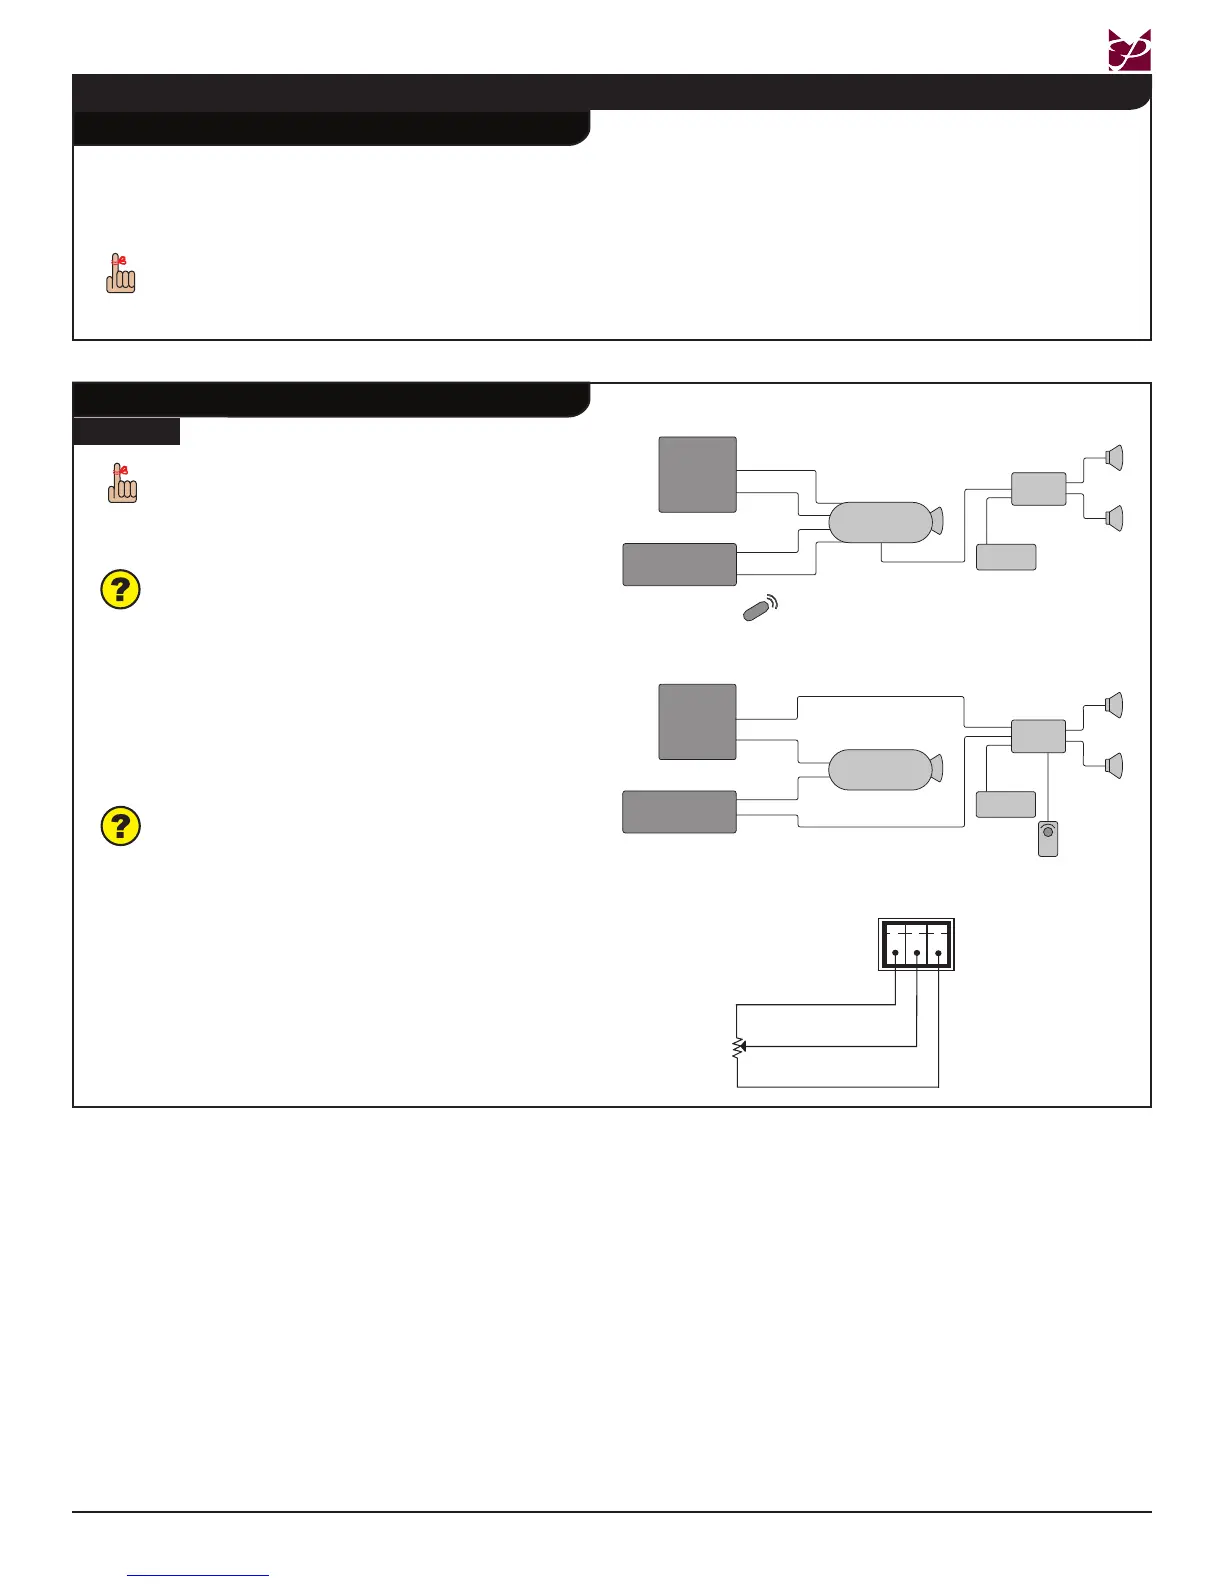
If you are connecting the sound sources directly to
the projector, follow the suggested Option A wiring
diagram (Figure 1) for reference.
If you are connecting the sound sources directly to
the CPA-50 Power Amp and are using the external
volume control, follow the suggested Option B
wiring diagram (Figure 2) and 10k Pot Volume
Diagram (Figure 3) for reference.
Are you replacing the speaker wires?
If Yes, continue to Step 2 on page 6.
If No, go to Step 3 on page 6.
PC
PROJECTOR
VGA
Audio
Audio
Line
Input
Mic
Input
Premier
Power Amp
Premier
Speaker
Left
Premier
Speaker
Right
Wireless
Mic Receiver
Variable
Audio Output
Projector Remote
Volume Control
Video
Audio
DVD
Option A
Option B
Figure 1
Figure 3
Figure 2
PC
PROJECTOR
VGA
Audio
Line Input
Line Input
Mic
Input
Premier
Power Amp
Premier
Speaker
Left
Premier
Speaker
Right
Wireless
Mic Receiver
Optional
10k Pot
Volume
Control
Video
Audio
DVD
Step 1
10k Pot Volume
Wiring Diagram
REMOTE
10V (Pin 1)
Vol/Mute (Pin 2)
GND (Pin 3)
Pot Volume
10K Ohm
 Loading...