UNI-SPKR/UNI-SPKRB
Installation Instructions Visit Premier Mounts website at http://www.premiermounts.com Page 7
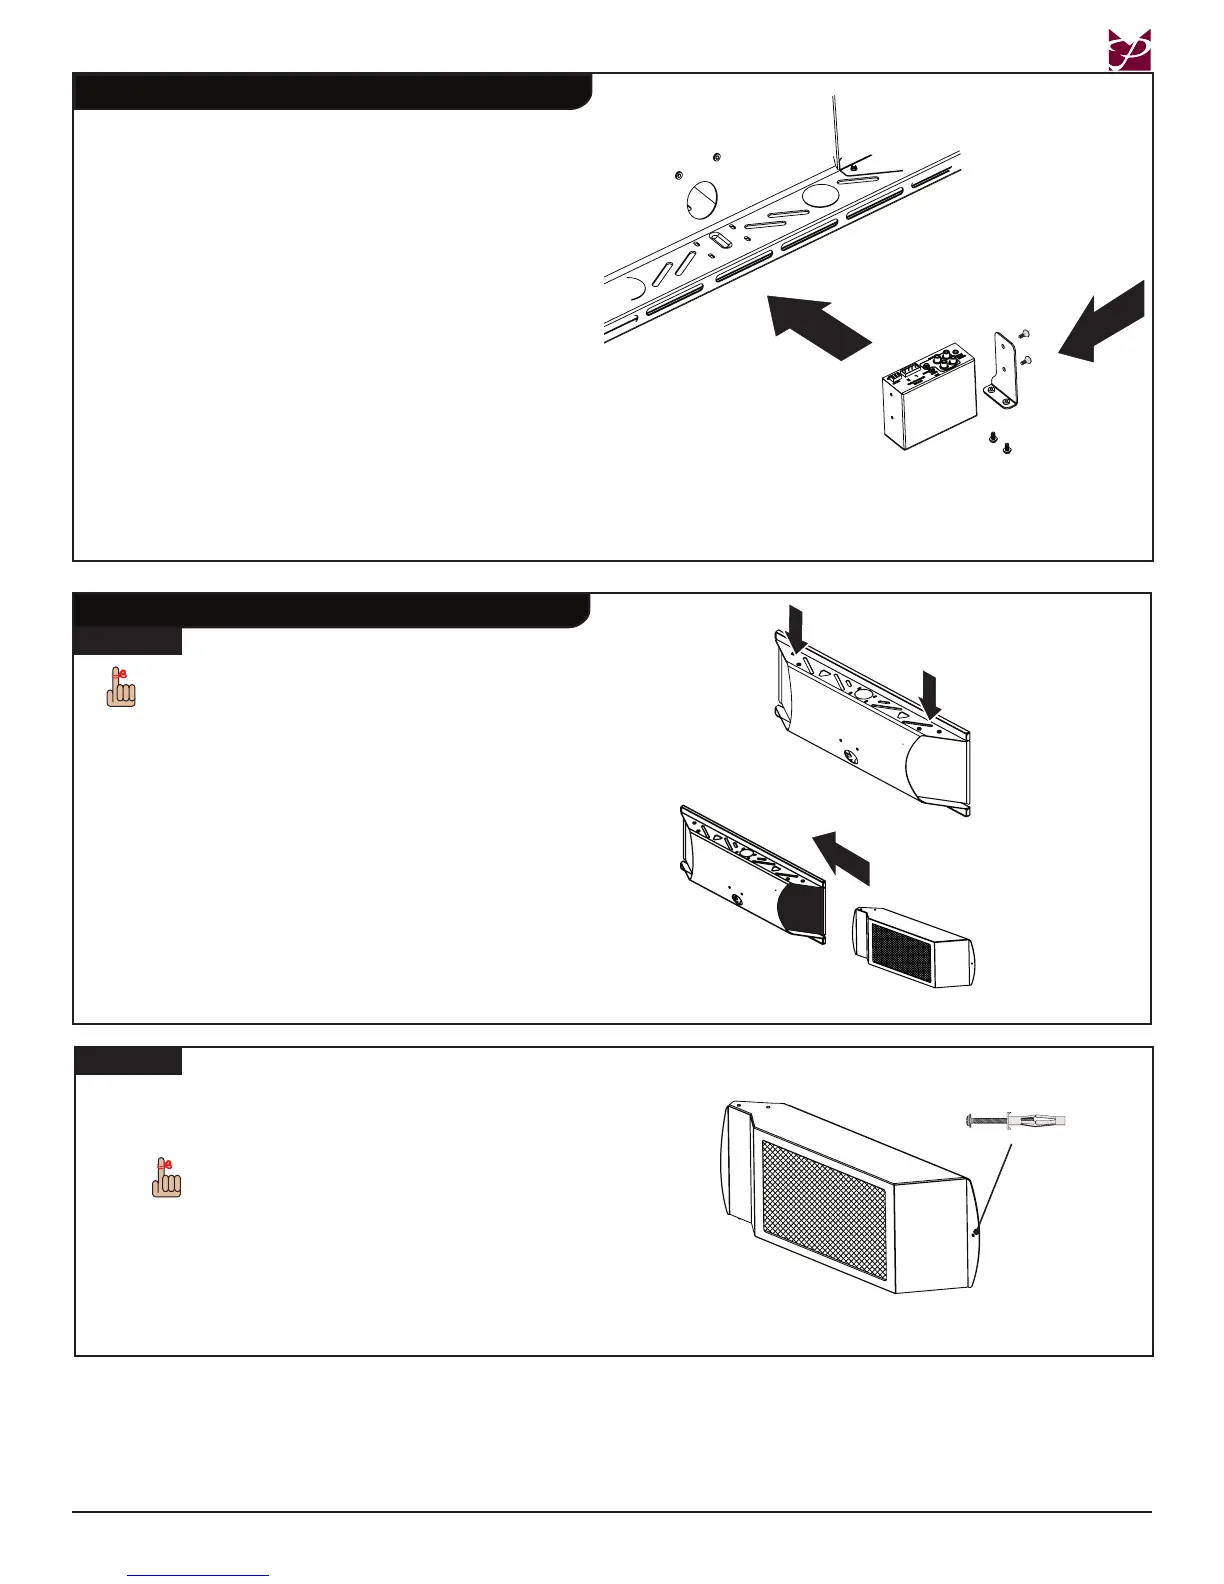
Attaching Speakers to the GearBox™
These instructions assume the GearBox™ mount
is attached to the wall. See installation instructions
for the mount if needed.
Remove the (4) M5 x 8mm security head screws
from the side doors on the mount’s wall plate
(Figure 1).
®
Remove the side doors.
¯
Insert the speakers into the sides of the mount
(Figure 2).
Figure 1
Remove the screws from
the side doors
Figure 2
Mark the holes on the outside edges of the
mount’s speakers where you will drill the drywall.
The holes are for attaching M5 drywall
anchors.
®
Remove the speakers.
¯
Drill the drywall using a 3/8” drill bit where you
made the marks.
Proceed to Step 3 on page 8.
Step 2
M5 drywall anchor
Step 1
Installing the Power Amp (sold separately)
Use two (2) 4-40 x ¼” Phillips athead screws to
attach the CPA-50 power amplier to the small
amp bracket.
®
Place the power amplier inside the GearBox™
(see drawing).
¯
Use two (2) M4 x 6mm Lock-It™ security screws
to attach the power amplier and small amp
bracket to the inside bottom of the mount.
°
Attach the power amp plug to the amplier.
Proceed to the “Attaching Speakers to the
GearBox™” section below.
Inside the Mount
Step 1
Step 2
Power Amp
Small Amp
Bracket
4-40 x ¼” Phillips at-
head screws
M4 x 6mm Lock-It™
security screws