3DJH
$IWHUGULOOLQJUHPRYHDOOVKDUSHGJHVDQGPDNHVXUHWKHVXUURXQGLQJV
of the sink are cooled before mounting the faucet.
6WHS
6WHS
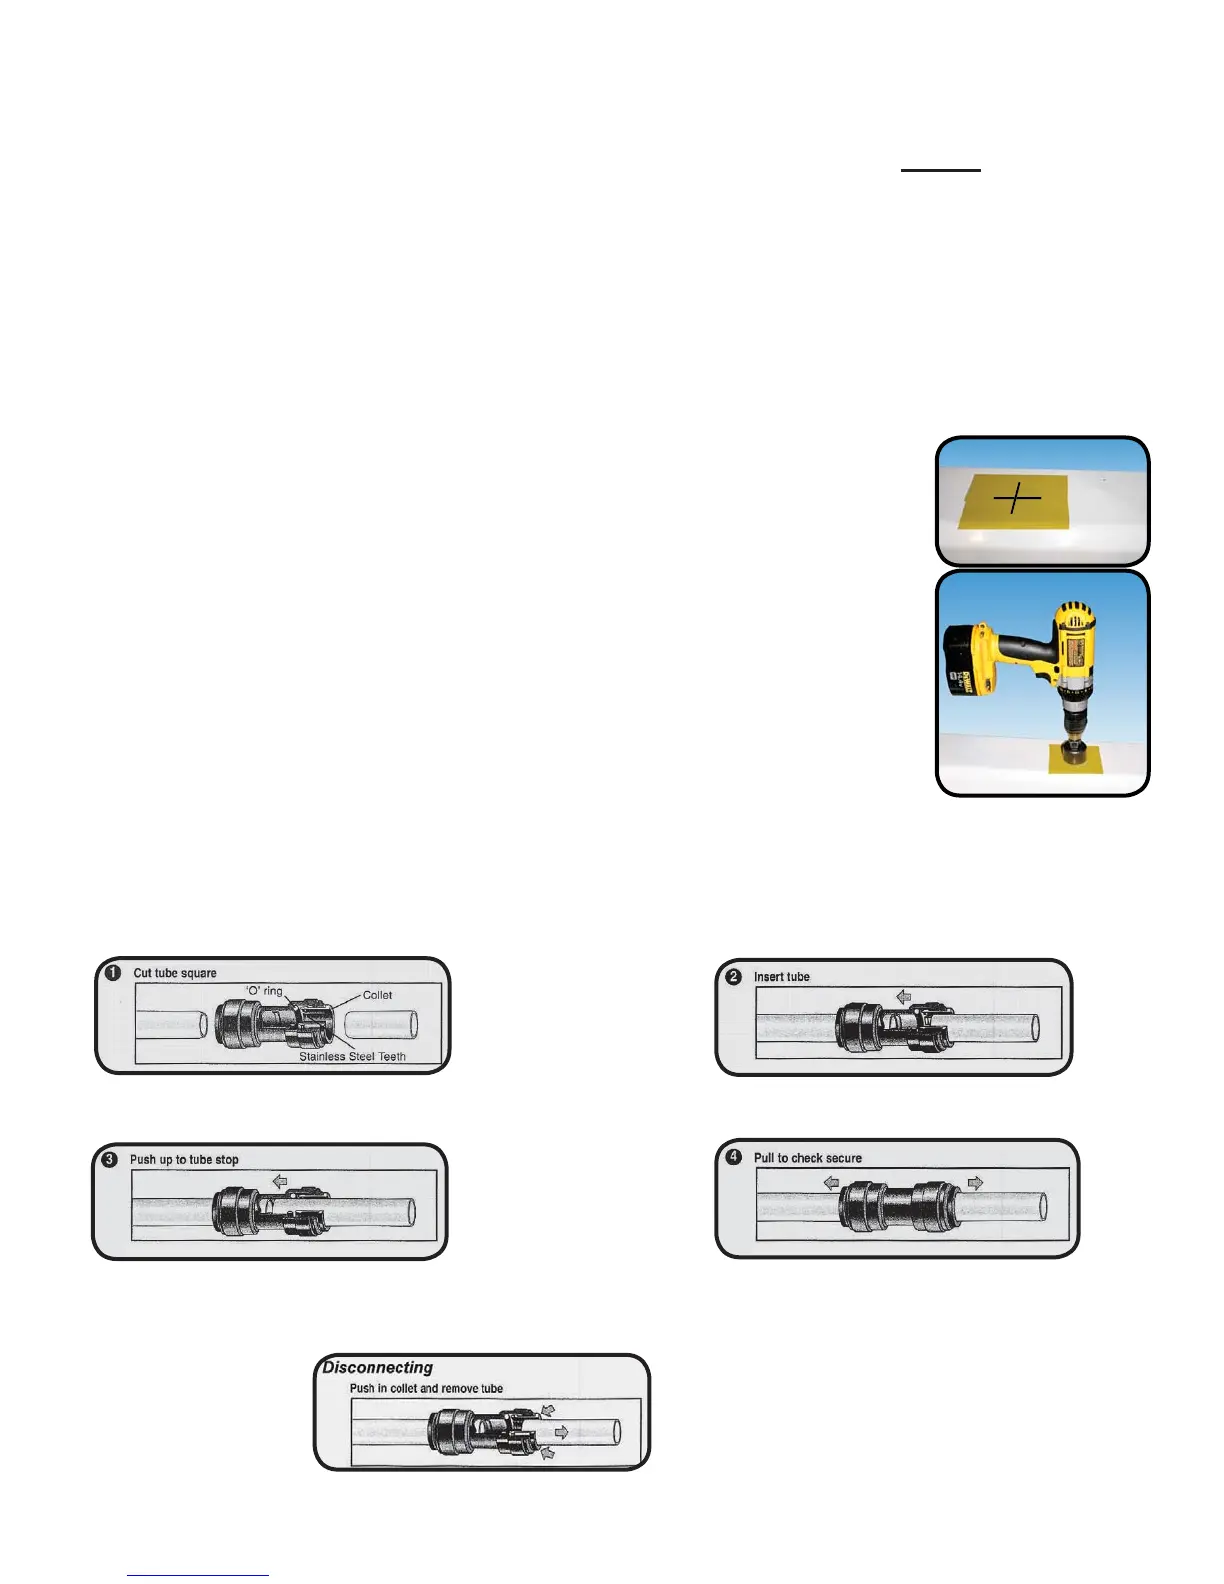
'HWHUPLQHGHVLUHGORFDWLRQIRUWKH52IDXFHWRQ\RXUVLQNDQGSODFH
a piece of masking tape over where the hole is to be drilled. Mark the
center of the hole on the tape.
Step 1
8VLQJDYDULDEOHVSHHGGULOOVHWRQWKHVORZHVWVSHHGGULOOD³SLORW
hole through both porcelain and metal casing of sink at the marked
FHQWHURIWKHGHVLUHGORFDWLRQ8VHOXEULFDWLQJRLORUOLTXLGVRDSWRNHHS
WKHGULOOELWFRRO,IGULOOELWJHWVKRWLWPD\FDXVHWKHSRUFHODLQWRFUDFN
or chip).
8VLQJD
¼´GLDPRQGWLSKROHVDZSURFHHGWRGULOOWKHODUJHKROH.HHS
drill speed on the slowest speed and use lubricating oil or liquid soap
to keep the hole saw cool during cutting.
6WHS
Counter Top / Porcelain & Stainless Steel Sink
Note:
Most sinks are pre drilled with 1 ¼” diameter hole that you can use for your RO faucet.
(If you are already using it for a sprayer or soap dispenser, see step 1)
Porcelain sinks are extremely hard and can crack or chip easily.
Use extreme caution when drilling. Watts accepts no responsibility for
damage resulting from the installation of faucet. Diamond tip bit recommended.
Marble Counter-top
:HUHFRPPHQGFRQWDFWLQJDTXDOL¿HGFRQWUDFWRUIRUGULOOLQJDKROHLQDmarble counter-top.
Drill a Hole for the Reverse Osmosis Faucet
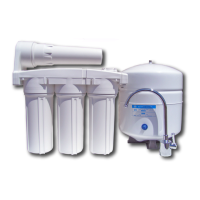
How to use the Quick Connect Fittings
7RPDNHDFRQQHFWLRQWKHWXEHLVVLPSO\SXVKHGLQWRWKH¿WWLQJ7KHXQLTXHORFNLQJV\VWHPKROGVWKHWXEH¿UPO\LQSODFH
ZLWKRXWGHIRUPLQJLWRUUHVWULFWLQJÀRZ8VHWKHVWHSVEHORZLQUHIHUHQFHWRDQ\TXLFNFRQQHFWWXEHFRQQHFWLRQV
,WLVHVVHQWLDOWKDWWKHRXWVLGHGLDPHWHUEHIUHHRIVFRUH
marks and that burrs and sharp edges be removed before
LQVHUWLQJLQWR¿WWLQJ
)LWWLQJ JULSV EHIRUH LW VHDOV (QVXUH WXEH LV SXVKHG LQWR
the tube stop.
3XVKWKHWXEHLQWRWKH¿WWLQJWRWKHWXEHVWRS7KHFROOHW
(gripper) has stainless steel teeth which hold the tube
¿UPO\LQSRVLWLRQZKLOHWKH2ULQJSURYLGHVDSHUPDQHQW
leak proof seal.
3XOORQWKHWXEHWRFKHFNWKDWLWLVVHFXUH,WLVDJRRGSUDFWLFH
WRWHVWWKHV\VWHPSULRUWROHDYLQJVLWHDQGRUEHIRUHXVH
To disconnect, ensure the system is
depressurized before removing the tube. Push in the col-
OHFW VTXDUHO\ DJDLQVW IDFH RI ¿WWLQJ :LWK WKH FROOHW KHOG
LQWKLVSRVLWLRQWKHWXEHFDQEHUHPRYHG7KH¿WWLQJFDQ
then be reused.