7
2 Hookup
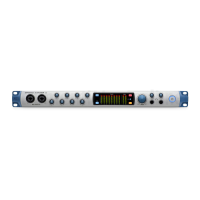
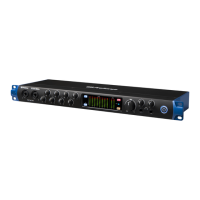
2.2 Back Panel Connections
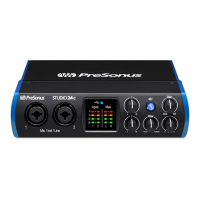
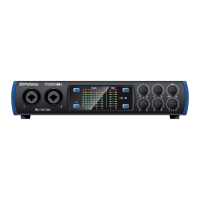
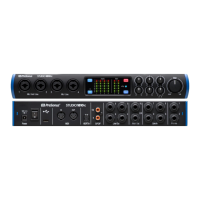
STUDIO26c and STUDIO68c
Owner’s Manual
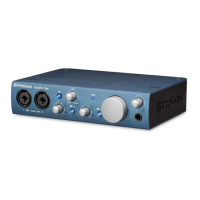
MIDI and S/PDIF Breakout-Cable Connector (STUDIO68c). This is where you
connect the breakout cable for the MIDI and S/PDIF I/O.
• MIDI stands for “Musical Instrument Digital Interface.” However, MIDI
can be used for many things other than instruments and sequencing.
The MIDI inputs and outputs allow connection to a variety of MIDI-
equipped hardware, such as keyboard controllers, and can be used
to send and receive MIDI Machine Control and MIDI Time Code.
Note: MIDI does not carry audio signals but is frequently used to trigger or control an
audio source, such as a virtual instrument or hardware synthesizer. You should
ensure that MIDI data is correctly sent and received by the appropriate hardware or
software. You may also need to route hardware sound sources’ audio to the inputs of
your Studio-series interface. Please consult the User’s Manual of your MIDI devices for
help with MIDI setup and usage.
• The S/PDIF standard allows transmission of 2 channels of up to 24-bit,
96 kHz audio. The S/PDIF I/O also allows your STUDIO68c interface
to send and receive word clock to external digital devices.
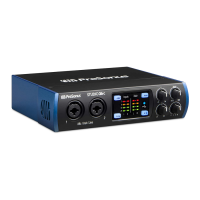
MIDI I/O (STUDIO26c). This is the MIDI input and output connections.
• MIDI stands for “Musical Instrument Digital Interface.” However, MIDI
can be used for many things other than instruments and sequencing.
The MIDI inputs and outputs allow connection to a variety of MIDI-
equipped hardware, such as keyboard controllers, and can be used
to send and receive MIDI Machine Control and MIDI Time Code.
Note: MIDI does not carry audio signals but is frequently used to trigger or control an
audio source, such as a virtual instrument or hardware synthesizer. You should
ensure that MIDI data is correctly sent and received by the appropriate hardware or
software. You may also need to route hardware sound sources’ audio to the inputs of
your Studio-series interface. Please consult the User’s Manual of your MIDI devices for
help with MIDI setup and usage.
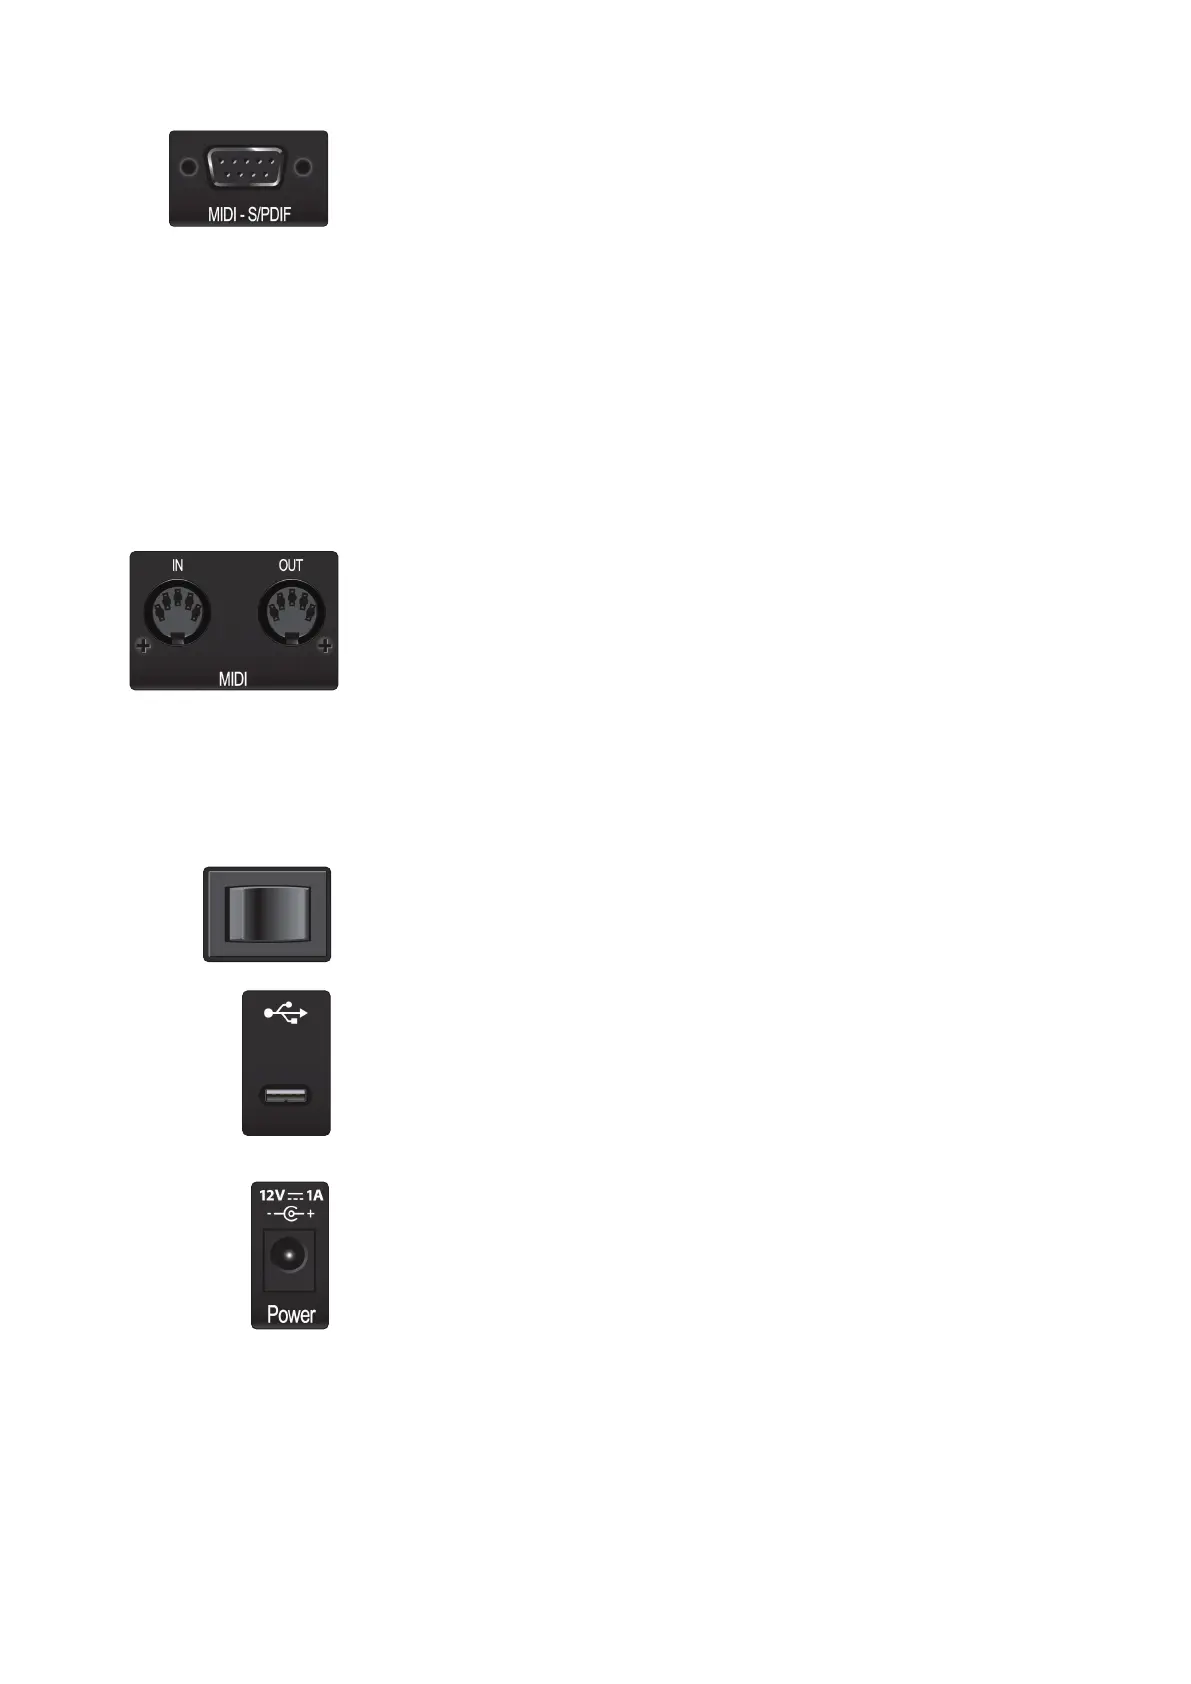
Power Switch (STUDIO68c). This is the power switch for your STUDIO68c.
USB-C Port. Use this port to connect your STUDIO26c or 68c to your computer. While
the STUDIO26c and 68c connect using USB-C, both are fully compatible with USB 2.0
and 3.0 connections. Use the USB-C to A cable that came with your interface if your
computer has a USB-A connection rather than a USB-C connection.
Please note: Studio-series interfaces are backward compatible with USB 2.0 and USB 3.0
speed connections. USB 1.1 is not supported. STUDIO26c interfaces can be bus powered
via USB-C or USB-A connections.
Power Connection (STUDIO68c). This is where you connect the included 12V
external power supply.