A B C D E
Installation Instructions
UNPACKING THE APPLIANCE
Re m o ve all packaging befo re use and check to make sure that the appliance is in perfe c t
c o n d ition. If you have any doubts do not use the appliance and call your suppli e r.
Some parts on the appliance are protected by a plastic film. This protective film
must be removed before the appliance is used. We recommend carefully slitting
the plastic film along the edges with a sharp knife or pin.
The packaging materials should carefully discarded and not left within easy reach
of children as they are a potential safety hazard.
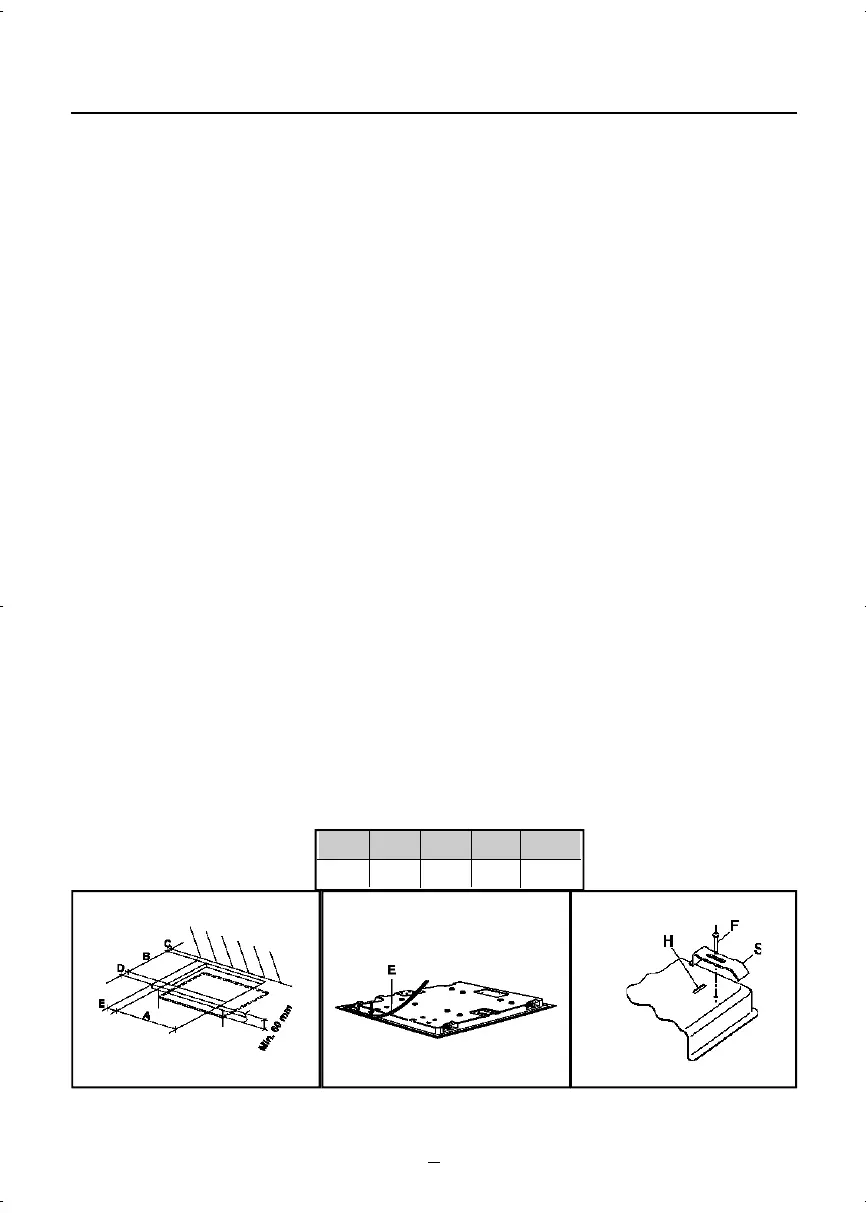
INSTALLING AND FIXING THE HOB
Your hob can be fitted to any worktop with a thickness of 30 to 40 mm.
No overhanging surface or cooker hood should be closer to the hotplate than 750 mm (29
1/2"). Fix in position in acc o rdance with fig. 9.
If fitting a 600 mm bridging unit above the hob unit, the sides of adjacent cabinets may be
lower than 750 mm, down to 336 mm depending on the cabinets fitted, provided that they
a r e resistant to heat and steam.
The hob has a special seal which pre vents liquid from entering the cabinet. Fo l low these
instructions in order to corre c tly apply this seal:
- detach the seals from their backing, checking that the tra n s p a rent protection still adhere s
to the seal it s e lf.
- Turn over the hob and corre c t ly position seal “E” (fig. 5) under the edge of the hob it s e lf,
so that the outer part of the seal it s e lf perfe c tly matches the outer edge of the hob. The
ends of the strips must fit together without ove r l a p p i n g .
- E v enly and securely fix the seal to the hob, pressing it firmly in place.
- Re m o ve the strip of pro t e c t i v e paper from the seal. Insert the hooks “S” into their re l a t i v e
housings “H” on the hob and place into the pre p a red hole in the cabinet. Lock in place wit h
the re l a t i v e fixing screws “F” (see fig. 6).
6
FIG. 4 FIG. 5 FIG. 6
553 473 6 7. 5 59.5 175 min.
Zepa GH60.qxd 19/9/07 8:55 Page 8