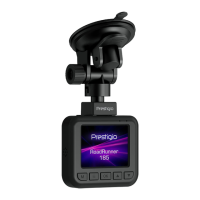
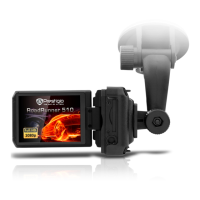
The Prestigio RoadRunner 185 is a compact digital video recorder (DVR) designed to capture video footage in Full HD resolution, ensuring realistic color reproduction and maximum image clarity. This allows users to clearly see license plates, even when the vehicle is in motion, and provides a valuable tool for resolving disputes on the road. The device features a compact LCD display, enabling convenient viewing of all recorded videos directly within the car.
One of the key usage features of the RoadRunner 185 is its quick-release magnetic mount with a power supply. This design allows for rapid installation and removal of the DVR in seconds, utilizing a micro-USB input for power. For enhanced flexibility, an additional attachment with 3M adhesive tape is included, offering an alternative mounting option. This is particularly convenient for users with multiple vehicles, as the DVR can be easily transferred between cars.
The device is engineered for high-quality recording at any time of day. It captures video at a resolution of 1920x1080 pixels at 30 frames per second, with a wide 140° viewing angle that covers up to five lanes of traffic. A dedicated night shooting mode ensures that emergency situations are recorded clearly, regardless of the time of day. The integrated IPS sensor further enhances image quality by delivering high-quality visuals with improved color reproduction, irrespective of the viewing angle.
A crucial safety feature is the G-sensor, which automatically detects shocks or sudden movements, such as those caused by a collision or emergency braking. When triggered, the G-sensor ensures that the video recording of the incident is automatically saved to a separate, protected folder, preventing it from being overwritten.
Before initial use, it is essential to fully charge the device's built-in battery. This typically takes at least 1.5 hours when charged from a car power source or at least 3 hours from a USB port on a computer. Charging commences automatically when the car's ignition is turned on, or when connected via a micro-USB cable (not included) to a power adapter or computer USB port providing 5V and at least 500mA. A red LED indicator signals charging, turning green when the device is fully charged. It's important to note that the built-in battery primarily serves to finalize the last video recording when external power is disconnected. If the device is not used for an extended period, it should be fully charged every two weeks to maintain battery health.
Installation of the DVR is straightforward. For the suction cup mount, align the bracket with the DVR body and slide it until the locking mechanism clicks into place. Choose a location on the windshield, ideally in the middle next to the rearview mirror, degrease the glass, remove the protective film from the suction cup, and press the mount firmly before lowering the latch. When using the 3M adhesive tape mount, select a suitable windshield location, degrease the glass, remove the protective film, and press the mount firmly. In both cases, route the power cable along the ceiling and front pillar of the car to avoid obstructing the driver's view and to ensure it does not interfere with airbag deployment or other vehicle systems. Finally, adjust the device's angle to achieve the best possible camera image. It's important to avoid placing the device on a windshield with excessively dense tinting, as this can compromise image quality. Temperature and humidity fluctuations may also cause the adhesive mount to detach from the glass.
To enable video recording, a micro-SD card (not included) must be installed. Ensure the card is correctly oriented and insert it into the slot until it clicks. The device automatically recognizes the card as a storage medium. It is recommended to use a micro-SD card with a read/write speed of at least 10 MB/s and a capacity between 8 GB and 32 GB. The memory card should only be installed when the device is powered off. For first-time use, the memory card must be formatted to FAT32. To remove the card, press it gently and then pull it out.
The DVR automatically powers on and begins cyclic video recording when connected to a car power source. When the engine is turned off, the device saves the last recorded file and shuts down, utilizing its built-in battery for an automatic shutdown delay (10/15/60 seconds, depending on settings). Manual recording can be started or stopped by pressing the [OK] button. To protect a currently recording file from being overwritten, press the [M] key.
The device offers various configurable settings. To access the settings menu, stop recording by pressing [OK], then press [=]. Navigate using the [▲]/[V] buttons and confirm selections with [OK]. Settings include:
- Resolution: Selects video recording quality (FHD/HD).
- Cyclic recording: Sets the duration of each video segment (1/3/5 min or off). When the card is full, unprotected older files are replaced.
- Motion sensor: Enables/disables automatic recording when motion is detected.
- Audio recording: Enables/disables simultaneous audio recording.
- Marks on the video: Displays date, time, brand, model, and license plate on the video.
- Date and time: Sets the correct date and time format.
- Automatic shutdown: Sets the time after which the device turns off after recording stops (1/3/5 min).
- Disabling the screen: Sets the time after which the screen turns off if inactive (30/60/120 sec).
- Beep: Turns button press sounds on/off.
- Volume: Adjusts playback sound level (low/medium/high).
- Selecting a language: Chooses the interface language.
- Update rate: Selects screen refresh rate (50/60 Hz).
- Turn off delay: Delays device shutdown to save video after parking/engine off (10/15/60 sec).
- G-sensor settings: Adjusts G-sensor sensitivity (high/medium/low).
- Parking mode: Enables/disables parking control via the G-sensor.
- Exposition: Adjusts exposure compensation (-3 to 3).
- Formatting: Deletes all files on the memory card.
- Reset Settings: Restores default system settings.
- Software version: Displays the device's software version.
- License plate: Allows entering the vehicle's license plate number.
File management includes viewing, deleting, and locking/unlocking files. To view files, stop recording, press [M], navigate with [▲]/[V], and press [OK] to play. To delete files, enter the main menu in playback mode, select the delete files option, and choose to delete the current or all files. To lock/unlock files, enter the main menu in playback mode, select the lock/unlock option, and use [▲]/[V]. The device can also function as a camera; stop recording, press [M] to switch to camera mode, and press [OK] to take a photo. A screenshot can be taken during video recording by pressing the [▲] button once.
To play files on a PC, connect the DVR to the computer using a USB cable with data transfer capabilities. After connecting, press the power button on the DVR. If recording has started, stop it with [OK]. The DVR will be recognized as an external hard drive, allowing file management via the computer. Disconnect the USB cable to complete the operation.
For maintenance, observe safe usage rules. Periodically clean the device of dirt and dust with a dry, soft cloth after turning it off. Regularly clean the camera lens. Any repairs should only be performed by authorized service centers. In case of warranty repair or replacement, contact the retailer with the receipt and the purchased device. Further information on replacement and repair can be found on the manufacturer's website. The service life of the device is two years.
The device and its accessories should be transported in their original packaging. At the end of its service life, the RoadRunner 185, along with its batteries and electrical/electronic accessories, must be disposed of separately from unsorted municipal waste, in accordance with WEEE regulations. Parts of unusable devices should be separated by material type for proper collection, recycling, and disposal to avoid environmental and health impacts. The device should be taken to a local recycling center, or handed over to a building/hardware store or the local department of the Ministry of Emergency Situations if a specialized facility is unavailable.