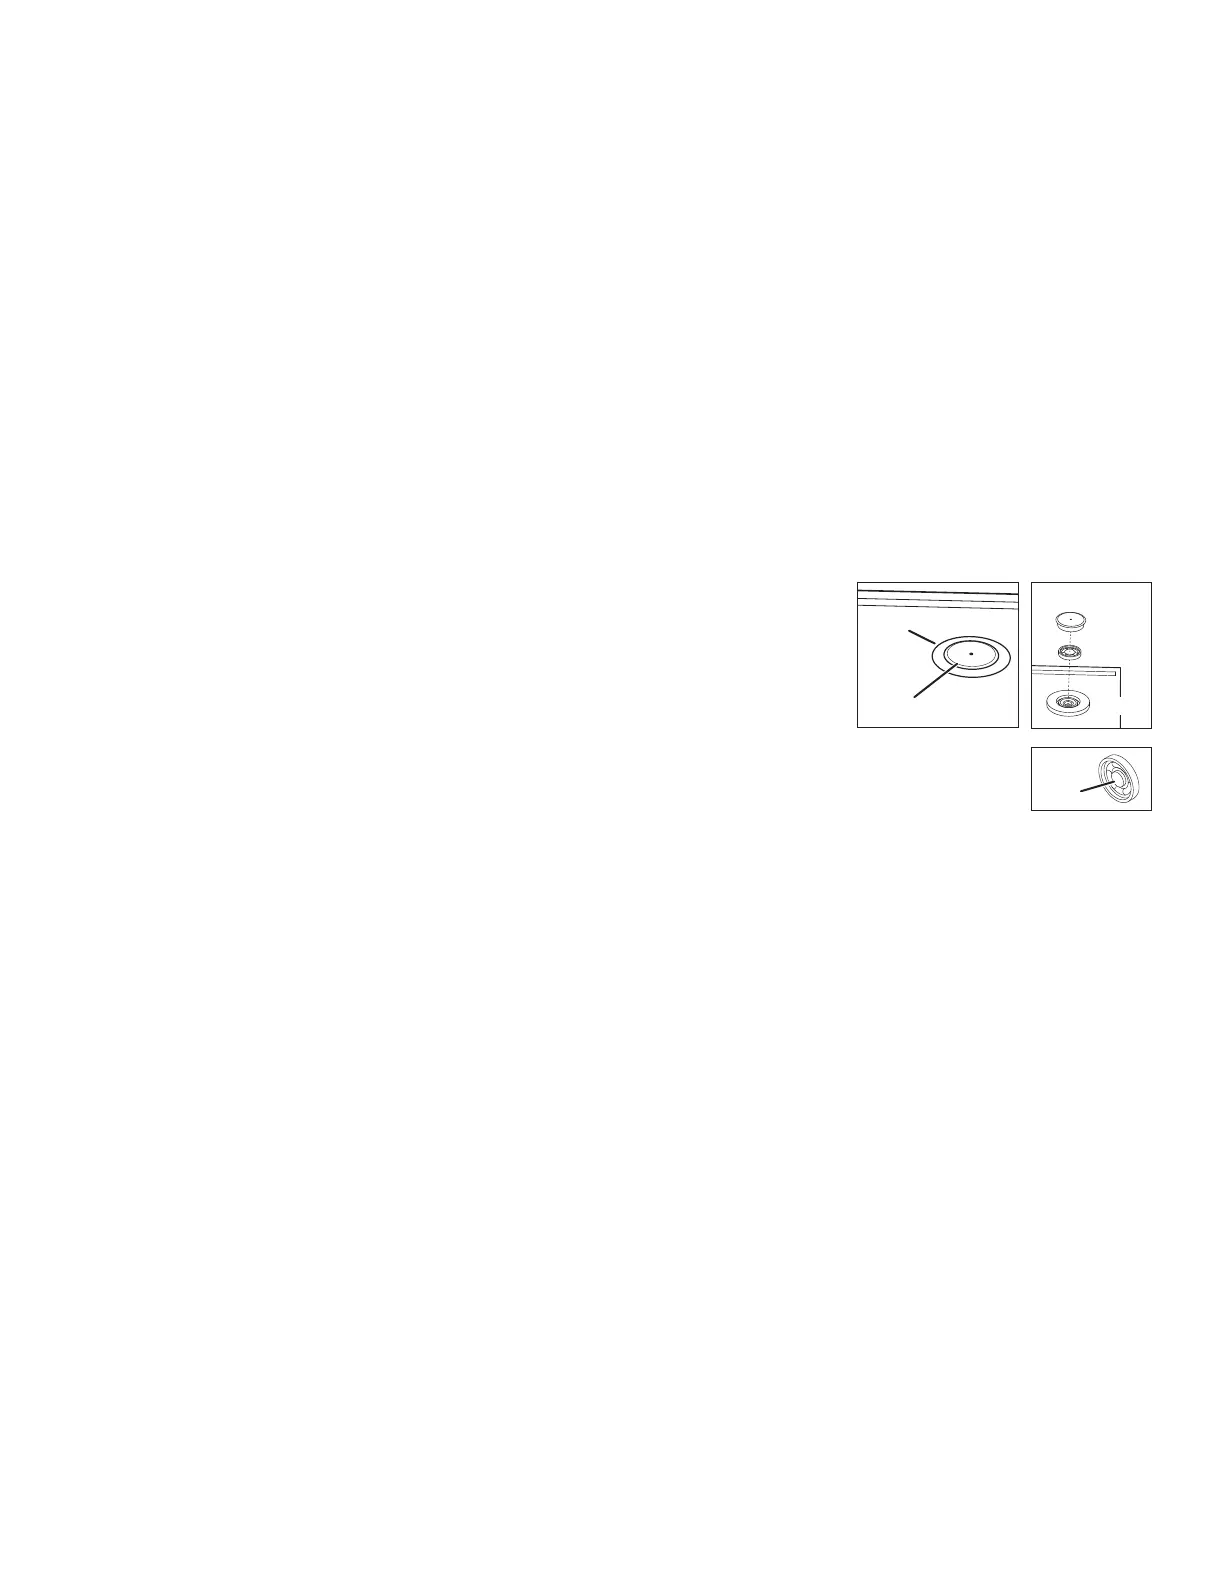
Port cover
Bag port
Gasket
nub
Port cover
Red gasket
Bag port
Fig. R
Fig. S
Fig. T
10
CARE AND CLEANING
1. Be sure the vacuum sealer is in the unlocked position and then unplug it from the wall outlet before cleaning.
2. The removable drip tray catches overflow liquids and needs to be cleaned regularly. Wash it in warm, soapy water. Rinse and dry.
3. Wipe the inside of the unit, including the sealing strip, sealing gaskets (upper and lower), and silicone contact bar with a damp, soapy
cloth. Dry thoroughly.
CAUTION! To prevent electrical shock and damage to the vacuum sealer, never immerse it in water or any other liquid.
If necessary, the lower sealing gasket and silicone contact bar (Fig. D, page 4) may be removed and cleaned in warm, soapy water.
Allow these parts to dry thoroughly before reinserting them into the unit. To reinsert the lower gasket, start by inserting one end into
the vacuum cavity. Gently press the gasket toward the other end, without stretching it, until it is fully installed.
NOTE: Replace the lower gasket if it is cracked or worn. Visit www.GoPresto.com or see the Consumer Service Information
(page 12).
4. Place the drip tray back in the unit after cleaning.
5. Gently wipe the outside of the unit with a damp cloth. If desired, remove the scale platform by turning it counterclockwise. Gently
clean the platform with a damp cloth. Do not immerse it in water.
NOTICE: To avoid scratches, do not use abrasive cleaners on the unit.
6. Always store the vacuum sealer in the unlocked position so the sealing gaskets are not compressed. This helps maintain the function
of the sealing gaskets.
Cleaning Zipper Bags with Ports
To clean the bag port, first remove the port cover on the outside of the bag (Fig. R). Insert your
fingernail between the port cover and the bag port to pry it off. Remove the cover and red gasket
(Fig. S).
Wash the bag port parts and bag in hot, soapy water. Do not wash in the dishwasher. After
washing, rinse and dry all parts thoroughly.
Reassemble the bag port by placing the red gasket, nub side down (Fig. T), in the port. Then snap
the port cover in place.
TROUBLESHOOTING
A. Why won’t the unit open or close when touching the open/close bar?
The unit is not plugged in. Be sure the cord is securely connected to the unit and the outlet. Also make sure there is power to the outlet.
B. I’m having trouble making a bag. Why won’t the end seal?
1. You may not have positioned the bag material so the entire open end is overlapping the brown sealing strip. Reposition (see Fig. G,
page 5) and try again.
2. You may not have fully closed the unit. Reposition the bag material. Hold it in place with one hand and manually close the unit with the
other hand. Then touch the open/close bar. The display should show the word CLOSE. If it says OPEN, touch the bar again and verify it
says CLOSE. Then press the SEAL button.
C. I’m having difficulty positioning and holding the bag with one hand. What can I do?
You can prop the lid open with the knuckles of both hands so you can use all of your fingers to position and smooth the bag material.
D. Nothing happens when I press the SEAL button. What am I doing wrong?
You are attempting to seal while the unit is in its smart protection mode. That mode prevents sealing during a 15-second cooling period
between each seal. The 15-second countdown appears on the display. Try again when zero is displayed. Note: The countdown will not appear
if the scale is in use.
E. Why won’t the bag contract around the food when I‘m vacuuming bags made from roll material?
1. You did not insert the open end of the bag in the vacuum cavity. Reposition (see Fig. J, page 6).
2. You may not have closed the vacuum sealer. See B2 above.
3. The vacuum tube may be connected to the port on the back of the unit when it shouldn’t be. Detach it and try again.
4. You may not have a good bottom seal. Reseal the bottom. See B1 above.
5. You may have overfilled the bag. Make sure to allow enough space between the items that are being sealed and the end of the bag.
6. The bag material itself may have pin holes or has been punctured. Discard the bag and make a new bag.
 Loading...