CANCEL
ADVANCE
CONTROL KNOB
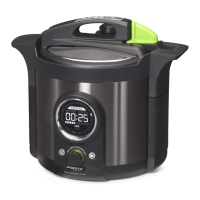
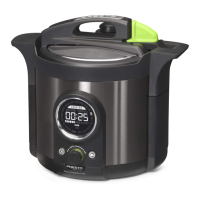
Fig. K
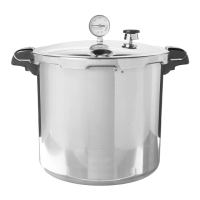
Fig. L
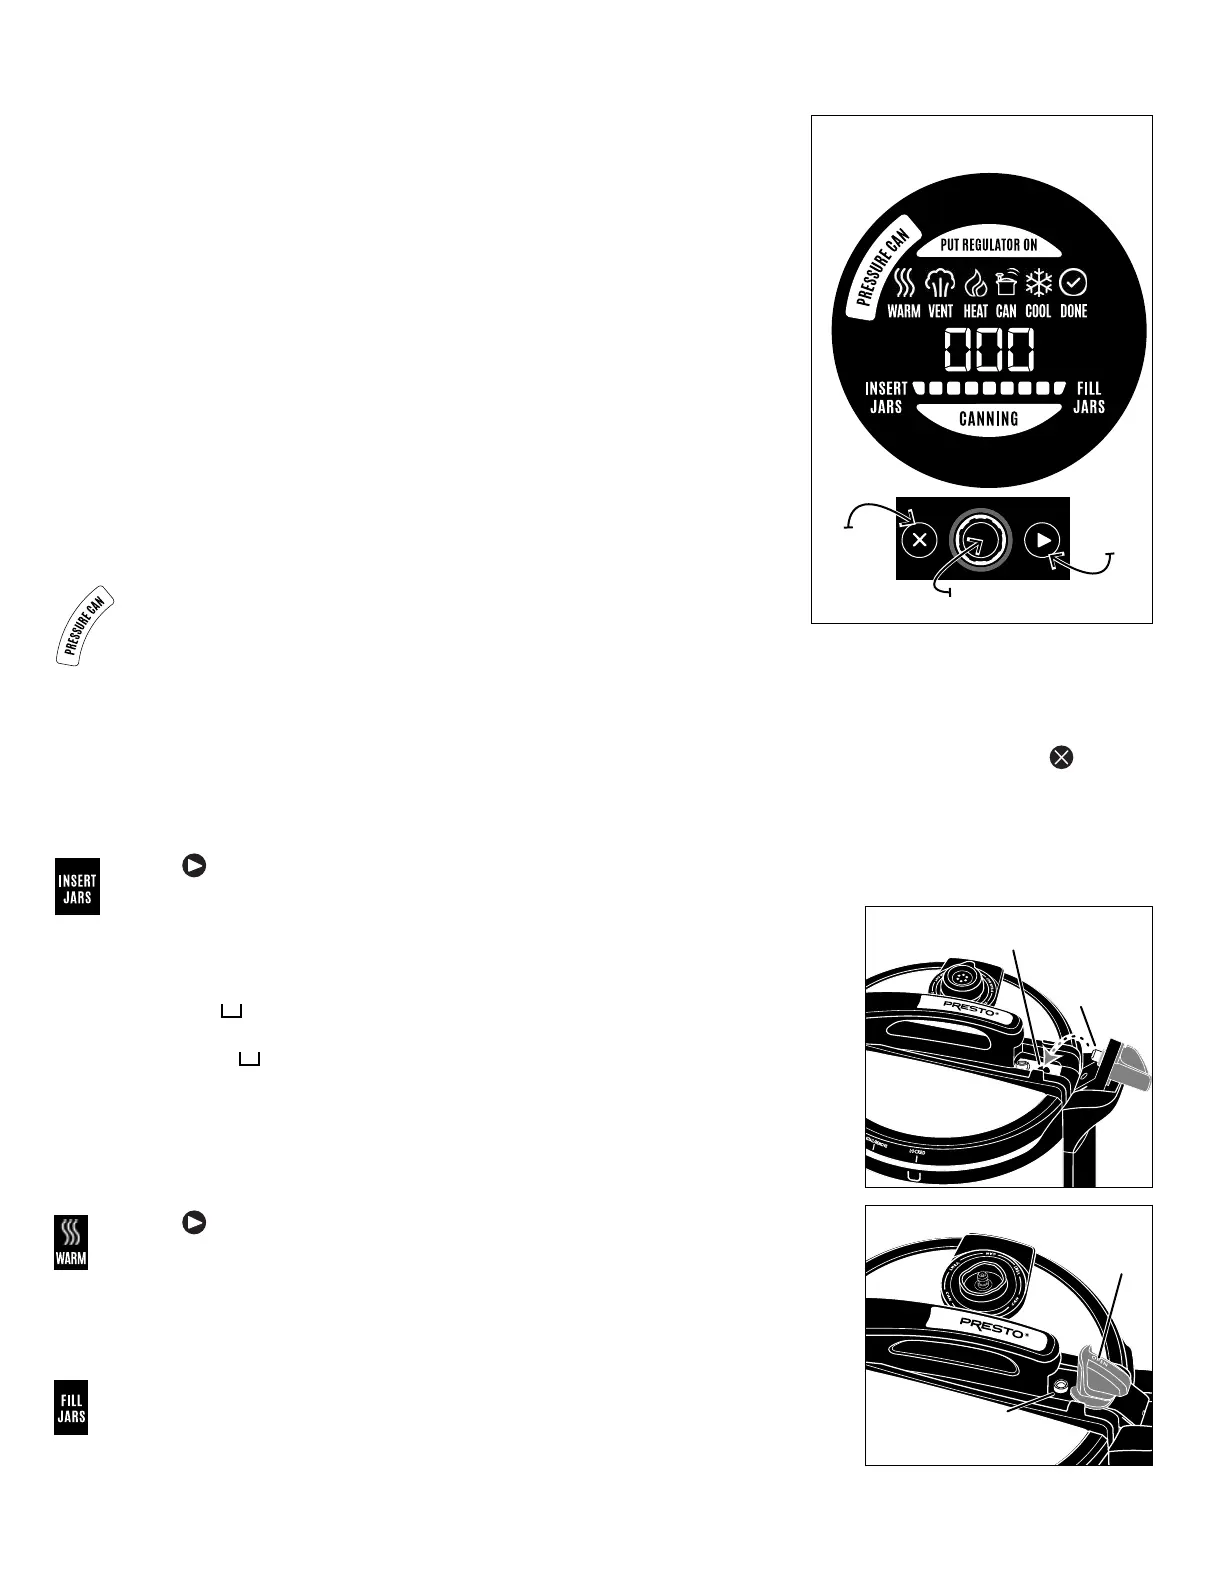
Sensor
Sensor hole
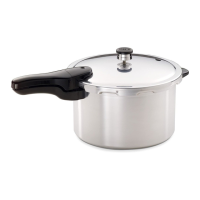
Green latch
aligned with
handle
Air vent/cover lock
in down position. No
pressure in unit.
Fig. M
Pressure Canning Display Icons
7
PRESSURE CANNING
I. GETTING READY
1. Complete the “Preparation Steps Before Canning” on page 6. Select canning
recipe (see pages 9 to 16) and gather needed supplies.
2. Begin preparing the food that will be used for lling the jars in step 11.
NOTE: Any food that is described in a recipe as “Hot Pack” should be freshly
prepared or, if made in advance, it should be reheated as instructed in the canning
recipe.
3. Place the removable pot in the canner body. Then pour water into the pot up to
the bottom ll line (Fig. A, page 3).
Tips: You may use hot tap water to shorten the time to heat the water. To prevent
water stains on jars, add 2 tablespoons of white vinegar to the water in the canner.
NOTE: 3 quarts of water are needed regardless of how many jars are being canned.
4. Place the canning rack in the pot.
NOTE: Jars will be placed on the rack in step 7. If set directly on the bottom of
the pot, jars may break.
5. Attach the power cord to the canner body, making sure to fully insert it in the
receptacle. Then plug into a 120VAC wall outlet. The default icon PRESSURE
CAN will ash in the display window (Fig. K). Press the control knob to select
the pressure can mode; the default time 0I0 (10 minutes) will light up. The
PRESSURE CAN icon will remain illuminated for the duration of the canning process.
6. Rotate the knob to adjust the time for the specic canning recipe and jar size being used. The time adjusts in 5-minute
increments up to 180 minutes. IMPORTANT: Verify you have set the right time and program.
NOTE: If the BOILING WATER CAN program is accidentally selected, or the wrong time is entered, press and hold for
3 seconds. The PRESSURE CAN icon will ash. Press the control knob and repeat step 6.
II. JAR WARMING
7. Press . INSERT JARS will light up. Fill the jars half full with water and place them on the canner rack.
Tip: Use hot tap water to speed the warming process.
8. REMOVE THE REGULATOR by pulling it rmly from the canner cover. It will
not be needed until step 14 of the venting phase.
9. Place the cover on the canner body, aligning the INSTALL/REMOVE vertical mark
within the mark on the canner body (Fig. D, page 3). Rotate the cover clockwise
until it stops. The canner cover is properly installed when the LOCKED vertical mark
is within the mark on the canner body (Fig. L).
Lock the cover on by rst lowering the temperature sensor arm and inserting the
sensor into its hole in the cover (Fig. L). It may be necessary to rotate the cover
slightly so the hole aligns with the sensor. Then, grasp the green latch and, using a
slight downward pressure, turn the latch clockwise until it is aligned with the handle
(Fig. M).
10. Press . WARM will light up and the progress bar will begin scrolling from left to
right, indicating the unit is heating.
Jar warming will take about 20 minutes. During this time, complete any necessary
food preparation.
III. FILL JARS
11. When the canner beeps twice and FILL JARS lights up, the jars are preheated and
ready for lling. The canner will continue to keep the jars warm until you are ready to
ll them. Unlock the green latch and lift the sensor arm. Then unlock and remove
the
canner cover. Lift the cover toward you to keep any steam away from you.