11
Your chair may require some assembly before initial use. It may also require disassembly to make servicing
the chair more convenient. If your chair is a Knock-Down (KD) model, follow the instructions in “Chair Back
Assembly.”
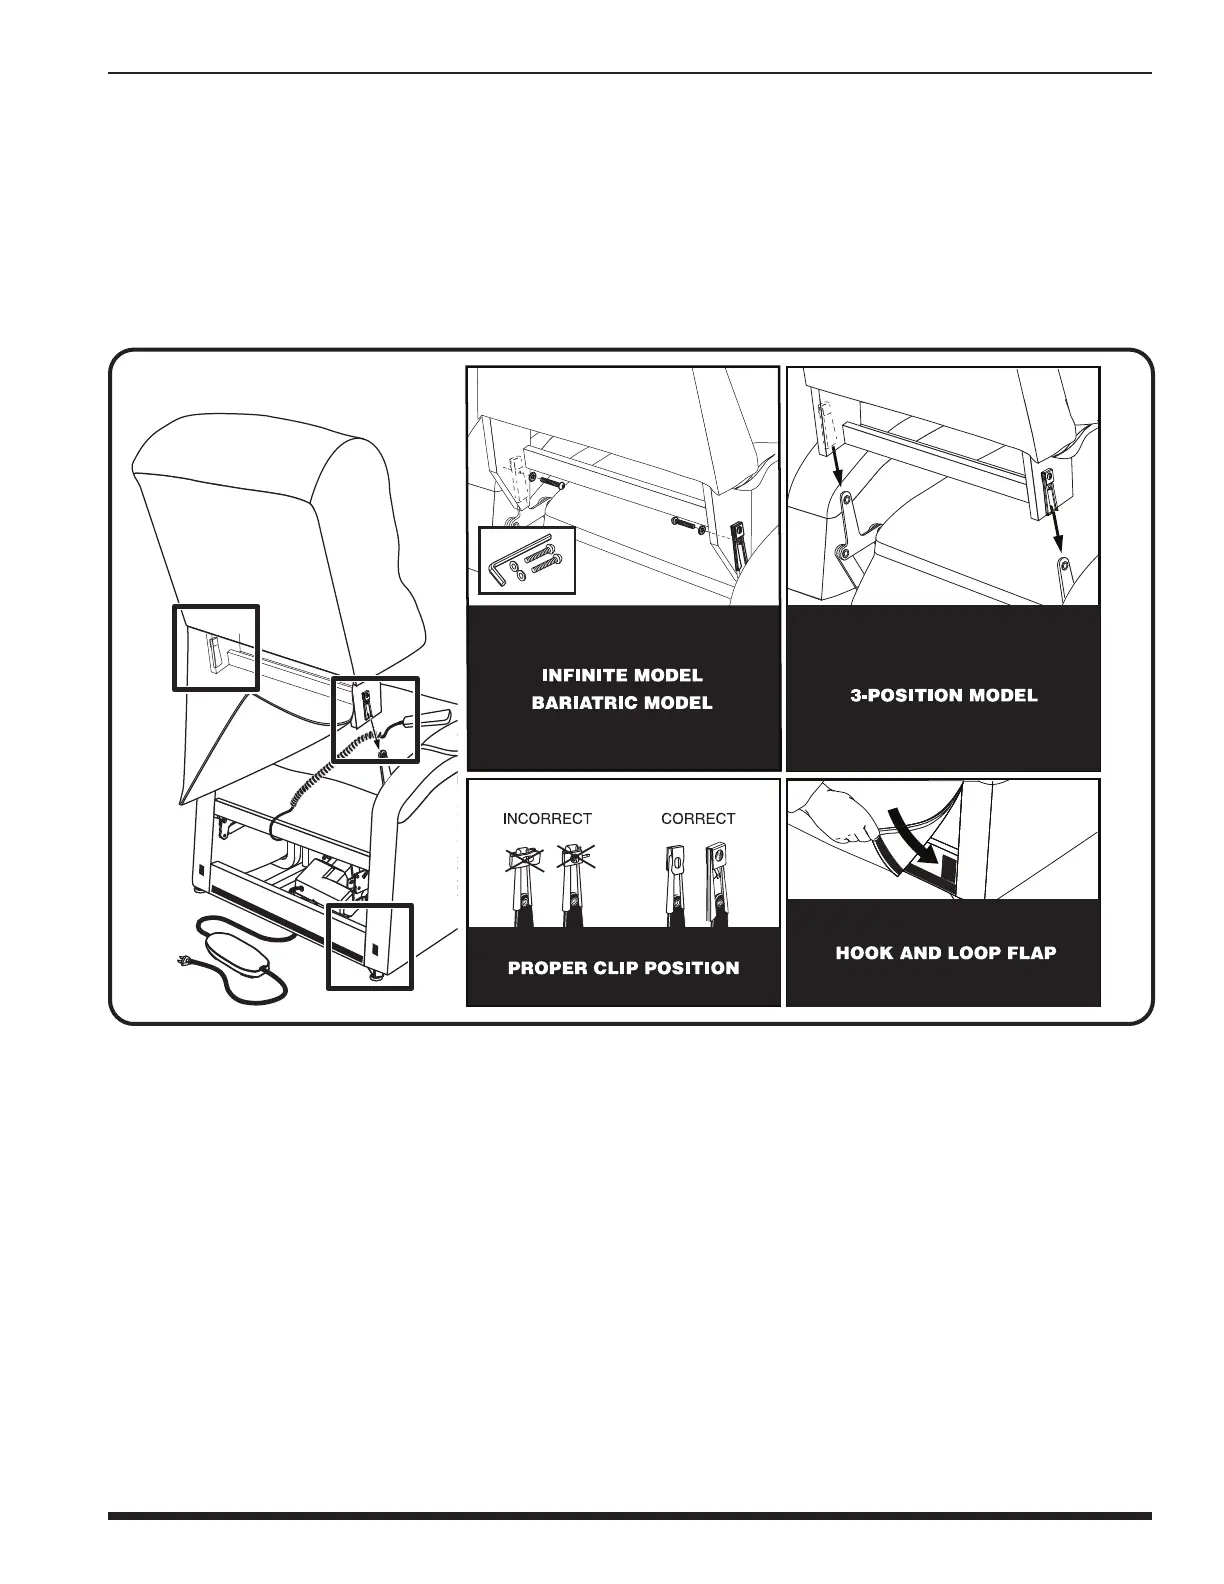
CHAIR BACK ASSEMBLY
NOTE: If your chair is an Innite model, refer to the assembly instructions provided with
the chair. For the 2-position model, the KD sleeves are located on the inside as shown
in gure 4.1.
Figure 4.1 Chair Assembly
1. Check that the locking clip on the back of the chair is in the vertical position. Reposition if necessary.
2. Drape the hand control and cable over the chair base, then slide the back onto the base. Ensure the hand
control cable is routed through the rear of the chair.
NOTE: Depending on chair width, you may need to slide on one side of the back at a
time. If this is the case, level the chair-back before pressing down to lock into position.
3. Push firmly on the top of the back to lock into position. You must hear a click from each side of the chair
to ensure the back is locked in properly.
IV. ASSEMBLY/DISASSEMBLY