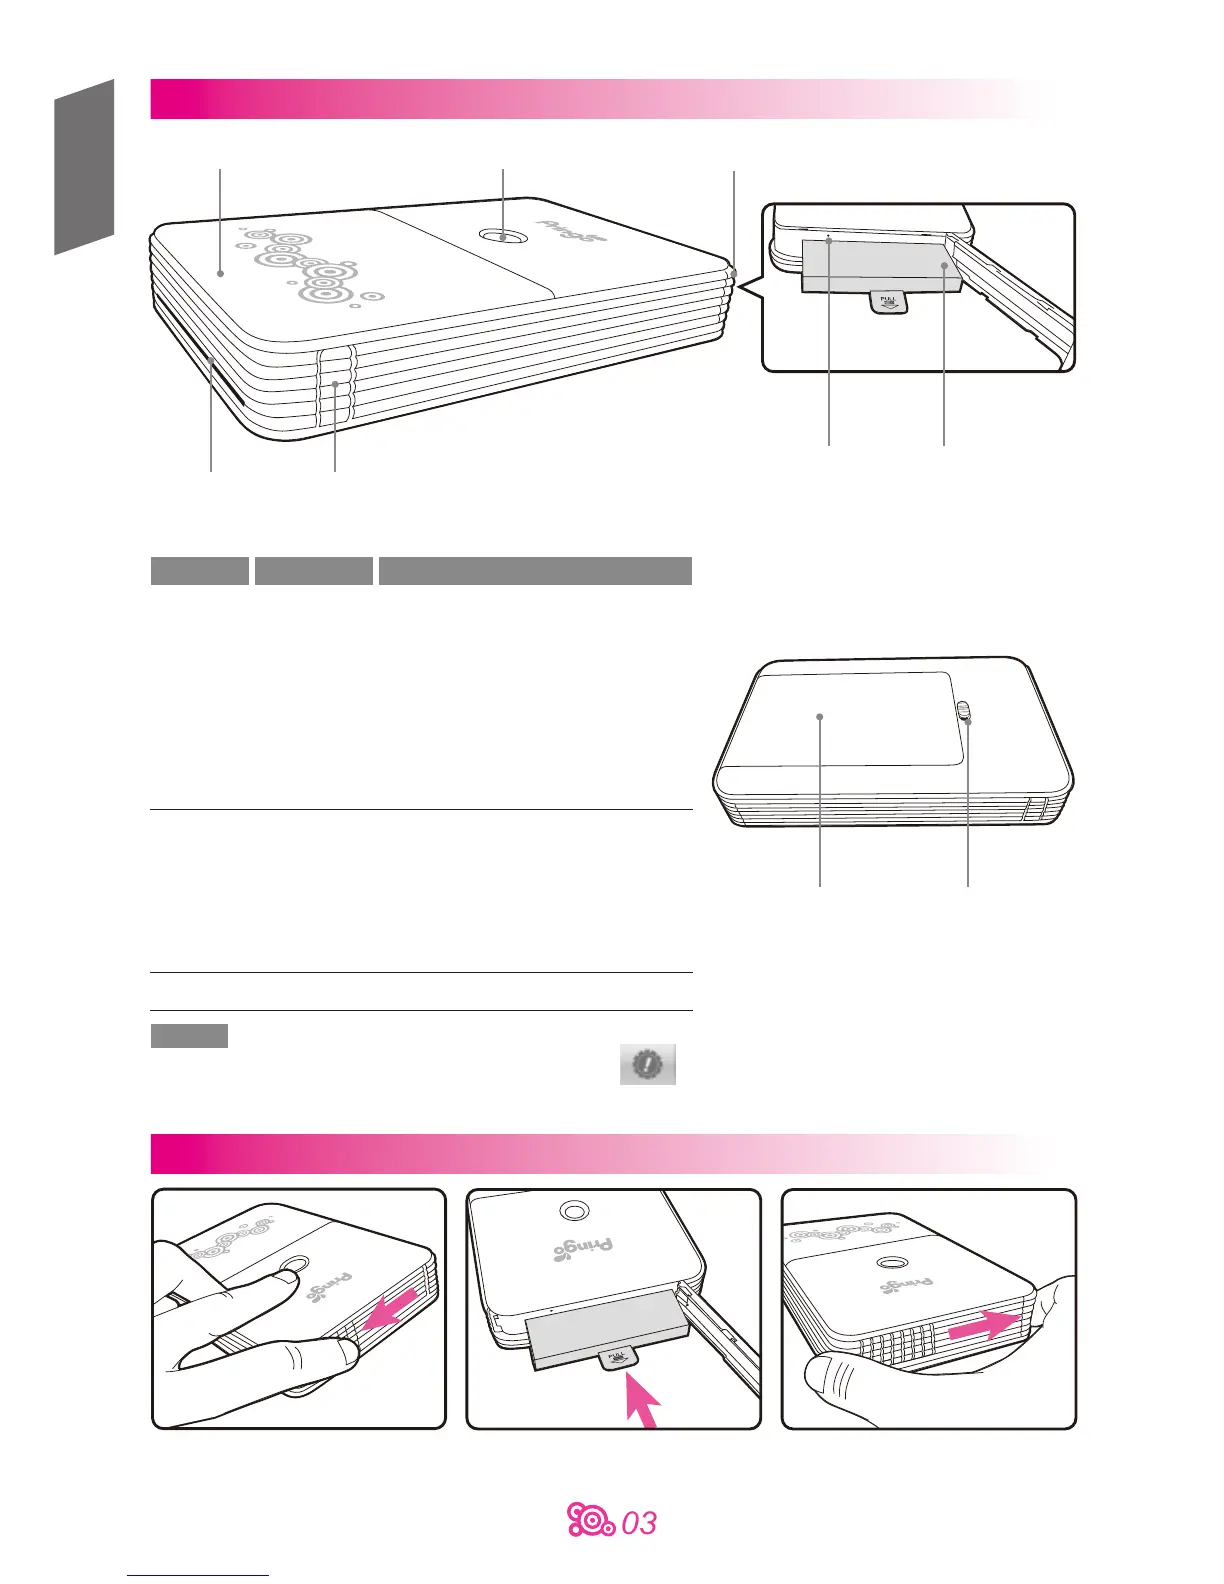
Component Guide
1. Open the battery door
2. Insert the battery into the battery
slot with label facing down
3. Close the battery door
Photo exit slot
Ribbon door
Ribbon door latch
Power button Battery door
WiFi reset button Battery slot
Power button LED
Color Action Message
Solid Ready for printing
Quick blink Receiving data /
Firmware updating
*Do not turn off the
White printer or remove the battery
Slow blink Printing in progress
Blink x1 Ribbon missing/
Ribbon door open
Blink x3 Ribbon out
Blink x4 Paper out
Red Blink x5 Paper jammed/
Ribbon jammed
Blink x13 Unable to update firmware
Orange Solid Low battery
Note
LED shows the status of the printer. You may also tap in the App to check for printer status and basic
troubleshooting instructions.
For complete instructions, please refer to the section “troubleshooting” on P. 8.
Paper door Paper door latch
Installing the battery
English