The kite is already set up with lines and control bar pre-attached. First unfold the
sail and lay the kite on the ground so that the bridle lines are facing up and air in-
takes are facing away from the wind. If necessary weigh the trailing edge down
with some sand or sand bags in order to keep in it place. Carefully separate the
bridle lines and lay the main bridles and the brake bridles in the direction of the
wind, making sure there are no tangles. Hold the control bar at the middle and
unwind the lines as you walk directly upwind. When the lines are fully unwound
make sure that all four are parallel and untwisted. The red line and red side of
the bar should be on the right.
Attach the Velcro safety strap to one wrist and be sure it’s not tangled around
your flying lines.
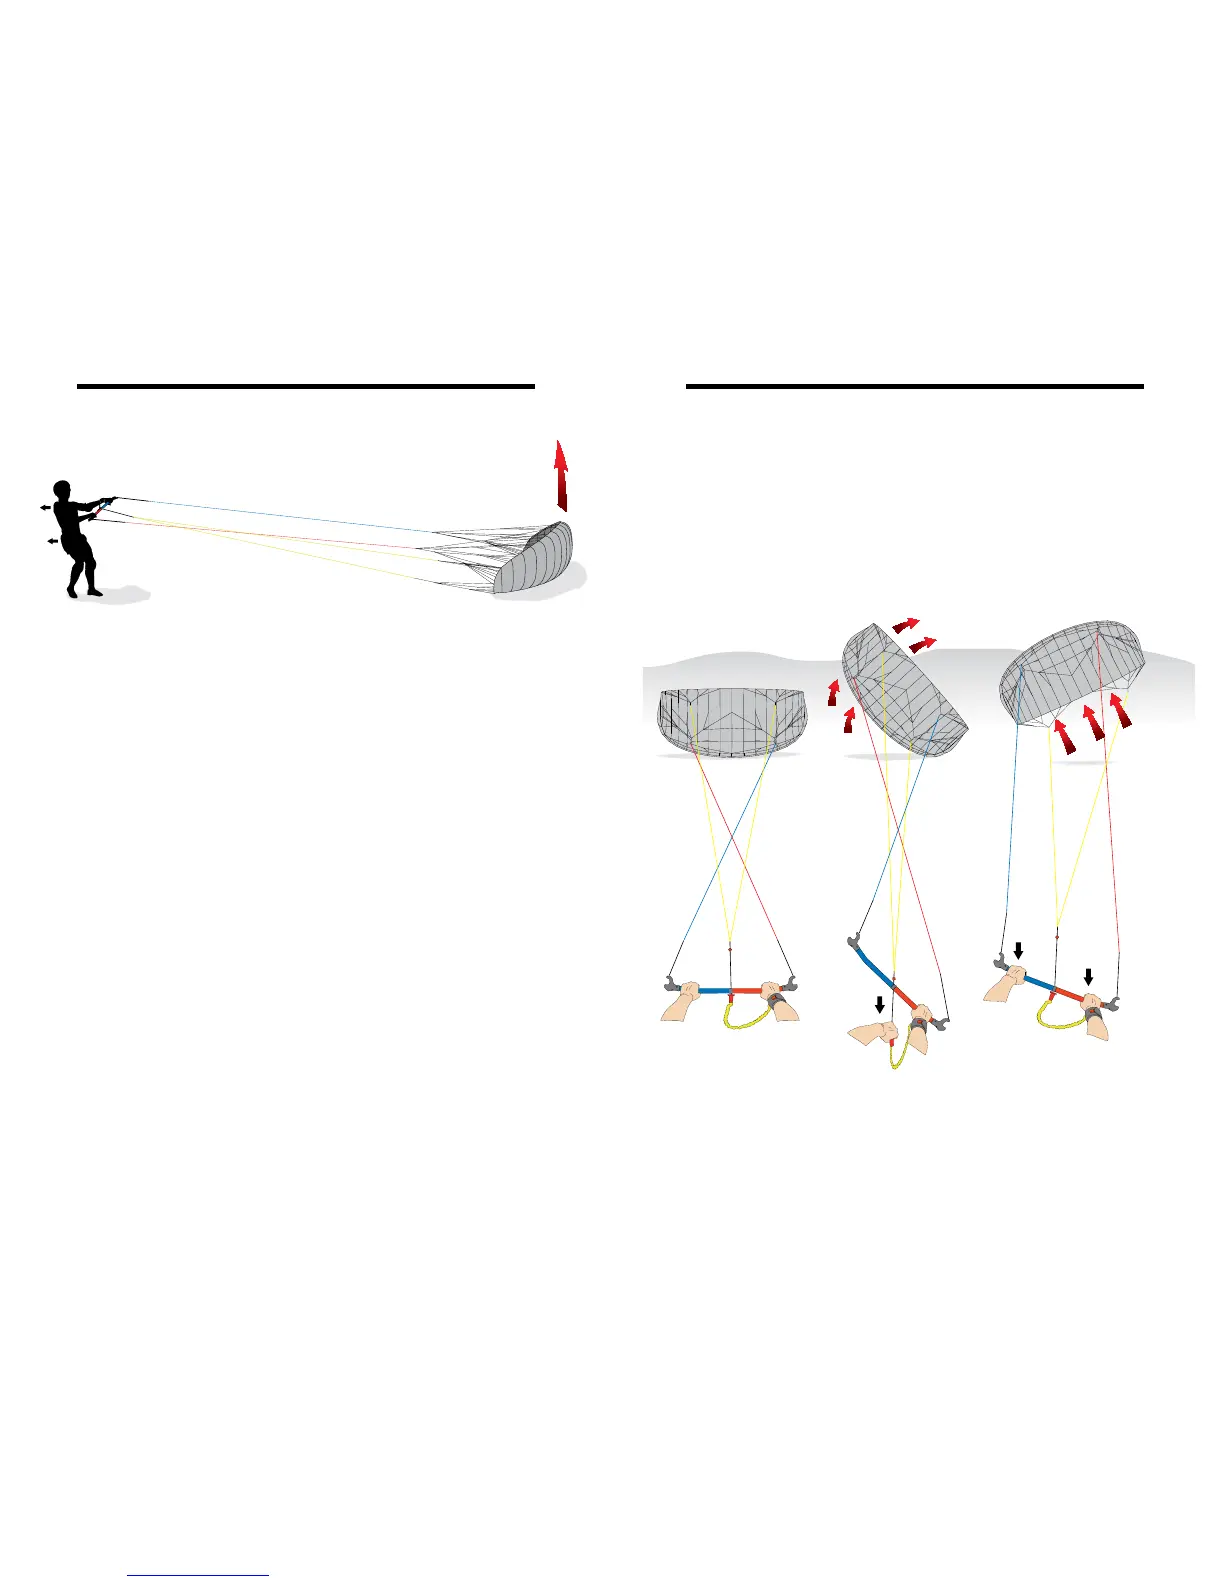
Control Bar Launch
The control bar should be held shoulder width apart with the right hand on the
red side and the left hand on the blue side
(see Fig. 7).
To launch, pull on the control bar evenly and take a few steps backwards. If the
wind is light, you may need to give the control bar one or more good pulls to
inflate the wing and achieve lift off. The kite will inflate and should accelerate
straight upward to the zenith. If the kite swerves to one side, correct its course
by steering with the bar as shown below.
Fig. 7: Launching with the Control Bar
CoNTRol BAR lAUNCH
Reverse Launch
If you land the kite on the ground with its leading edge down, you can launch it in
reverse by pulling on the center line
(see Fig. 8). This pulls in the brake lines and
causes the kite to lift off backwards. As it rises, pull one end of the bar to pivot it
in place, then let the center line go and steer it normally into the air.
Fig. 8: Reverse Launch with Bar
16 17