Setting the Remote for Time Delay Exposures
1. Setting your camera
a) Connect the remote to the camera and turn it ON.
b) Adjust the camera setting.
2. Setting the remote
a) Press the SET button (7). The SET icon on the Control Panel (17) will flash.
b) Adjust the following settings:
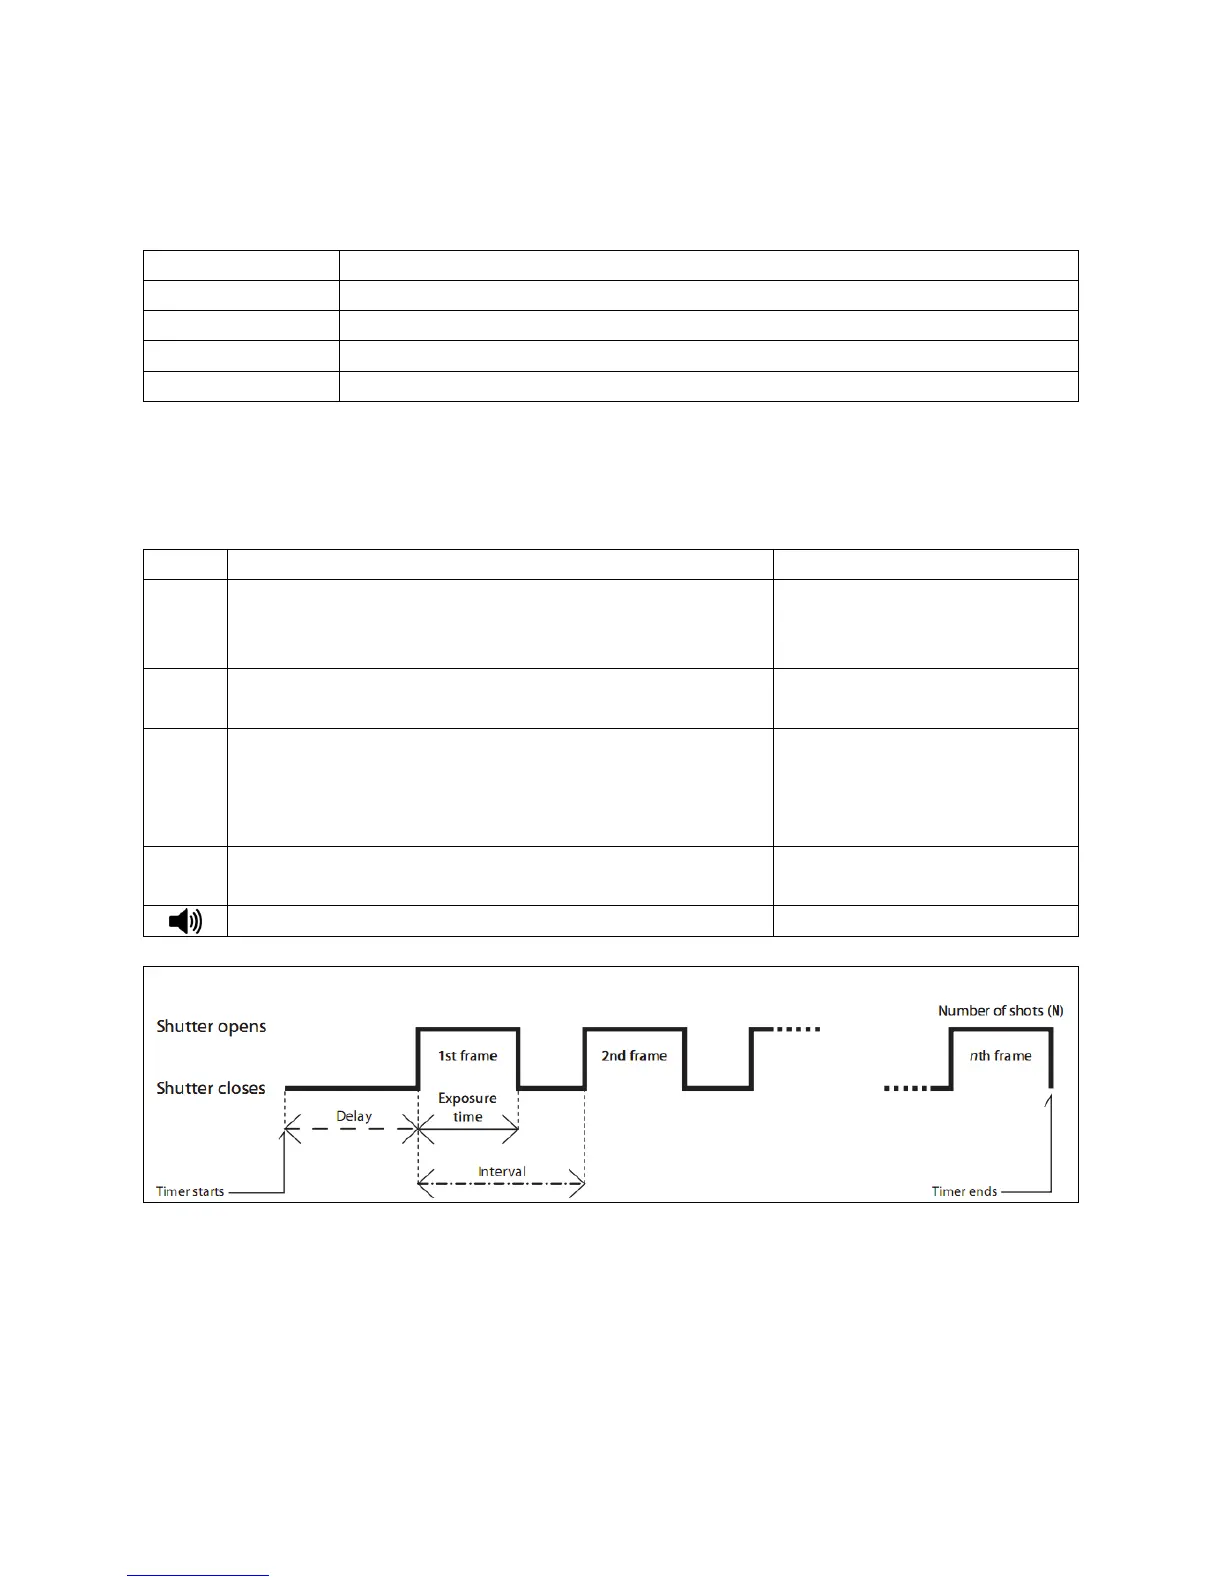
Just like the self-timer on your camera, the timer remote
switch allows you to set any delay (in 1 second increments)
up to 99 hours, 99 minutes and 99 seconds.
It allows you to take time exposures up to 100 hours in
length.
The Interval Timer can be set to any time period up to 100
hours. If you set it to 10 minutes, for example, one exposure
will be taken every 10 minutes until no available exposures
remain or until the Exposure Count limit has been reached.
This setting permits you to set the number of exposures that
will be taken, up to 999.
1 to 999 or -- (unlimited)
Delay (DE), Exposure/BULB (BU) and Interval Settings (INT)
IMPORTANT
Please ensure the interval time is longer than the exposure timer by at least 2 seconds.