8836363 40-TON HYDRAULIC SHOP PRESS V1.0
10 For technical questions call 1-800-665-8685
ASSEMBLY & INSTALLATION
Numbered references in parenthesis (#1) refer to the included
Parts List.
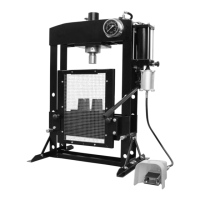
Use the exploded drawing as your guide to assemble. Lay out
all parts before beginning. You may need another person to assist
during assembly, as components like the ram are heavy.
1. Attach the two upper crossbeams (#30) to the left and
right posts (#5) using 4 bolts (#6), 4 lock washers (#8) and
4 nuts (#7) for each crossbeam. The bolts are inserted from
the post’s interior.
2. Attach one base section (#3) to the left post and lower cross
member (#14) using 2 bolts (#1), 2 washers (#17), 2 lock
washers (#16) and 2 nuts (#15). Attach the other base section
to the right post and lower cross member in the same way.
3. Attach two support bars to the left post’s second lowest
crosspiece with 2 bolts (#2), 2 washers (#17), 2 lock washers
(#16) and 2 nuts (#15).
4. Align the lower support bar bolt holes and outer base
section bolt holes. Secure the bottom of each support bar
with 2 bolts (#2), 2 washers (#17), 2 lock washers (#16) and 2
nuts (#15).
5. Repeat steps 3 and 4 on the right post.
6. Lift the press frame into an upright position. Insert one bed
frame pin (#13) into a set of holes in each post. Make sure
the pins are in the same set of holes on the left and right.
Place the bed frame (#21) into the press frame and onto
bed frame pins.
7. Secure a pull-rod (#19) to the bed frame on the left and
right with 4 bolts (#20). Pass a bolt through each bolt hole,
the handle hole and secure with a lock nut (#18). Repeat
with the other bolts.