39
ASSEMBLING THE STAND
Separate all parts from packing materials. Check each part with the
illustration on the next page and the “Table of Loose Parts” to make
certain all items are accounted for before discarding any packing
material.
If any part is missing or damaged, do not attempt to assemble the
table saw, plug in the power cord, or turn the switch ON until the
missing or damaged part is obtained and is installed correctly.
E 4 x Feet
F 2 x Top strengthening bracket, short
G 2 x Top strengthening bracket, long, with 2 fastening holes in
each for the tool
H 2 x Strengthening bracket, short
I 2 x Strengthening bracket, long
J 4 x Rubber feet
K 20 x Hexagonal screw
L 20 x Spring rings
M 20 x Hexagonal nuts
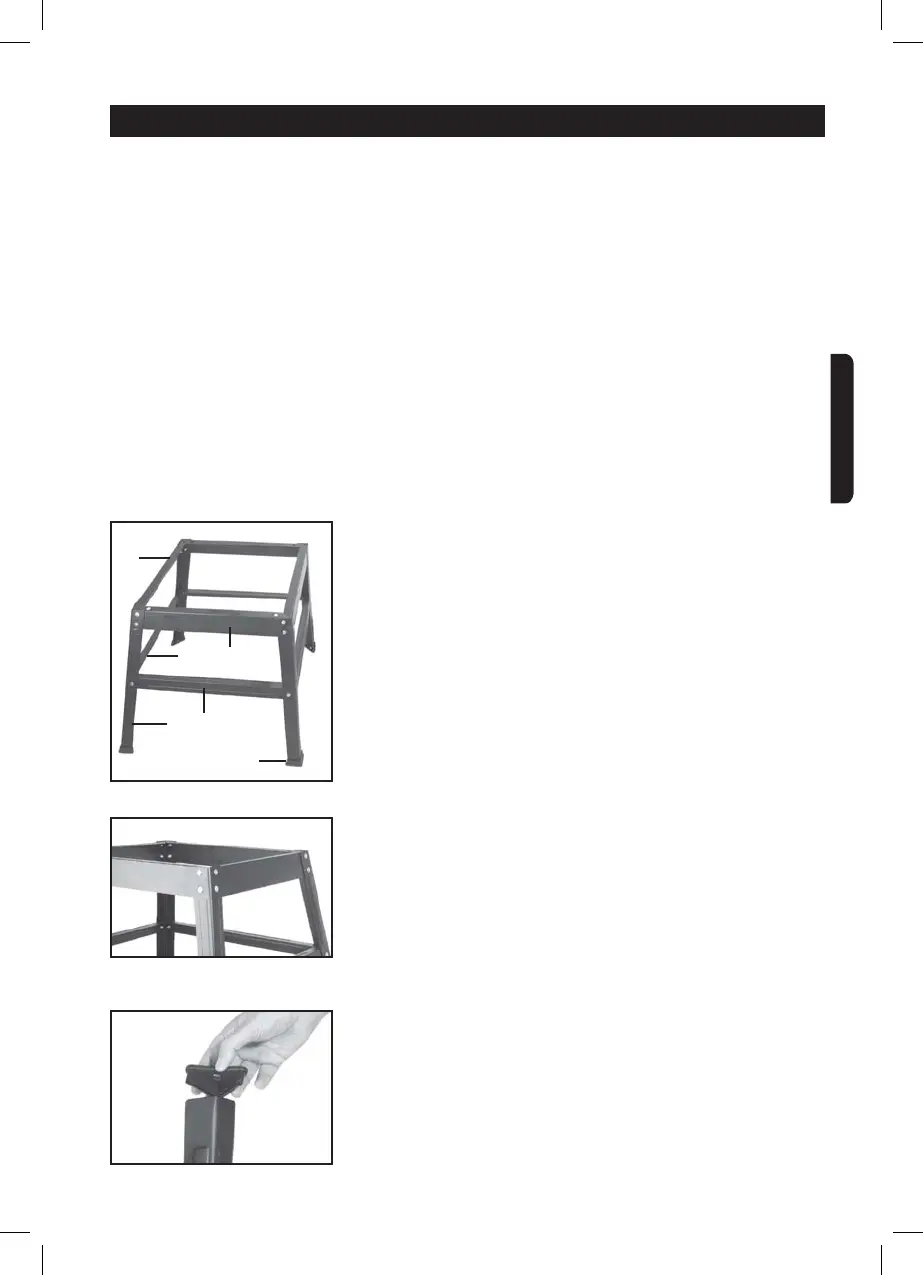
1. Screw the base frame together loosely. Place the feet (E) on the
outside and the strengthening brackets (F, G, H and I) on the
inside (Fig. 1).
2. Align the loosely assembled frame precisely with a spirit level
and tighten the internal hexagonal screws (K) with a hexagonal
wrench (Fig. 2).
3. Turn the base frame over and press the rubber feet (J) ¿UPO\ on
to the feet (E) (Fig. 3).
¿J
¿J
H
G
F
E
I
J
¿J
ASSEMBLY AND ADJUSTMENTS
ENGLISH