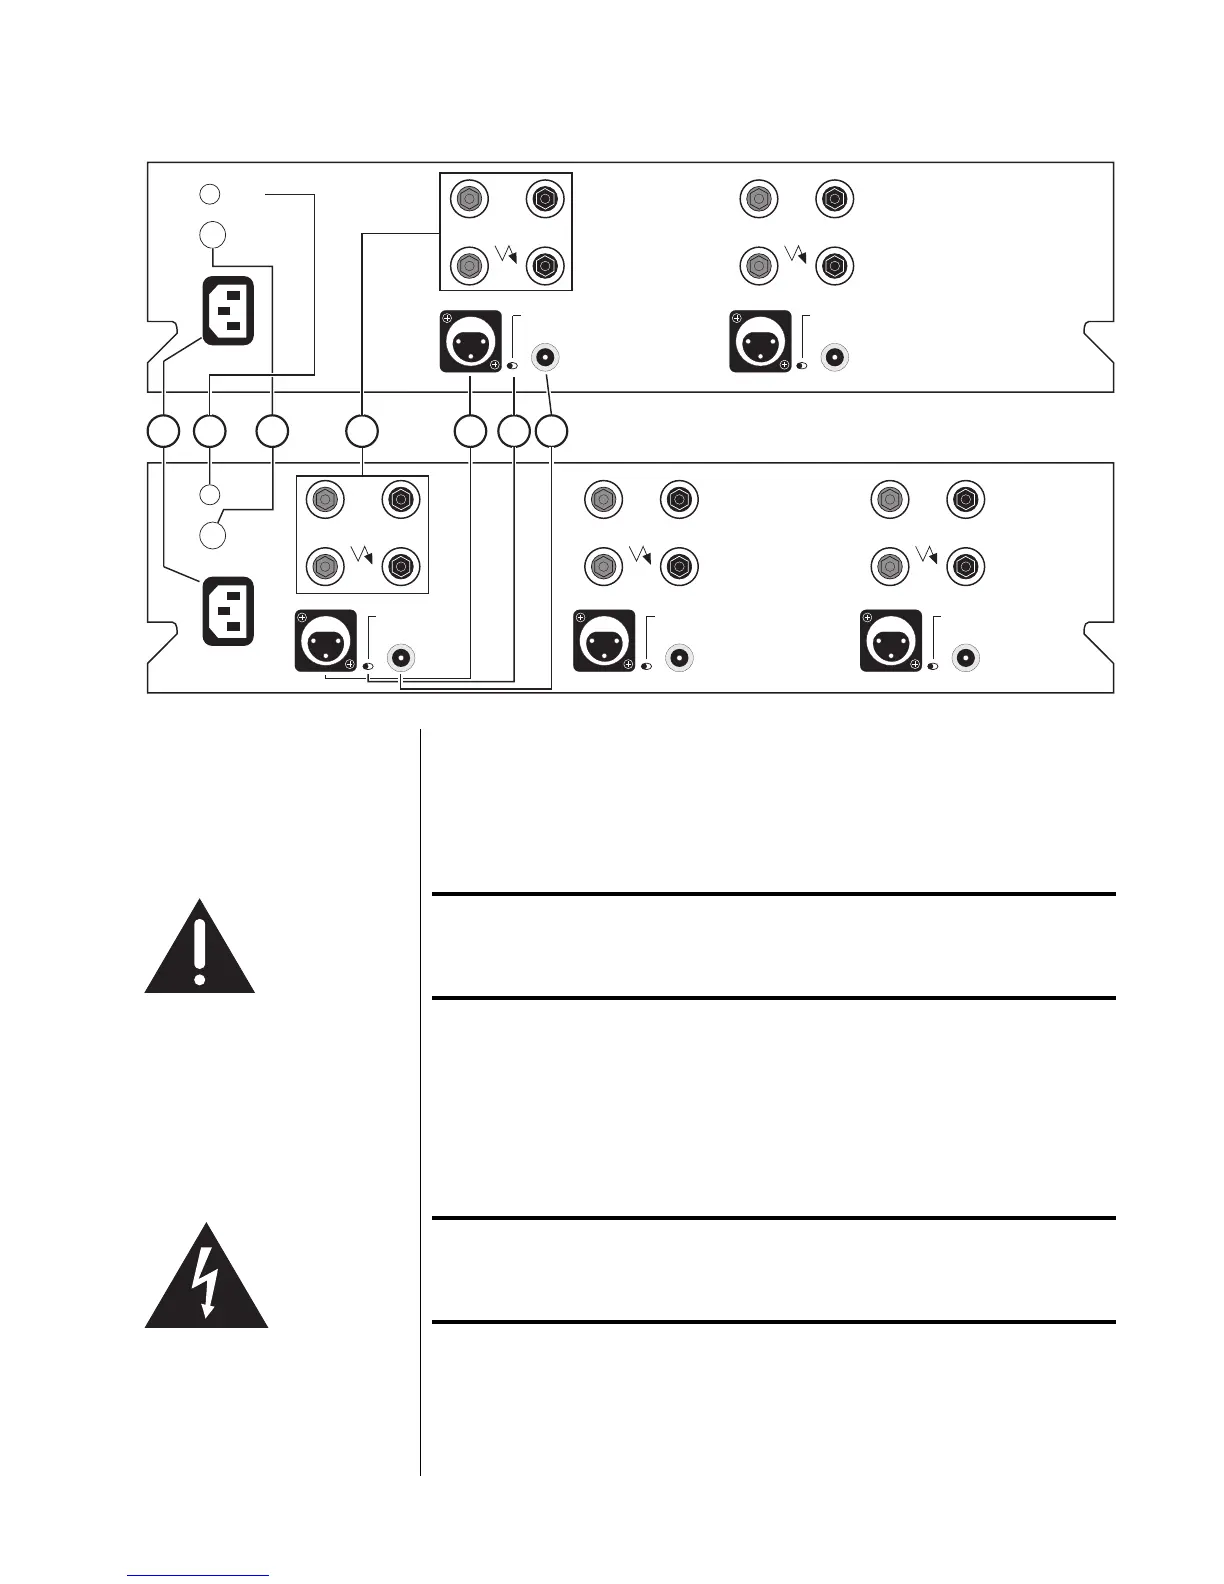
13
PUSH
21
3
PUSH
21
3
PUSH
21
3
PUSH
21
3
PUSH
21
3
mains fuse
100-120VAC:
8A 3AG fast acting
200-240VAC:
4A 3AG fast acting
remote
turn-on
~ ac
mains
+ outputs –
input select
channel 1 (right)
when viewed from the front
+ outputs –
input select
channel 2 (left)
when viewed from the front
mains fuse
100-120VAC:
12A 3AB fast acting
200-240VAC:
6A 3AG fast acting
remote
turn-on
~ ac
mains
+ outputs –
input select
channel 1 (right)
when viewed from the front
+ outputs –
input select
channel 3 (left)
when viewed from the front
+ outputs –
input select
channel 2 (center)
when viewed from the front
1 2 3 4 5 6 7
Rear Panel
Caution! Turn the volume on your preamplifier all the way down
before attempting to connect anything to your Proceed
AMP 2 or AMP 3.
1 AC MAINS RECEPTACLE
Connect the AC power cord (included in the accessory pack) to the I.E.C.-
standard AC receptacle on the rear panel of the AMP, then to the AC mains
outlet.
Warning! The Proceed AMP has been safety-tested and is designed
for operation with a three-conductor power cord. Do not
defeat the “third pin” or earth ground of the AC power cord.