Proco Products, Inc. IOMSeries700R3 Page 7 of 13
4.1.2 Style 720: ProFlex Slip-In Flanged Rubber Check Valve Installation
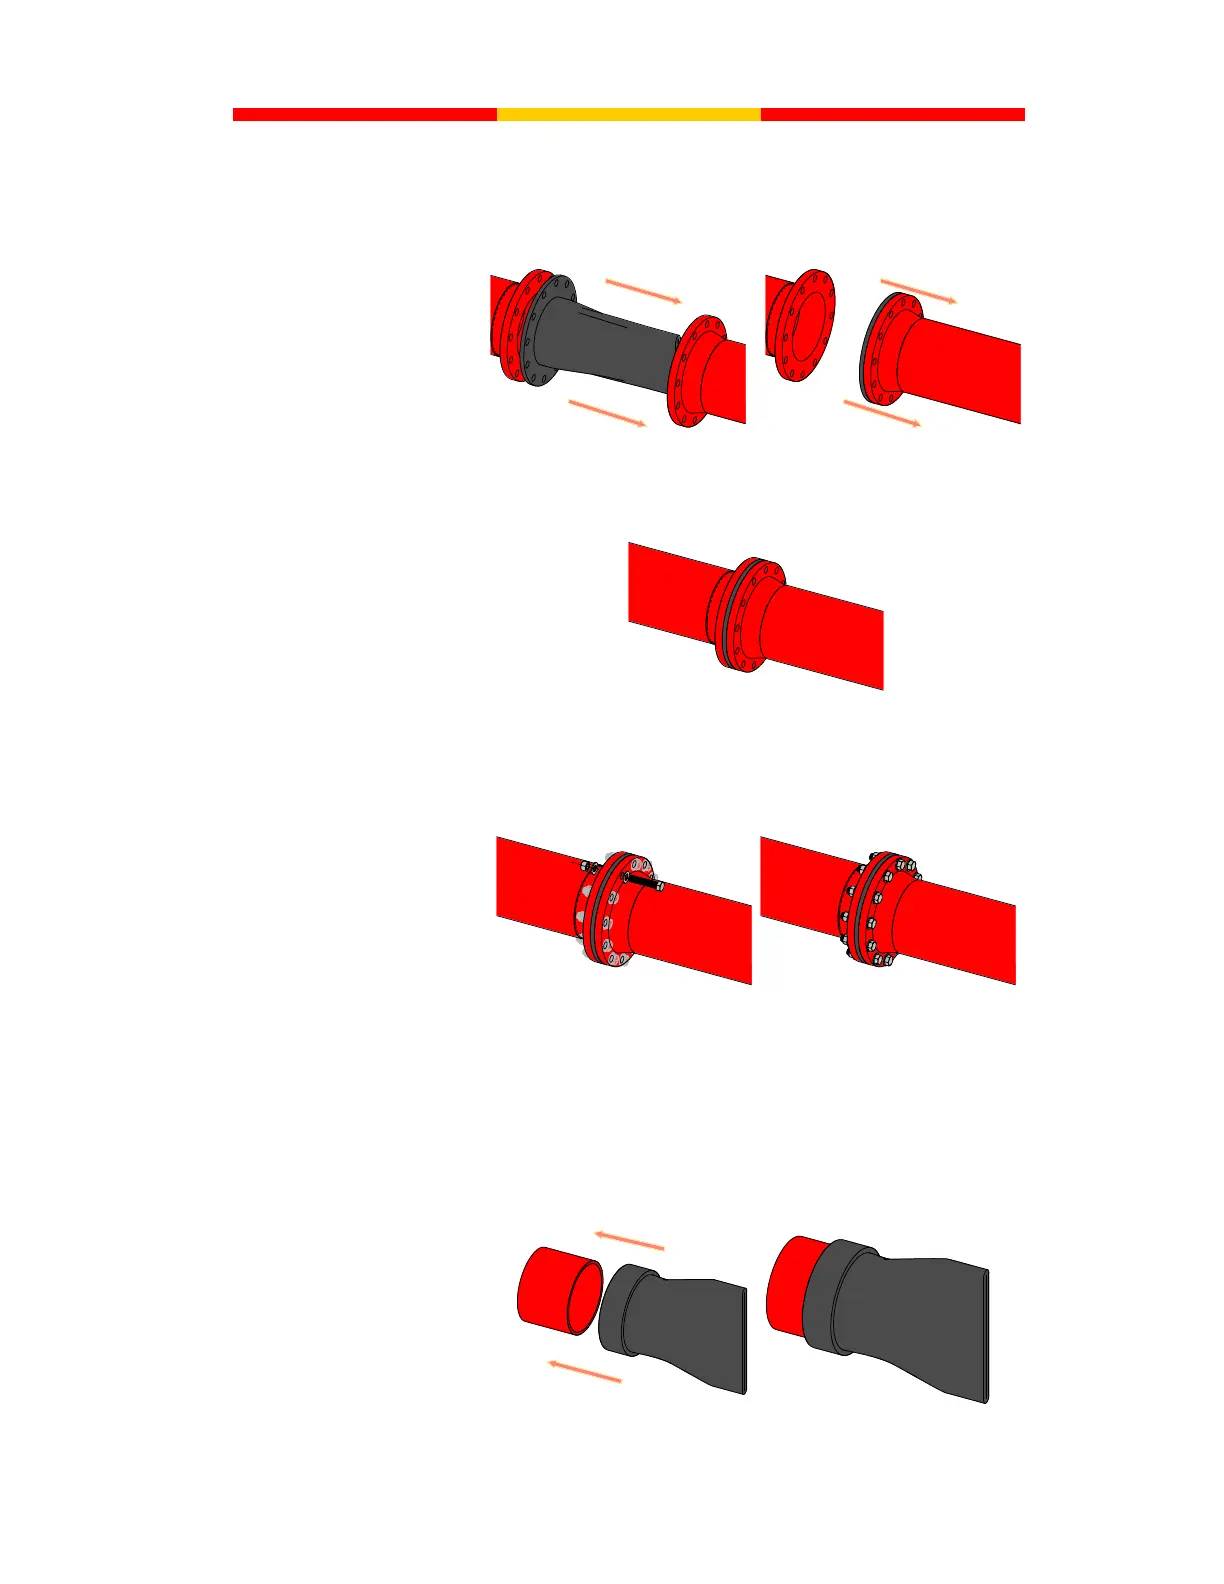
4.1.2.1 Step 1: Insert
Insert the Slip-In flanged rubber check valve into the existing pipe. For horizontal applications the
bill of the check valve should be installed in a vertical orientation in the mating pipe as shown in
below in Figure 9.
Figure 12: Style 720 Installation Step 1
4.1.2.2 Step 2: Attach
Re-attach the 2 mating pipe flanges.
Figure 13: Style 720 Installation Step 2
4.1.2.3 Step 3: Flange Bolting
Add the flange bolting to the installation and tighten to a “snug” tight fit before torqueing. Proceed
to step 4.1.7 for proper bolt torqueing and a sample torqueing pattern.
Figure 14: Style 720 Installation Step 3
4.1.3 Style 730/731: ProFlex Sleeved Rubber Check Valve Installation
4.1.3.1 Step 1: Slip-On
For Slip-On rubber check valves, slip the rubber check valve over the existing pipe. For horizontal
applications the bill of the check valve must be installed in a vertical orientation relative to the
ground unless there are clearance issues. For the Style 731 eccentric sloped bottom design the
eccentric slop to be positioned at the bottom or 6 o’clock position of the valve installation. In the
case of clearance issues the check valve may be rotated to a maximum of 35 degrees to allow
clearance to the ground. To ease installation, it is acceptable but not necessary to add soapy water to
the exterior of the pipe to facilitate the installation of the check valve.
Figure 15: Style 730/731 Installation Step 1