Proco Products, Inc. IOMSeries700R3 Page 9 of 13
4.1.4.3 Step 3: Expand Clamp
Tighten the expandable internal clamp until the stainless-steel portion of the clamp has embedded
itself into the rubber cuff of the valve. Once the clamp has been sufficiently held in place tap the
clamp with a 4-5 pound hammer on the inner section of the clamp in a circular motion to further
embed the clamp into the rubber. Re-tighten the clamp to ensure a proper seal. Once the clamp is
properly sealed, tighten the lock nut on the internal expandable clamp and proceed to section 4.1.8
for anchor bolting/pinning to anchor the slip-in check valve to the mating pipe. When installing
multiple internal expandable clamps ensure the clamps are evenly spaced/rotated to provide even
clamping pressure as well as with the internal expandable fasteners located in a position that
minimizes flow interference. Note: This style of check valve installation relies on external pressure
of the internal expandable clamp to ensure that the valve does not move, care should be taken to
ensure proper sealing. When installing the check valve on corrugated pipe the clamp(s) shall be
positioned at the lowest part of corrugation, at the minimum ID of the pipe.
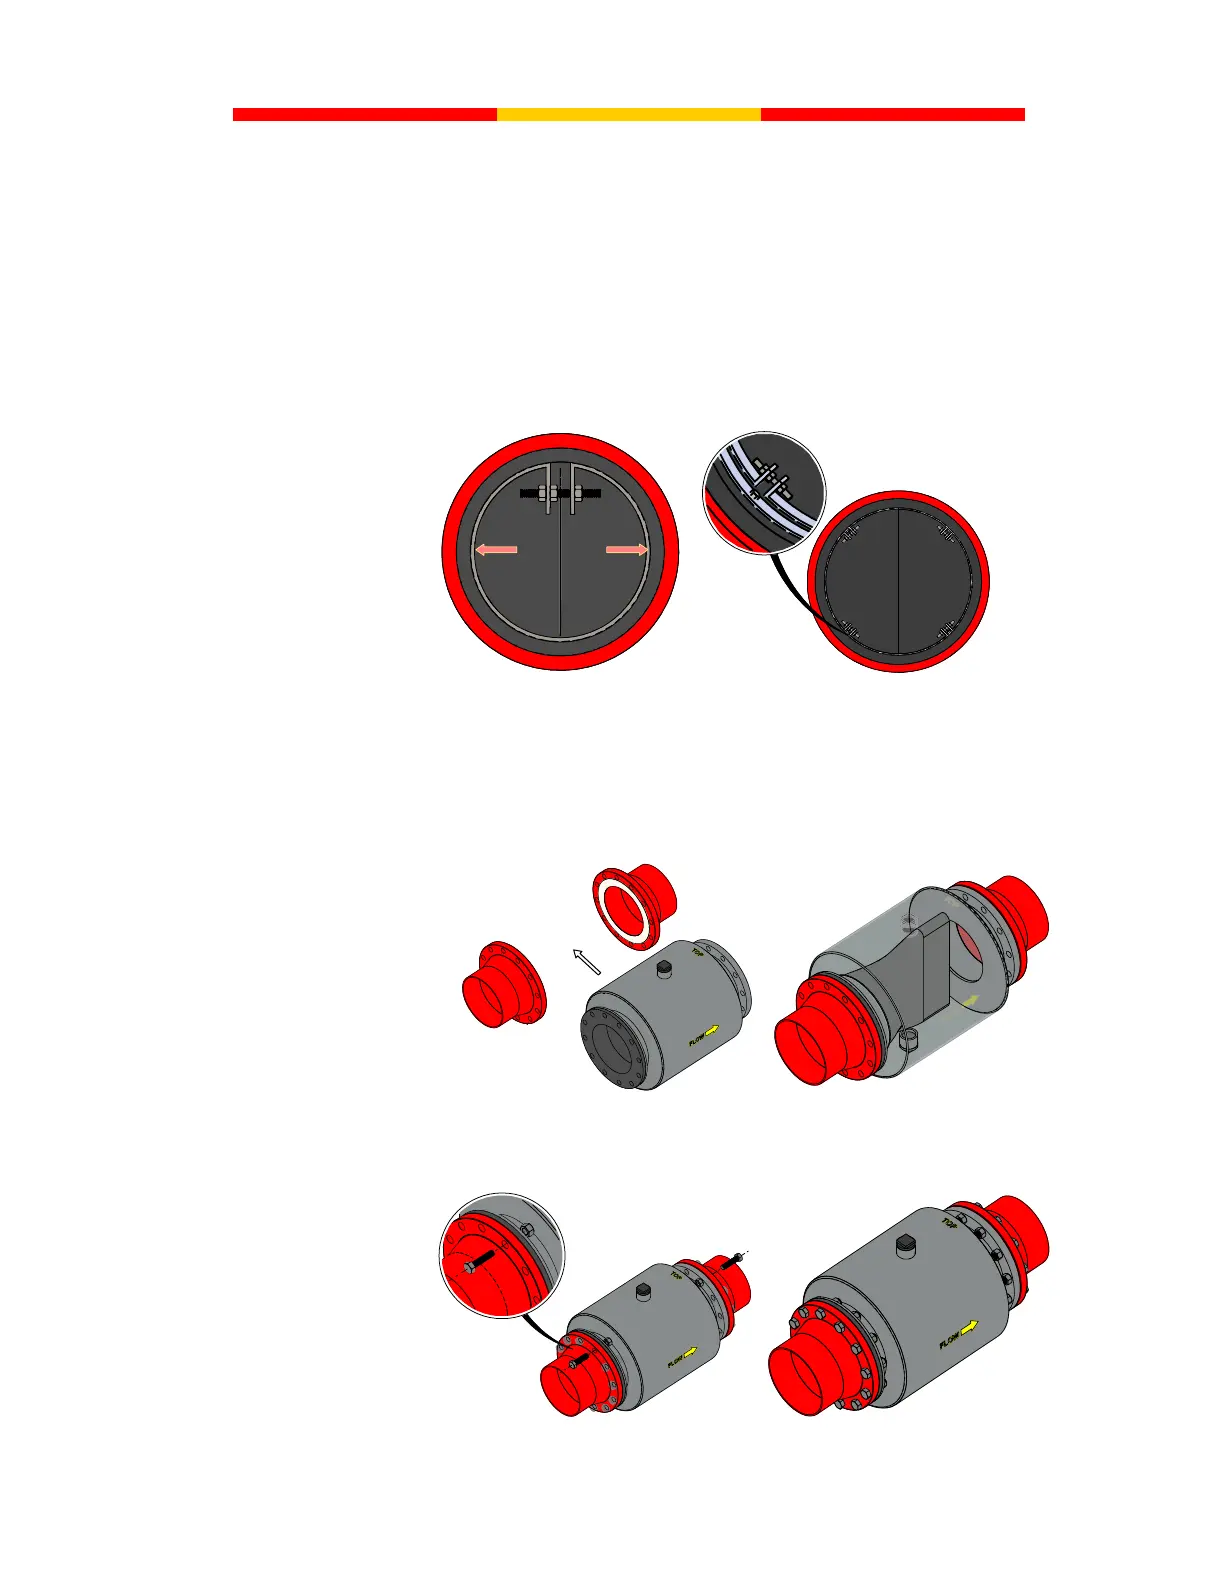
Figure 20: Style 740 Installation Step 3
4.1.5 Style 750: ProFlex Jacketed In-Line Flanged Rubber Check Valve Installation
4.1.5.1 Step 1: Align/Insert
Align/Insert the Style 750 Assembly into the required breach opening noting the position of flow and
orientation of the valve. The assembly should be installed to where the top notation on the style 750
shroud is in the vertical position as shown in Figure 21. Use a gasket where required, supplied by
others. Note: Ensure the bill of the check valve is in the vertical position when installed.
Figure 21: Style 750 Installation Step 1
4.1.5.2 Step 2: Flange Bolting
Secure the Style 750 assembly to the mating flanges with the appropriate flange bolting hardware.
Follow the procedures in section 4.1.7 for proper flange bolt torqueing.
Figure 22: Style 750 Installation Step 2